For individuals and businesses on app.sign.net: create an account, send and sign documents, save templates and brand your business portal.
Create a free account
Sign up as an individual. A personal account is free, and you pay for each document you send in Sign points.
1
Open the sign-up page
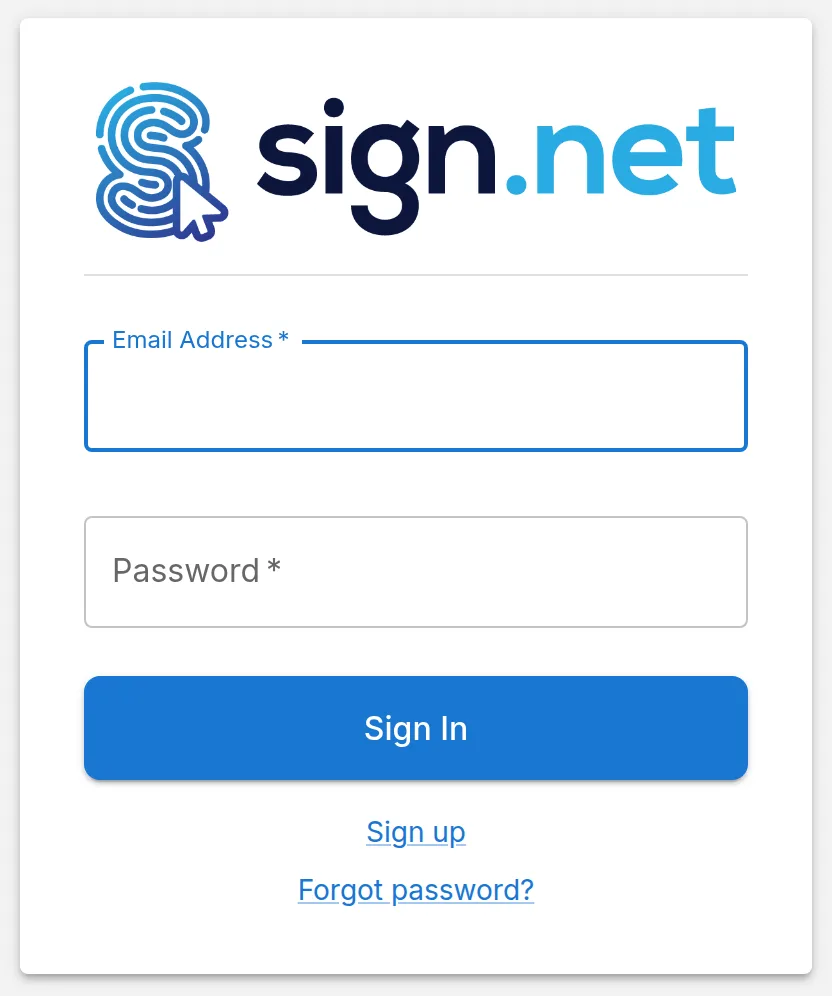
Go to app.sign.net and click “Sign up” under the “Sign In” button.
2
Choose the Personal Plan
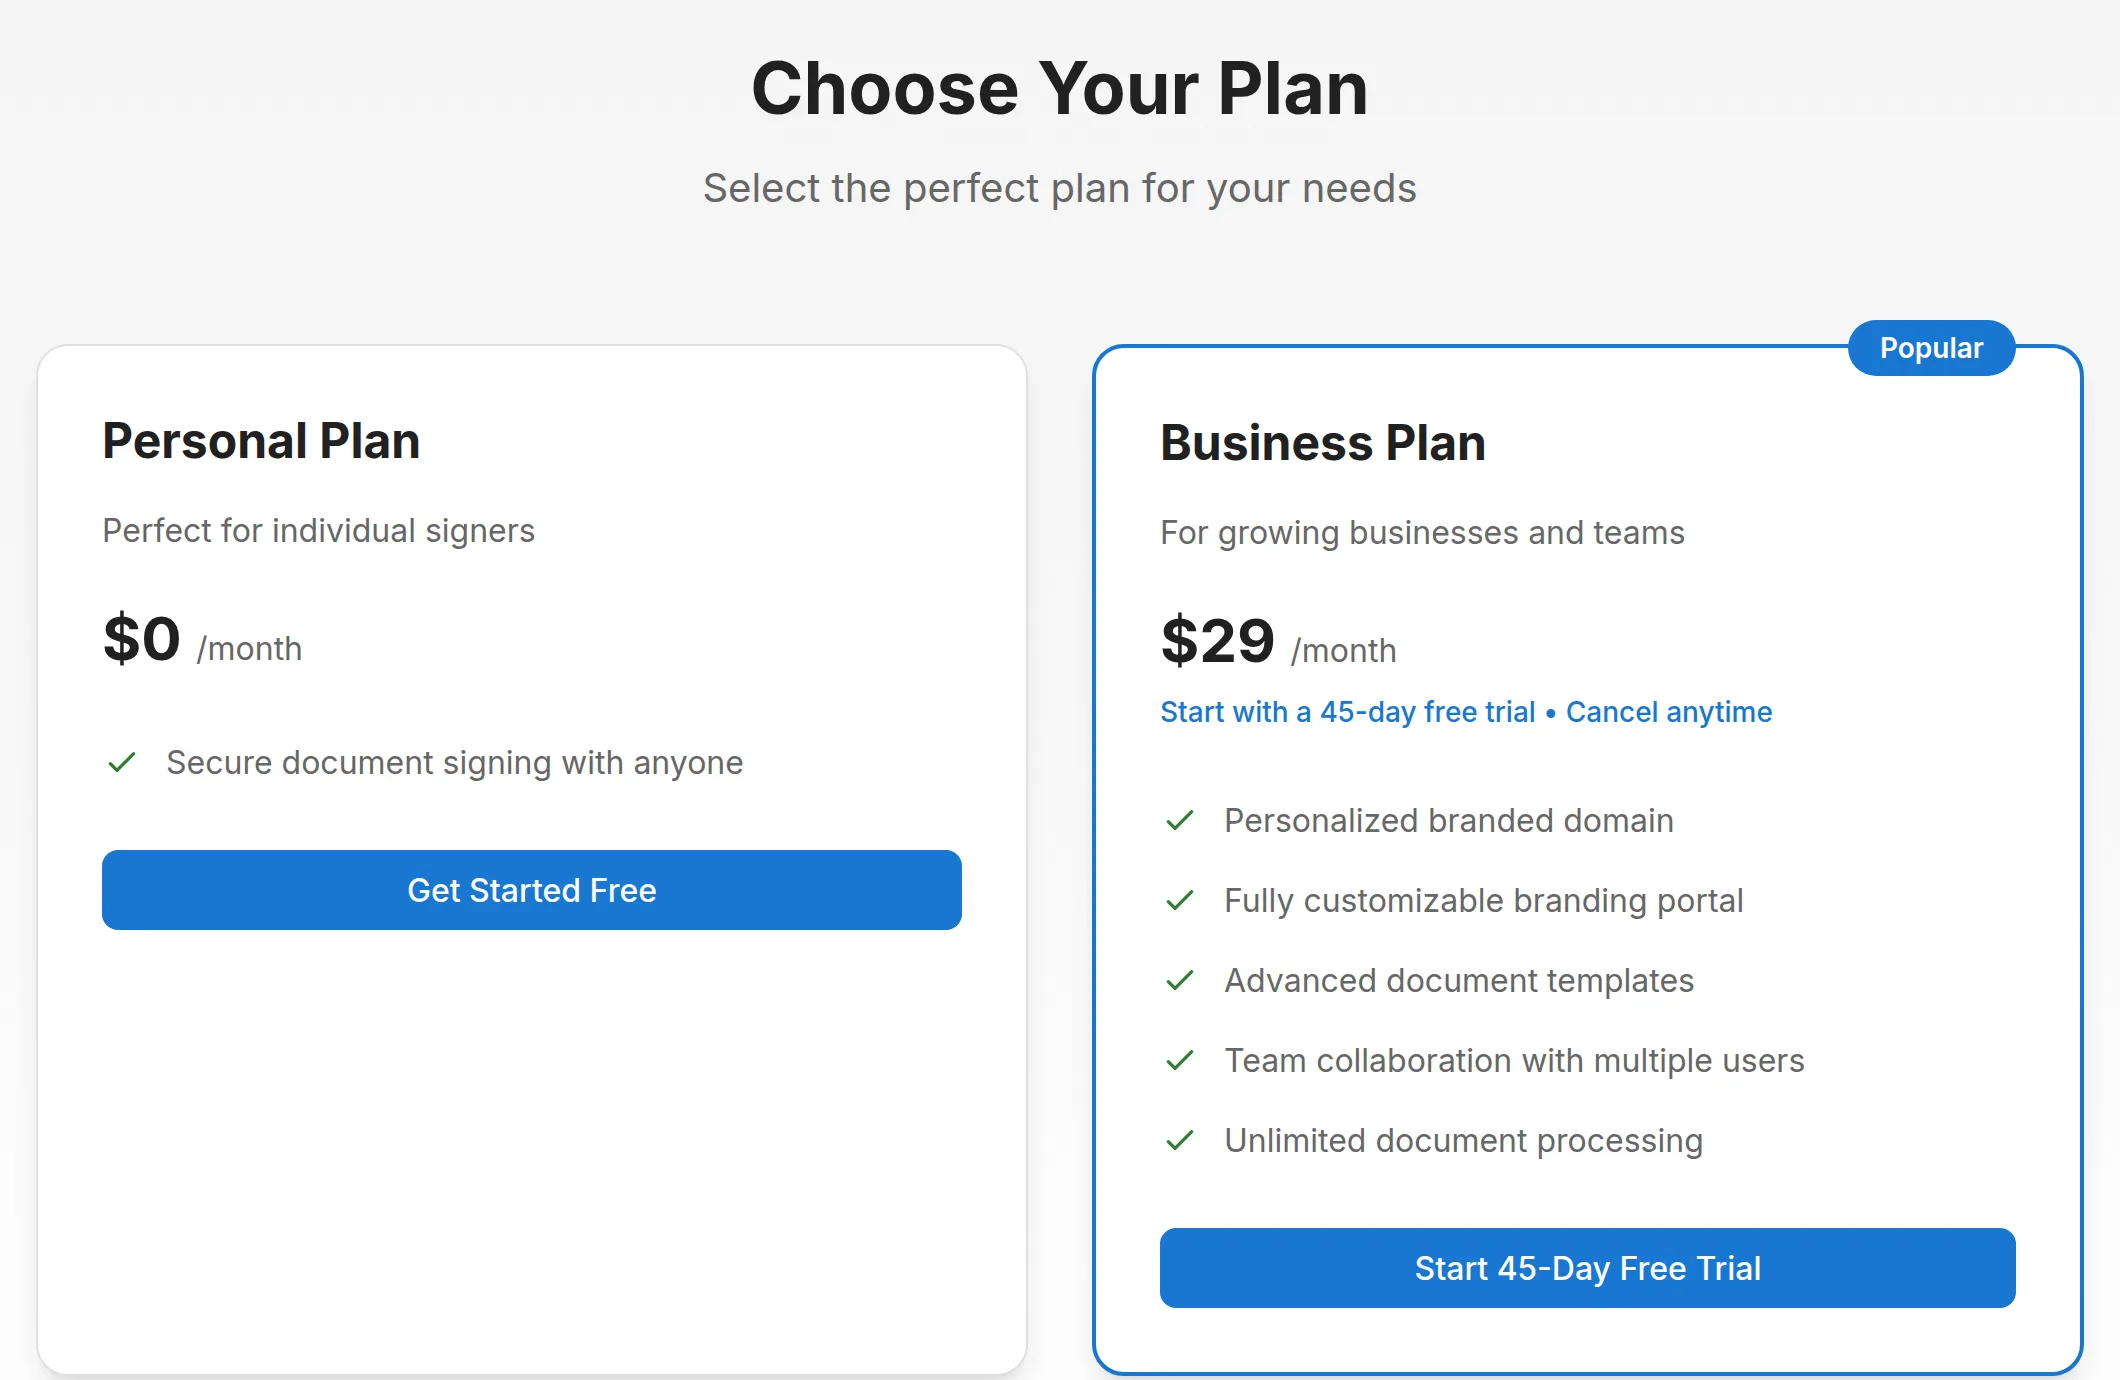
On “Choose Your Plan”, click “Get Started Free” under “Personal Plan”.
3
Enter your details
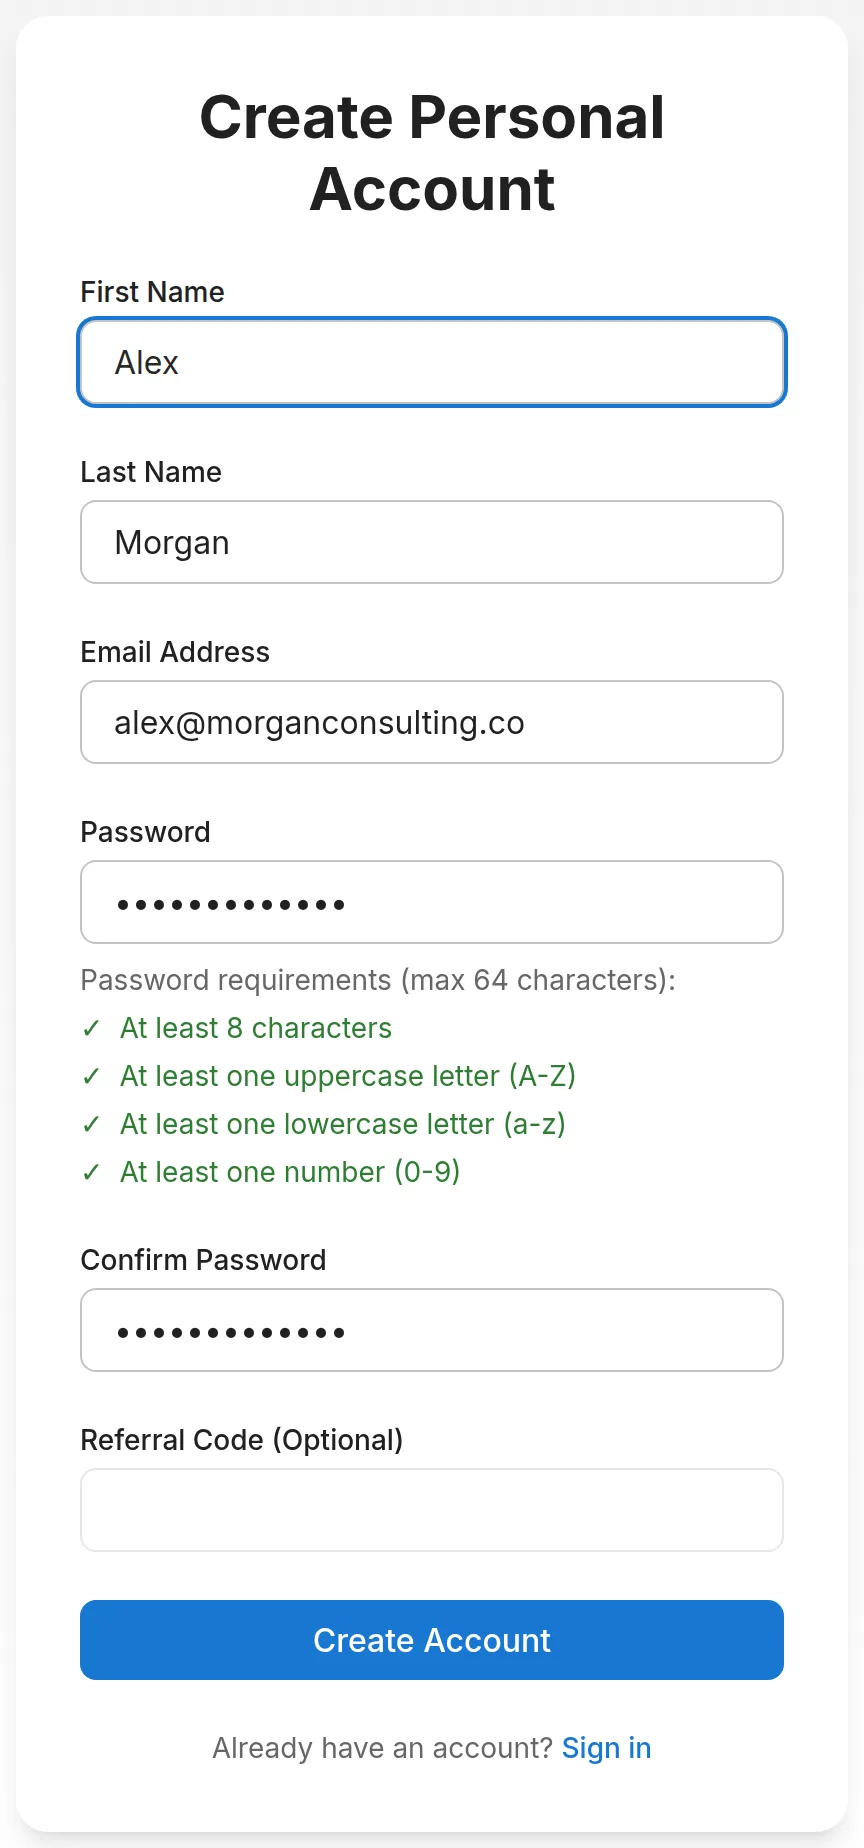
Fill in your first name, last name, email address and a password, then type the password again under “Confirm Password”. The password needs at least 8 characters, with an uppercase letter, a lowercase letter and a number; each rule turns green as you meet it. If someone gave you a referral code, enter it under “Referral Code (Optional)”. Click “Create Account”.
4
Activate your account
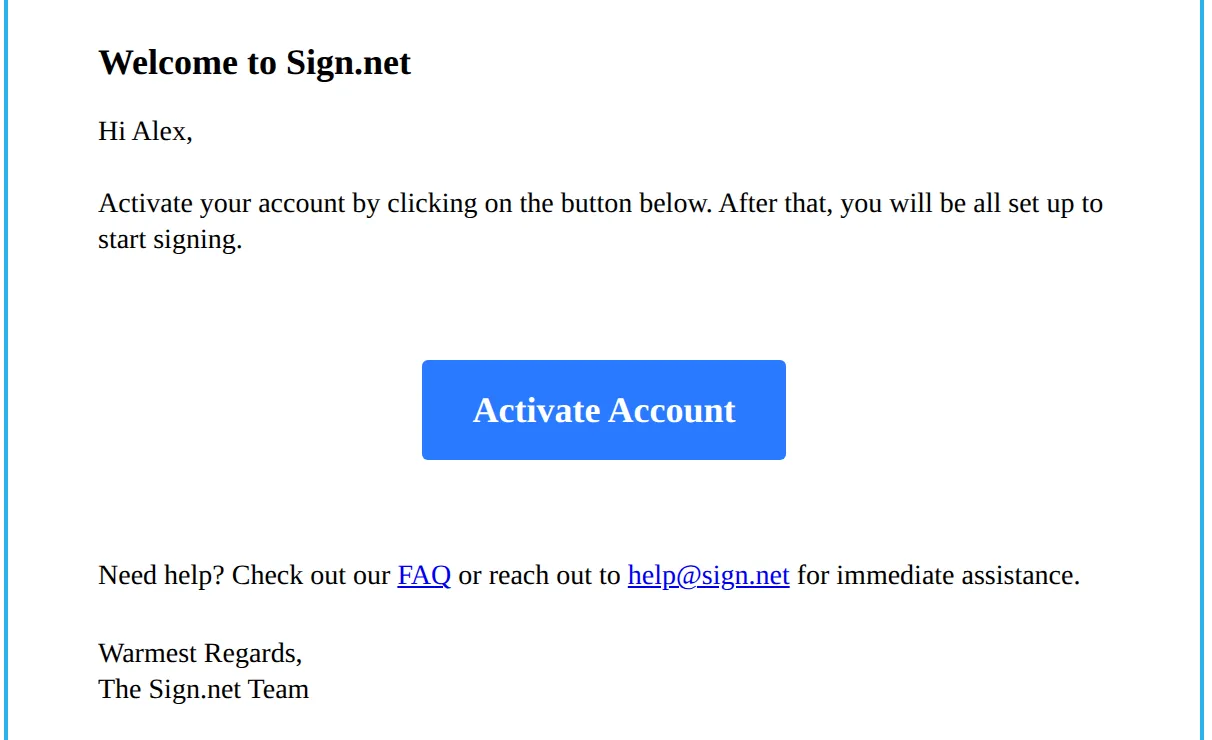
You'll see “Registration Successful!” and we'll email you “Welcome to Sign.net”. Click “Activate Account” within 24 hours. You can't sign in until you do. The link signs you in and opens your Dashboard.
5
Add Sign points before you send
Sending from a personal account is paid in Sign points, and a new account starts with none. Open the menu (☰) at the top right, choose “Sign.net Reward Points”, enter an amount in US dollars under “Top Up System Balance” and click “ADD POINTS” to pay by card. Each document costs the equivalent of US$0.50, plus US$0.05 for each person you add to it, at the current rate. The “Cost Summary” shows the exact number of points before you send.
Register a business
Get a branded portal at yourcompany.sign.net for your team, starting with a 45-day free trial.
1
Choose the Business Plan
On “Choose Your Plan”, click “Start 45-Day Free Trial” under “Business Plan”. It's $29 a month once the trial ends.
2
Pick your subdomain and enter your details
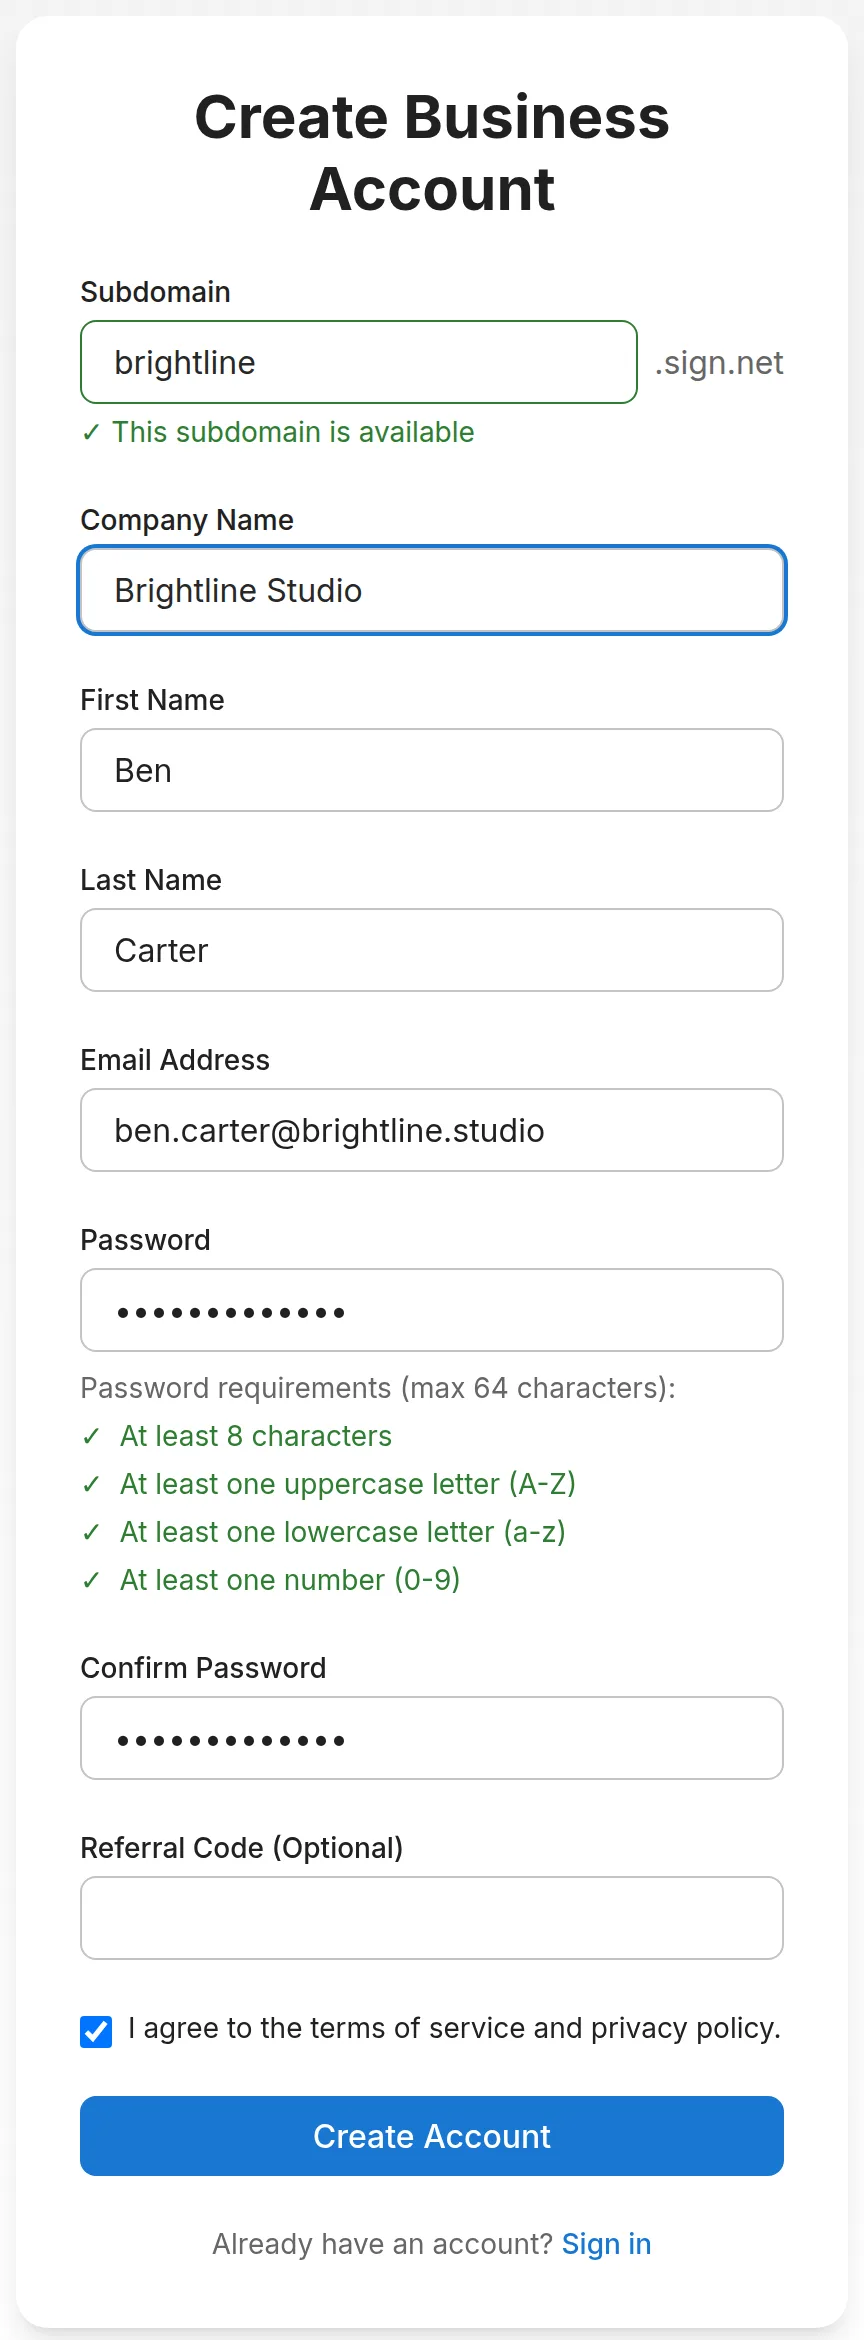
Under “Subdomain”, type the name for your portal, such as brightline for brightline.sign.net. Use lowercase letters, numbers and hyphens, at least 3 characters; “✓ This subdomain is available” confirms it's free. Add your “Company Name”, your name, email address and password, tick “I agree to the terms of service and privacy policy.” and click “Create Account”. Use an email address that doesn't already have a Sign.net account.
3
Start your trial
You're taken to a secure Stripe checkout. Enter your card details to start the 45-day free trial. You aren't charged until it ends, and you can cancel any time.
4
Activate your account
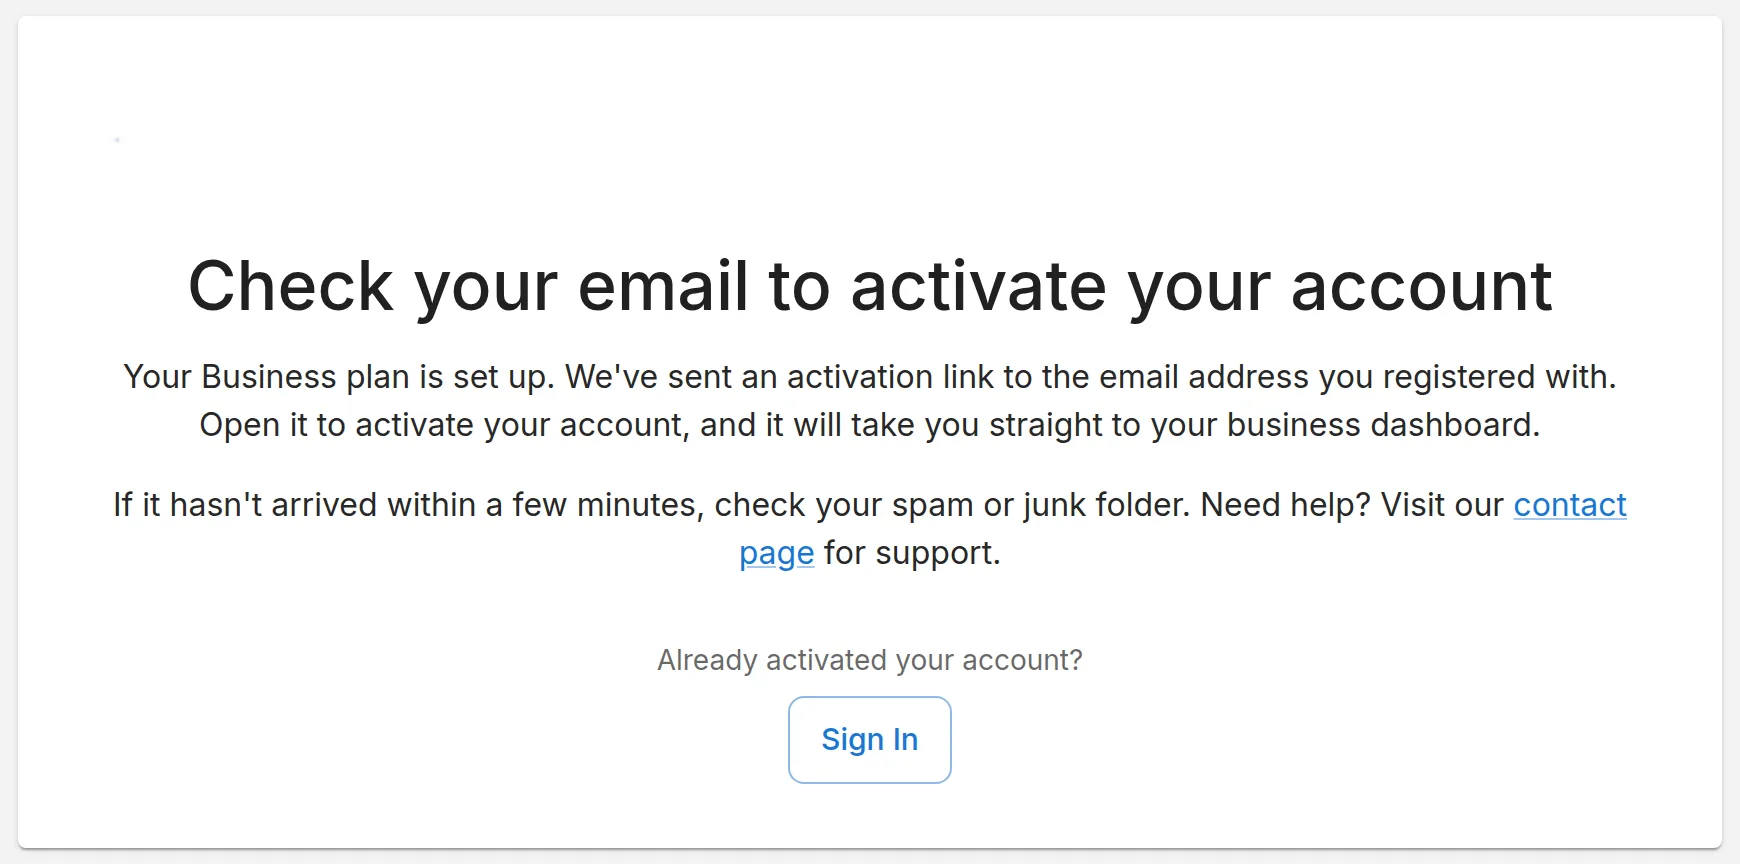
Back on Sign.net you'll see “Check your email to activate your account”. Open the activation email and click its button. It activates your account and opens your business dashboard.
Send a document for signature
Upload a PDF, choose who signs it, and show them where.
1
Upload your PDF
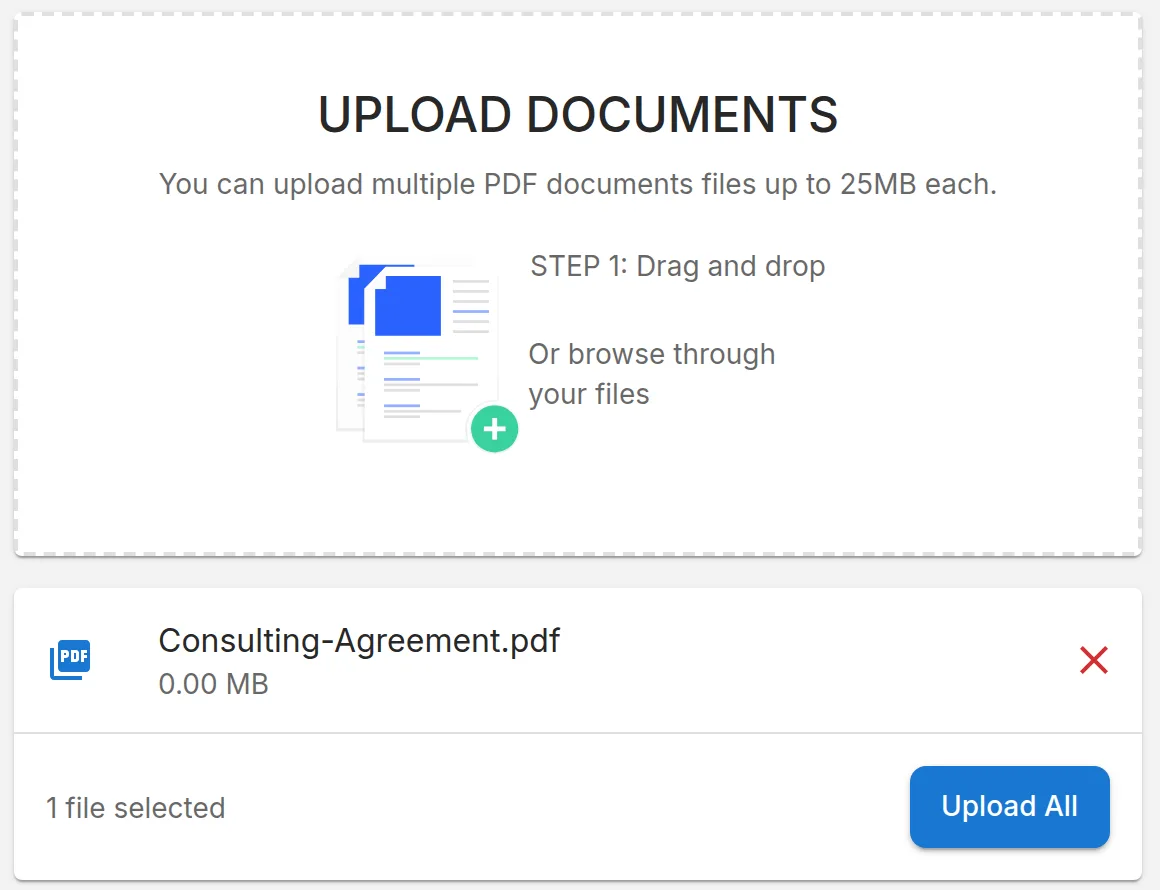
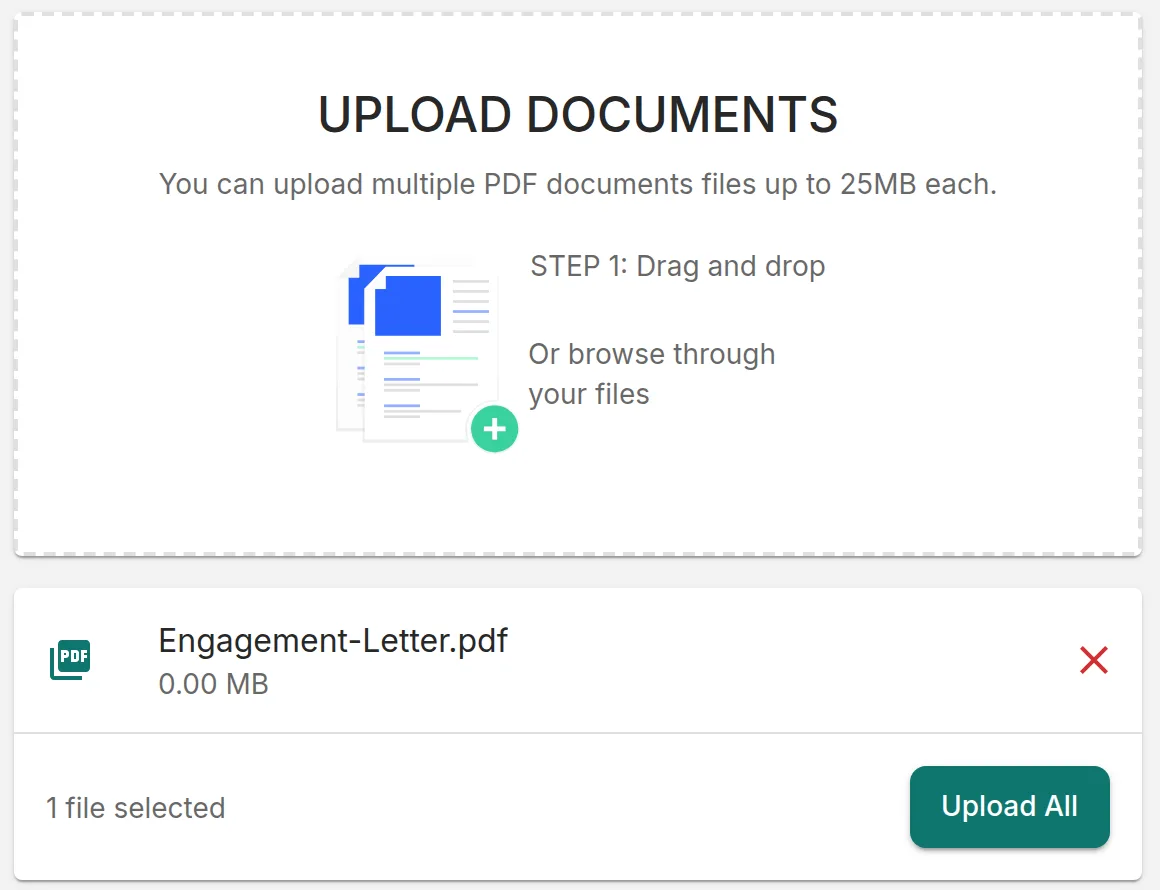
On your Dashboard, drop one or more PDFs on “UPLOAD DOCUMENTS” (or click it to browse) and click “Upload All”. Each file can be up to 25MB. Password-protected PDFs and PDFs with rotated pages can't be uploaded.
2
Name the document
Check the “Document Name” and click “Continue”.
3
Add the people involved
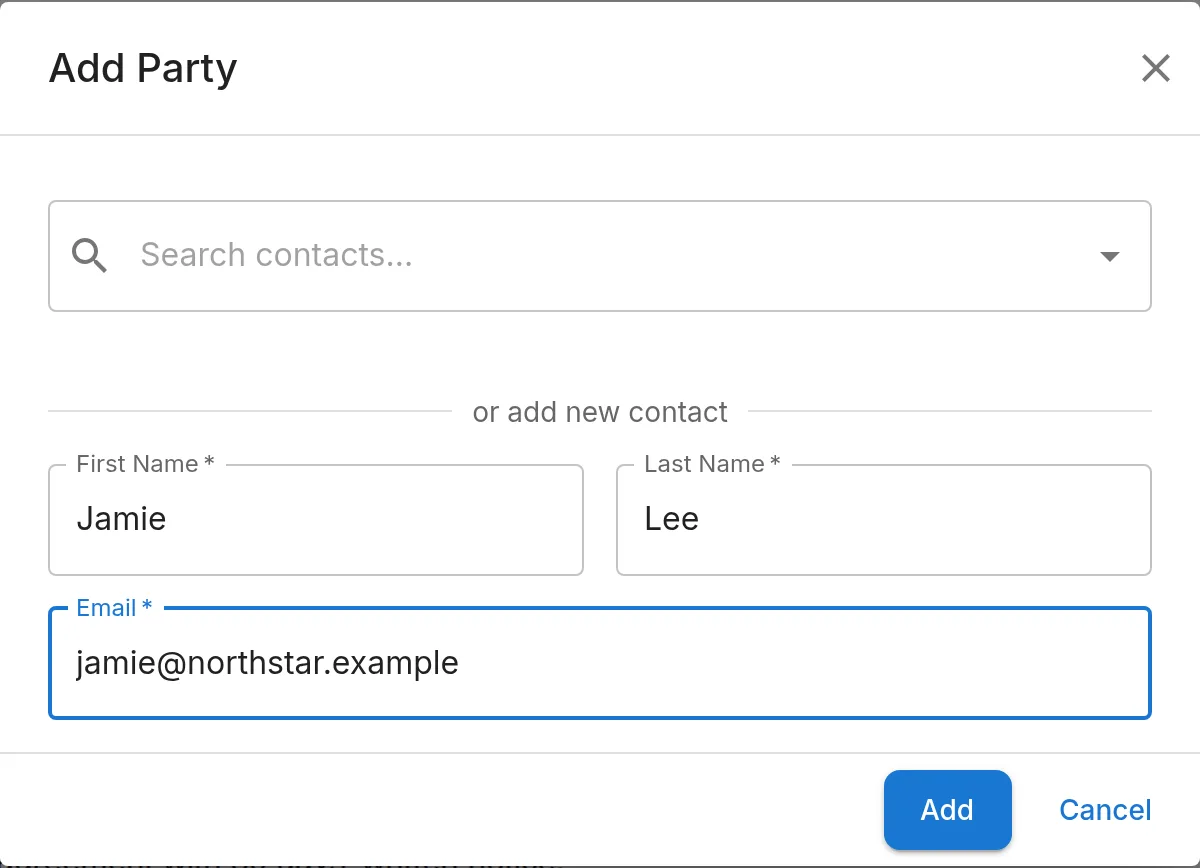
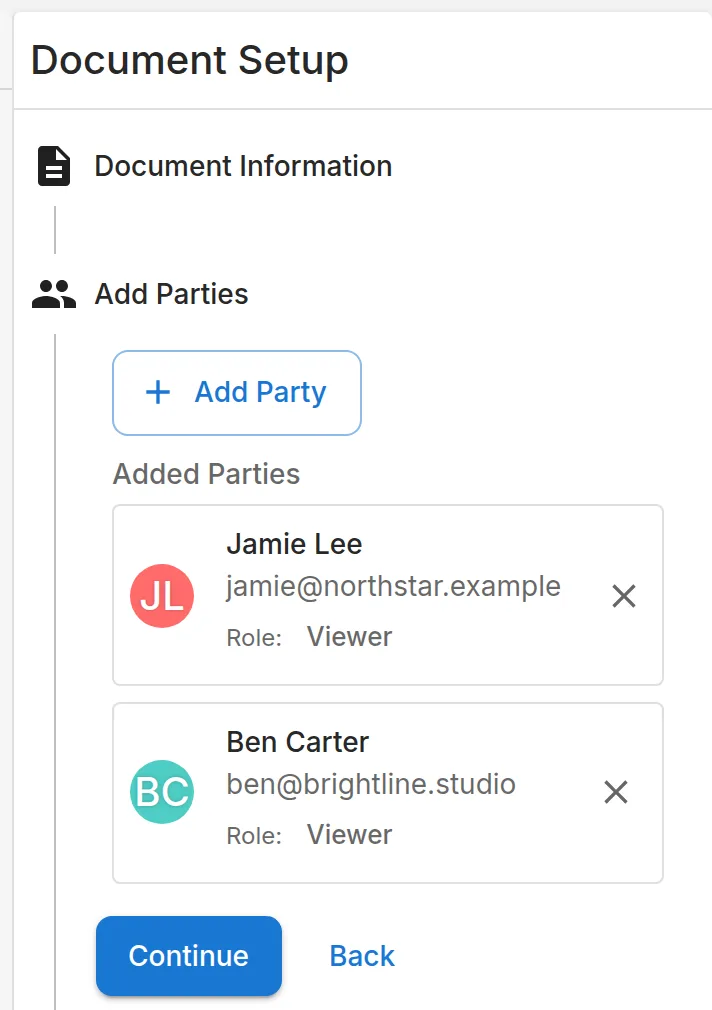
Click “Add Party”. Search your contacts, or enter a first name, last name and email and click “Add”. Add everyone who needs to sign, approve or get a copy, up to 11 people. Click the role under a name to change it: an Approver must approve the document before anyone can sign it.
4
Place the fields
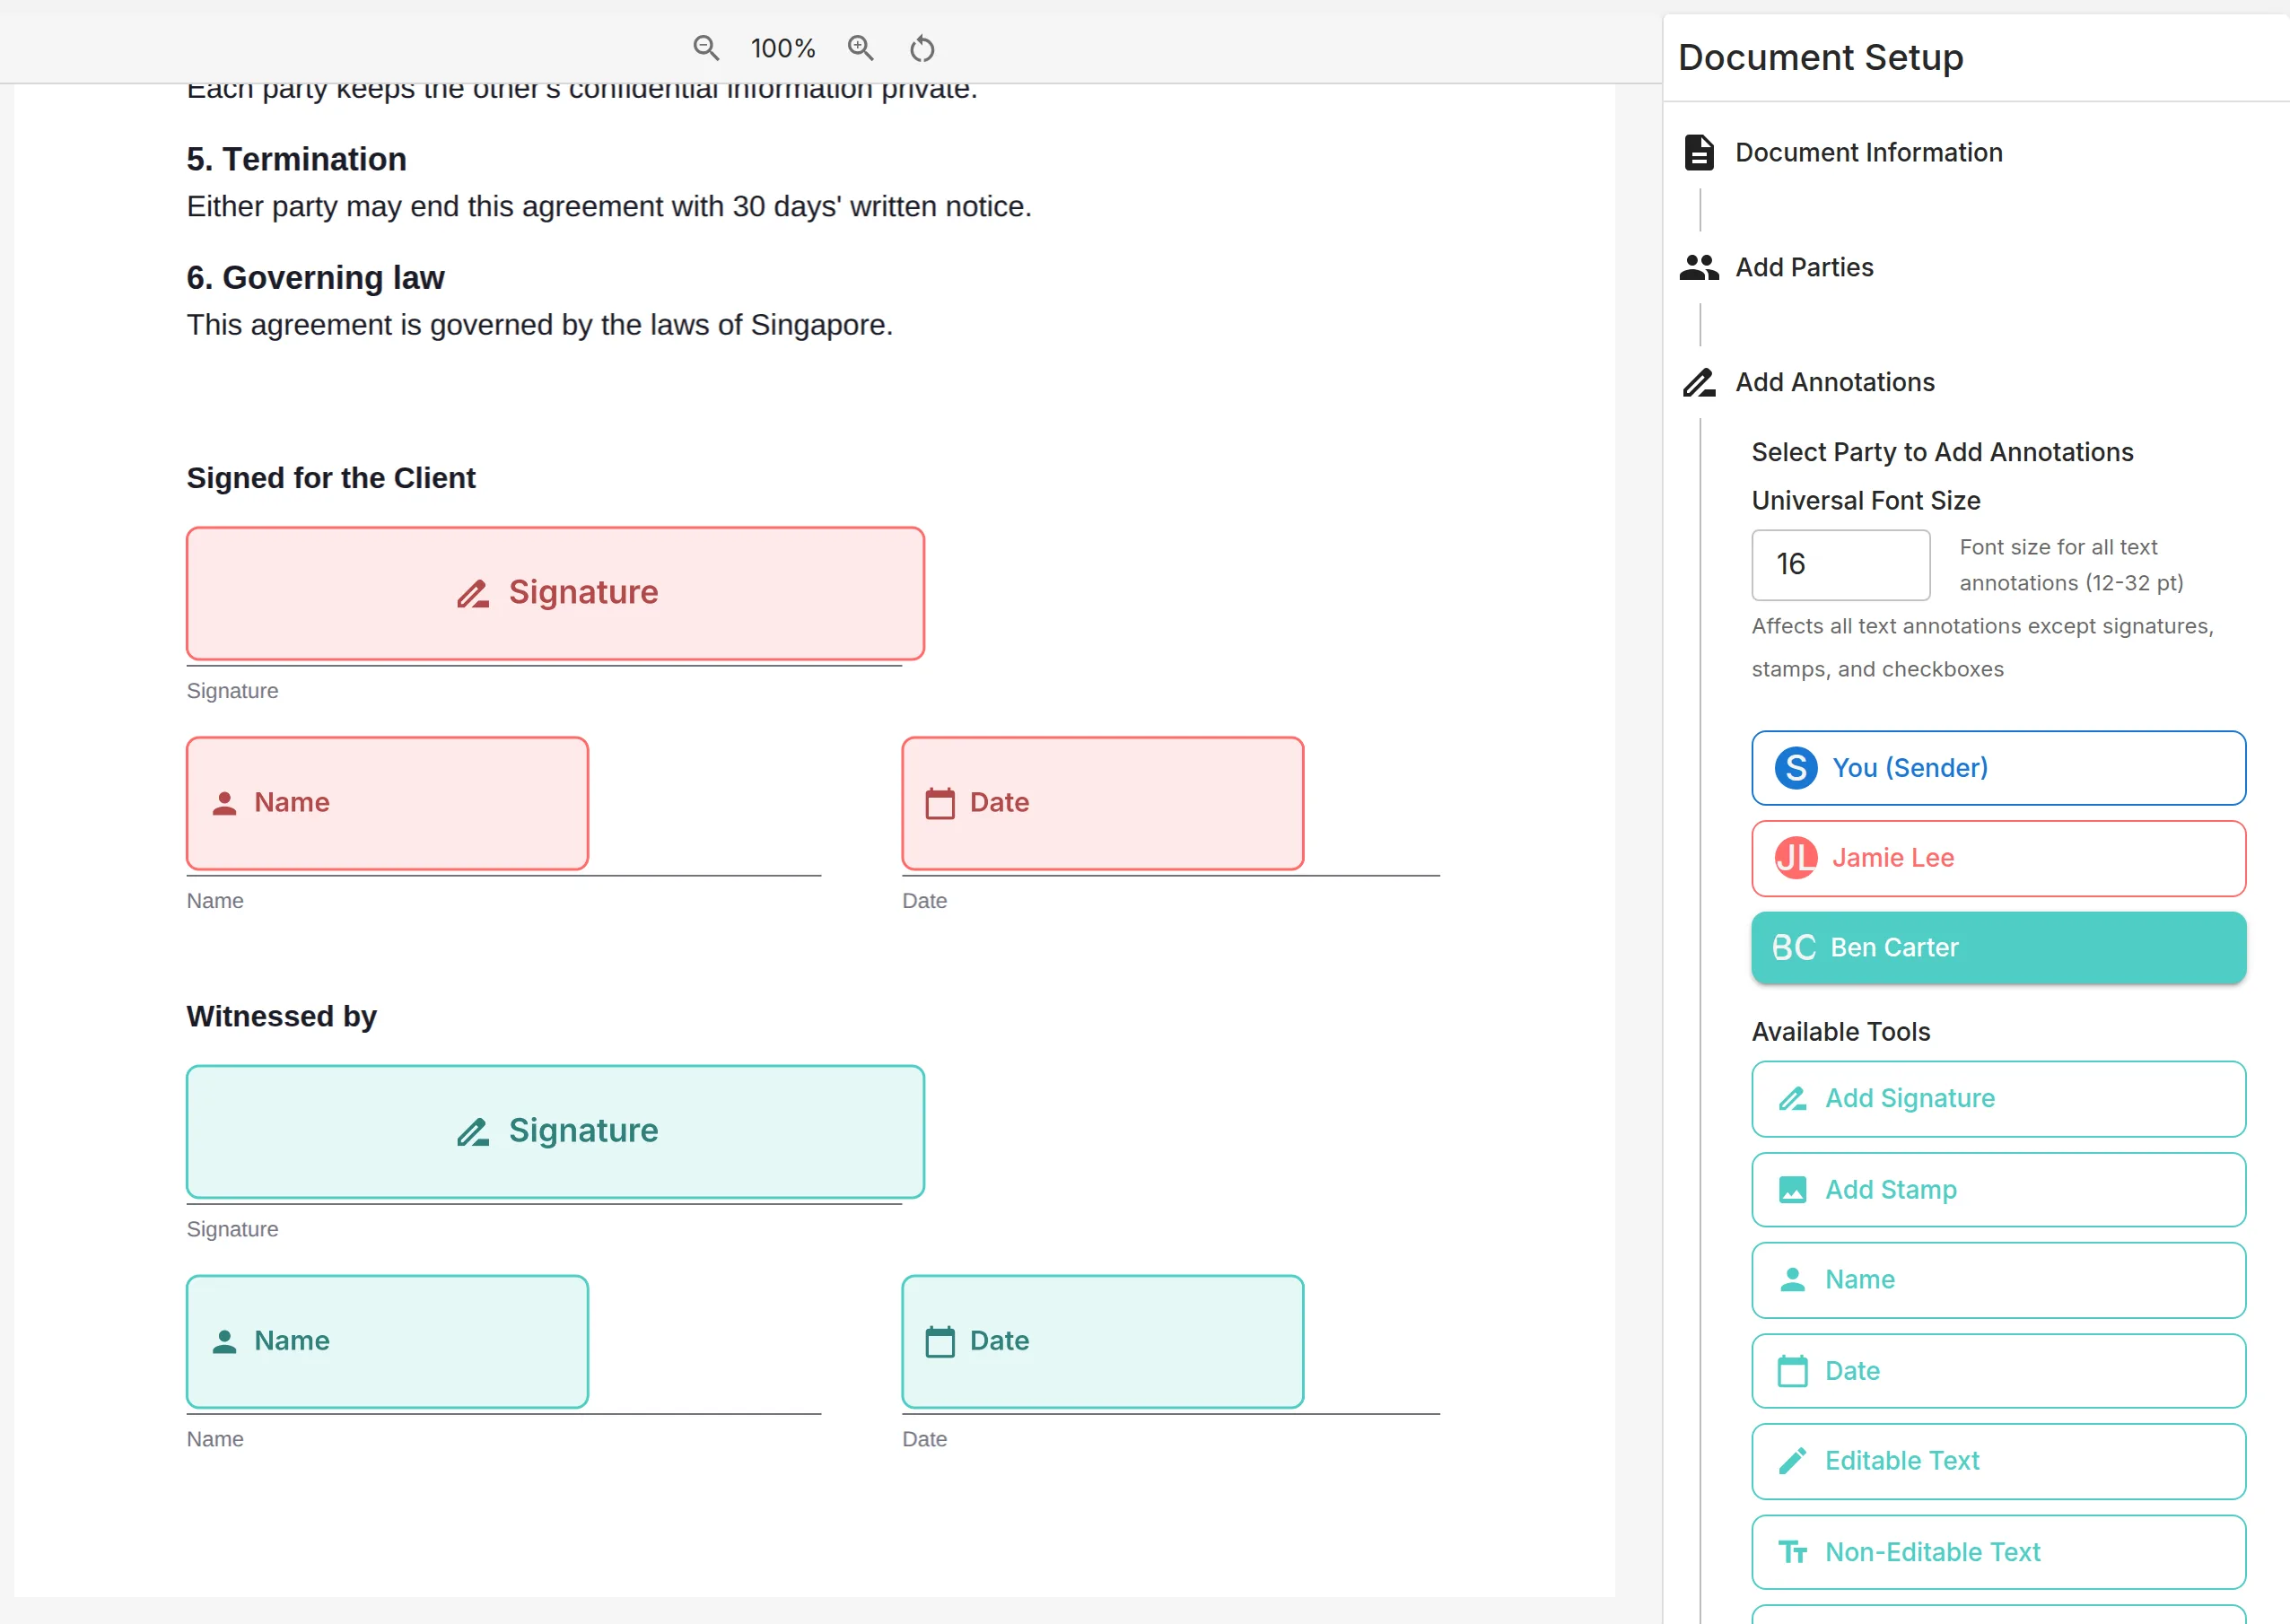
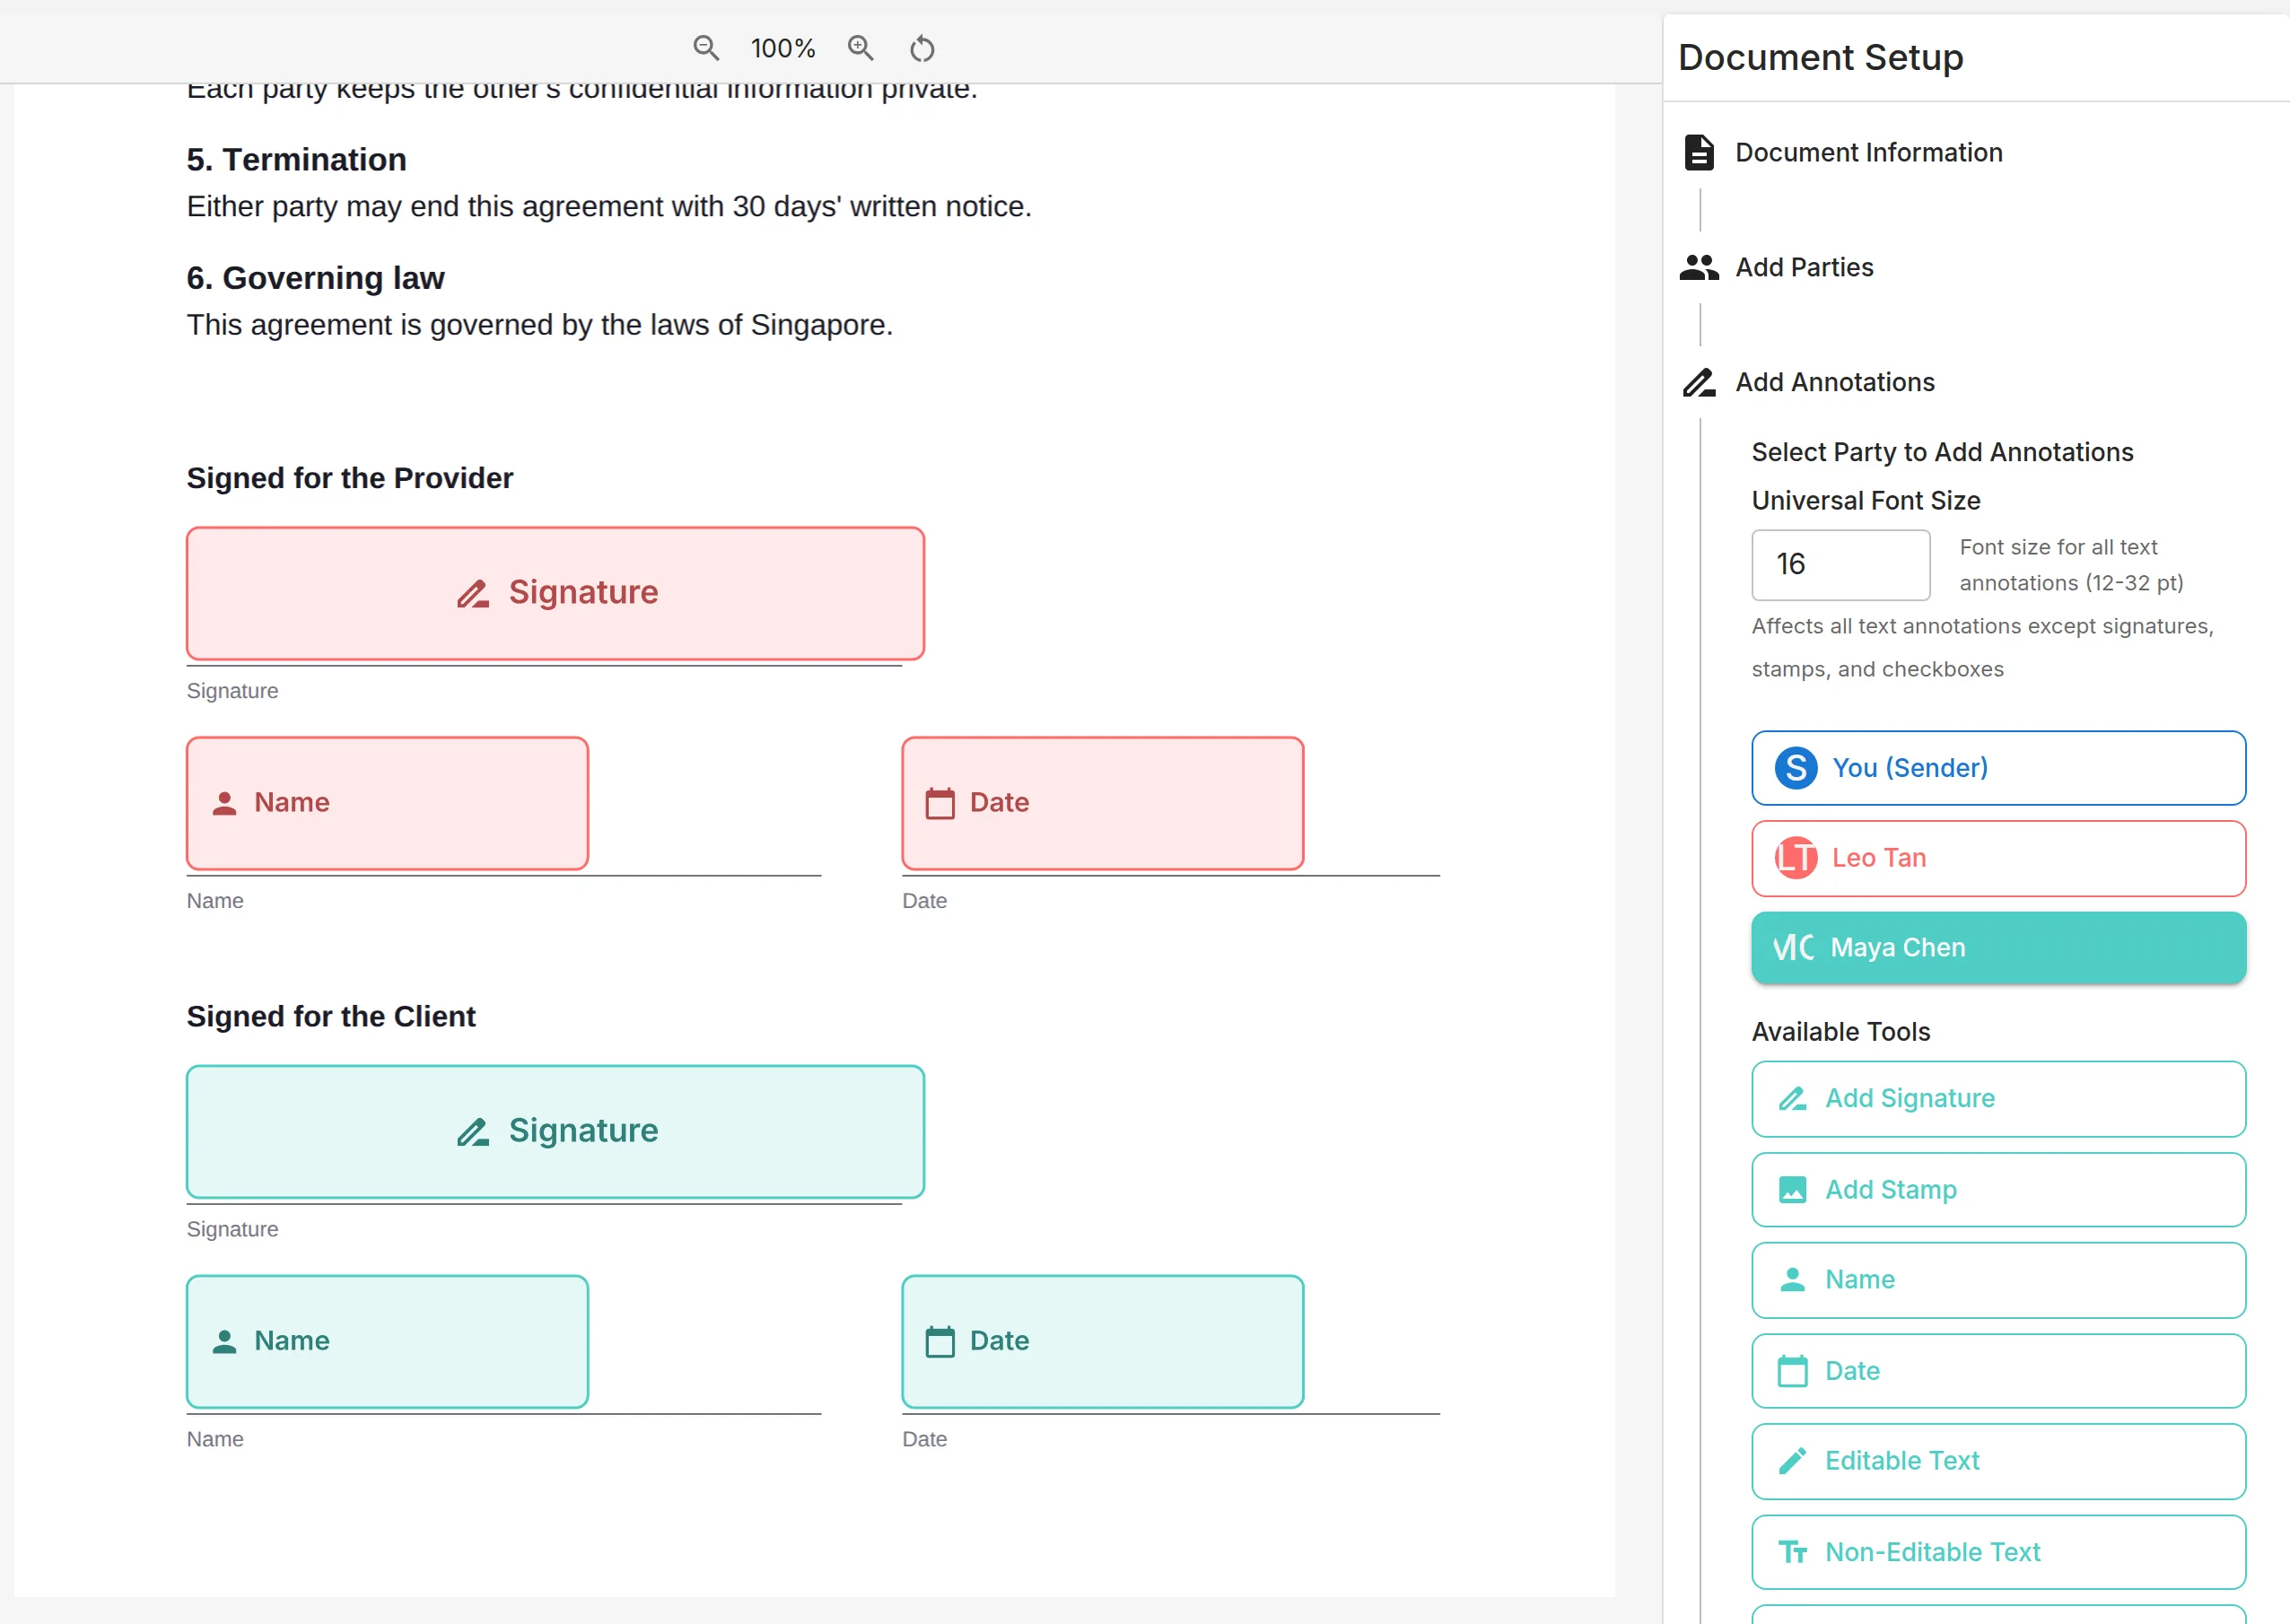
Click “Continue” and choose a person. Pick a field such as “Add Signature”, “Name” or “Date”, then click the spot on the page where it goes. Each person's fields are shown in their own colour, and every signer needs at least one signature field. To fill in fields yourself, choose “You (Sender)”.
5
Choose any optional settings
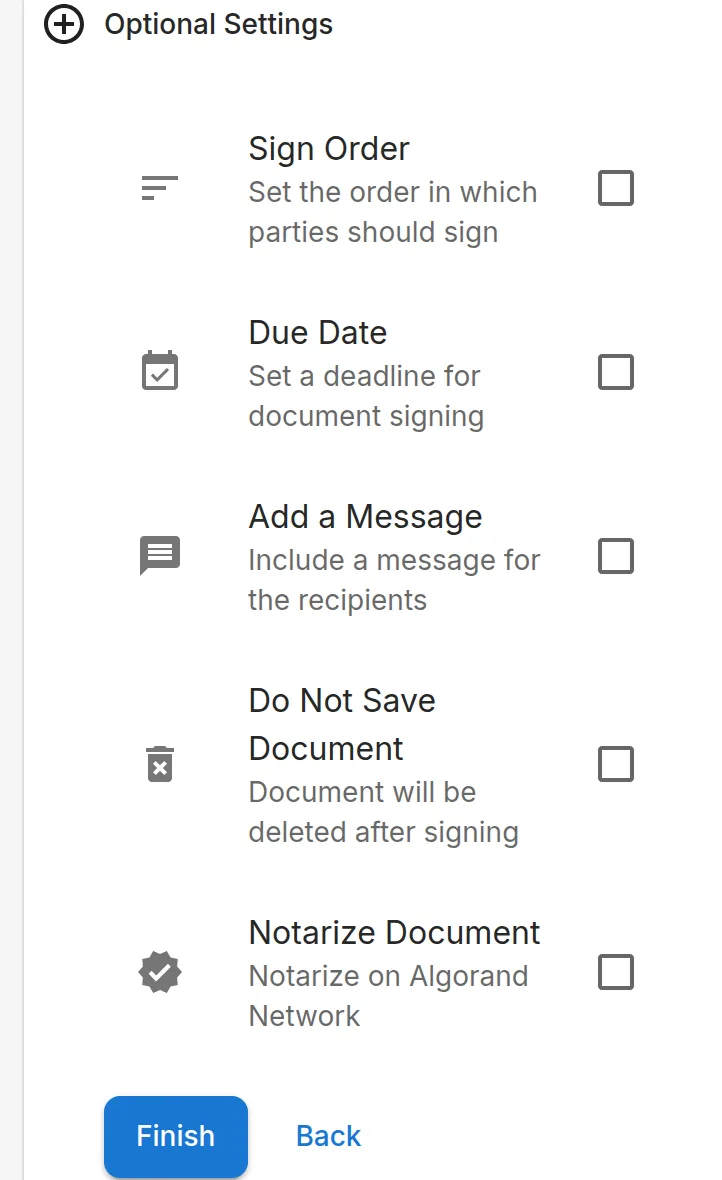
Click “Continue” to see “Optional Settings”: a “Sign Order”, a “Due Date” (recipients are reminded about it), “Add a Message”, “Do Not Save Document” (it's deleted once signed) and “Notarize Document” on the Algorand network. Click “Finish” when you're done.
6
Send it
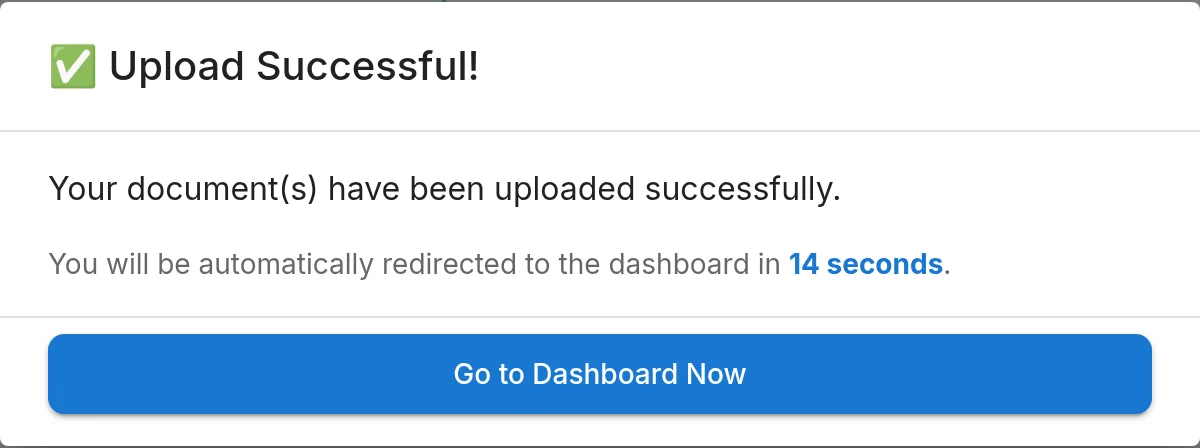
Check the “Cost Summary”, then click “Submit Document(s)”. When you see “Upload Successful!”, each signer is emailed a link: all at once, or in turn if you set a sign order, and only after any approvers have approved. Follow the document under “Recently Sent” on your Dashboard or in “Documents”.
Sign a document
No account needed: open the link in your email, confirm each field and sign.
1
Open the email
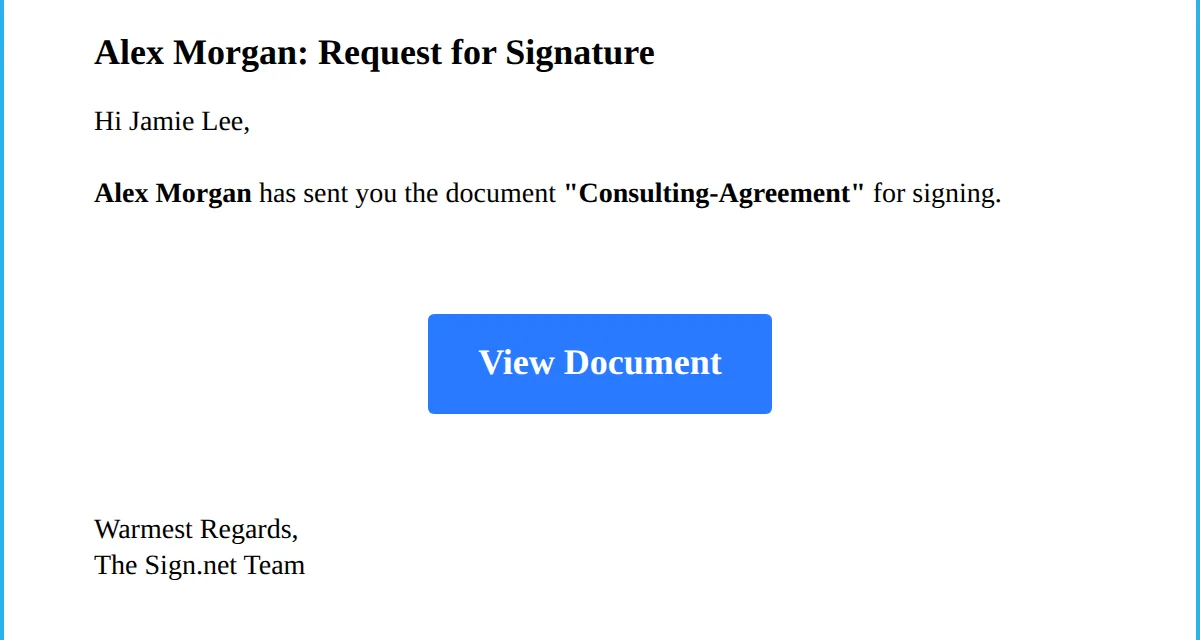
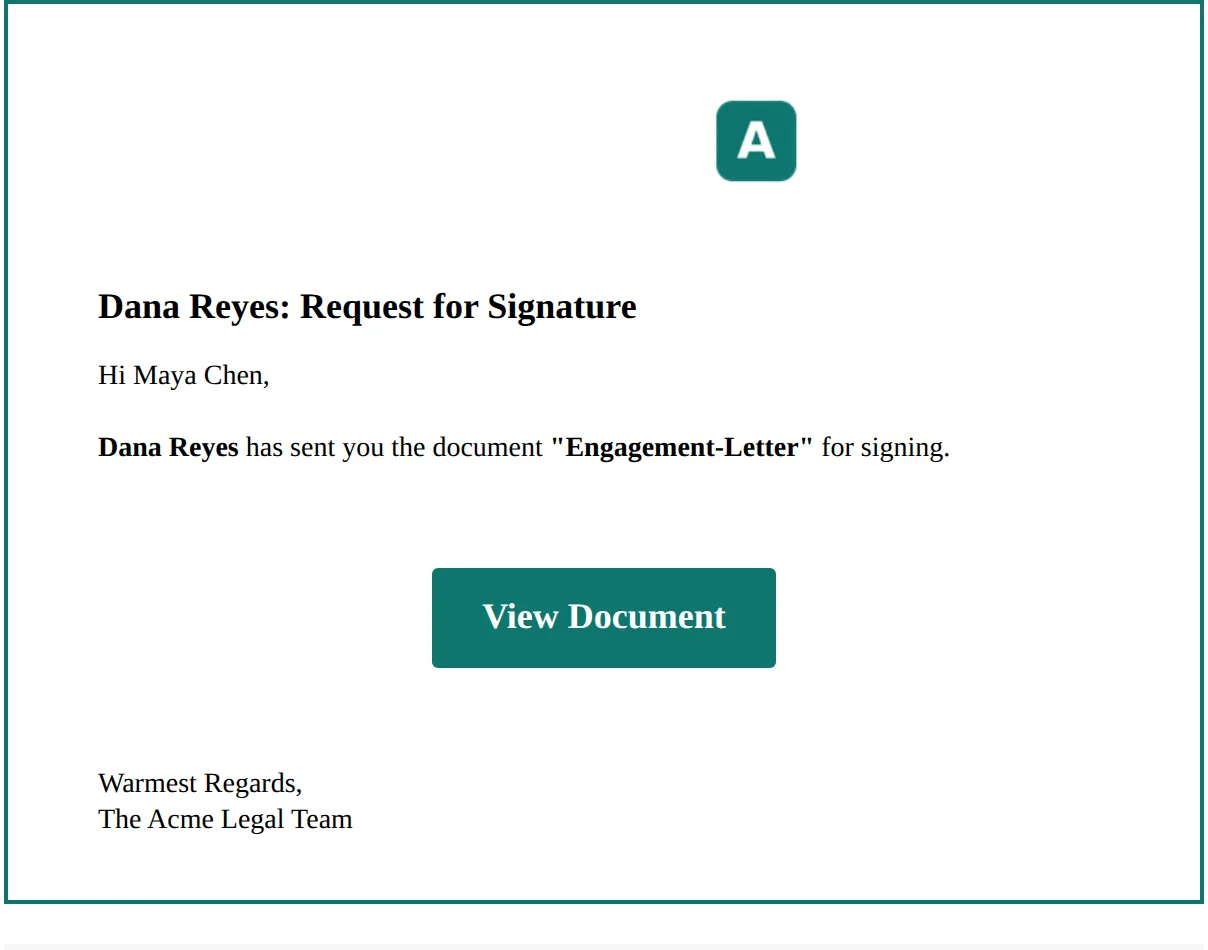
You'll get an email headed “Request for Signature”. Click “View Document”. If you have a Sign.net account, you'll also find the document under “To Sign” on your Dashboard.
2
Confirm your name
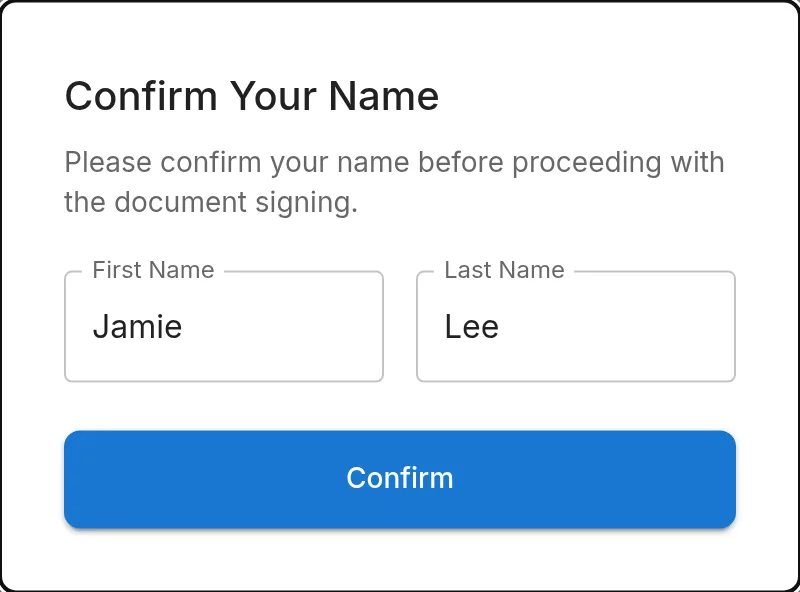
The first time you sign without an account, check your first and last name and click “Confirm”.
3
Agree to sign electronically
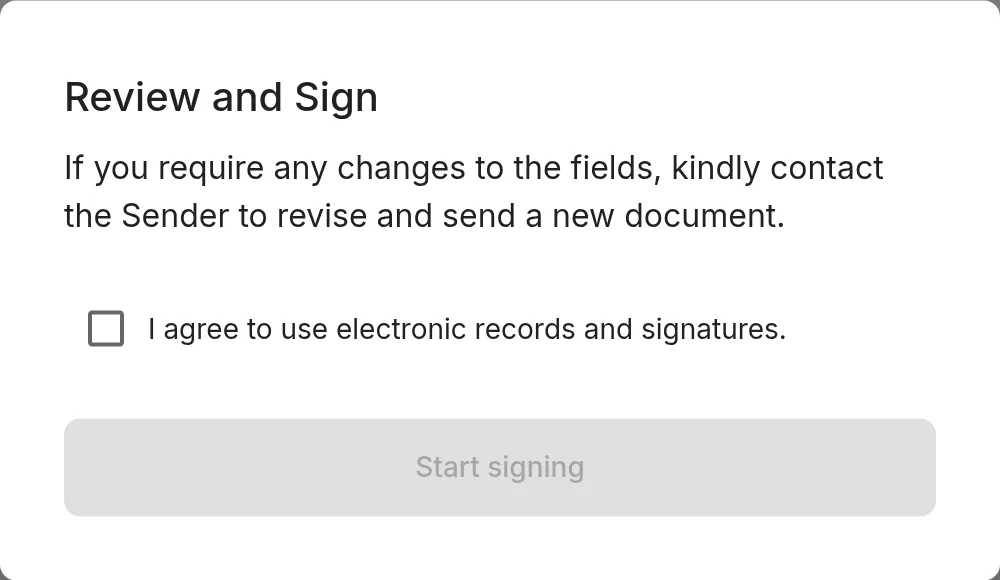
Tick “I agree to use electronic records and signatures.” and click “Start signing”. A short tour of the screen follows; step through it or click “Skip”.
4
Create your signature
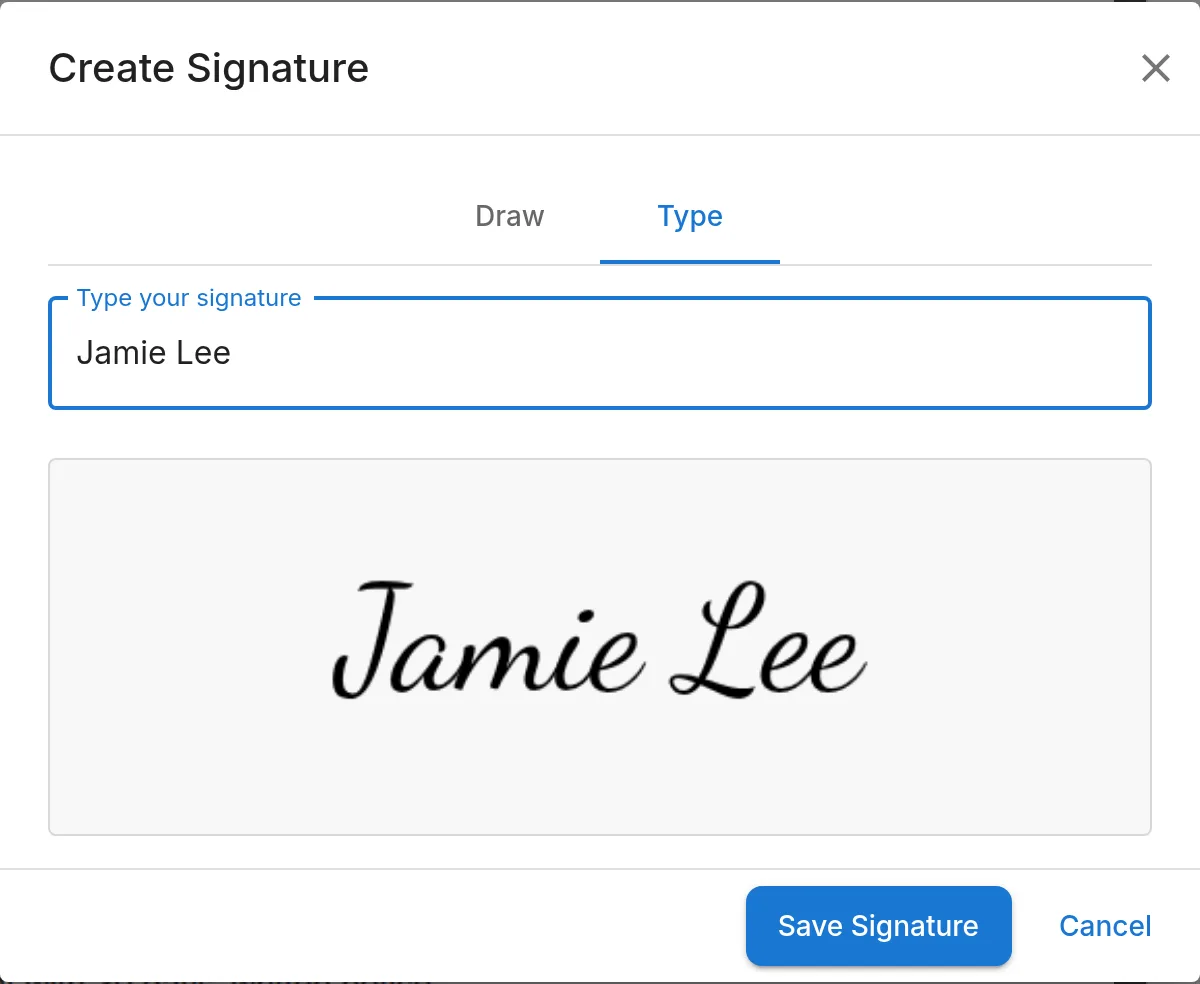
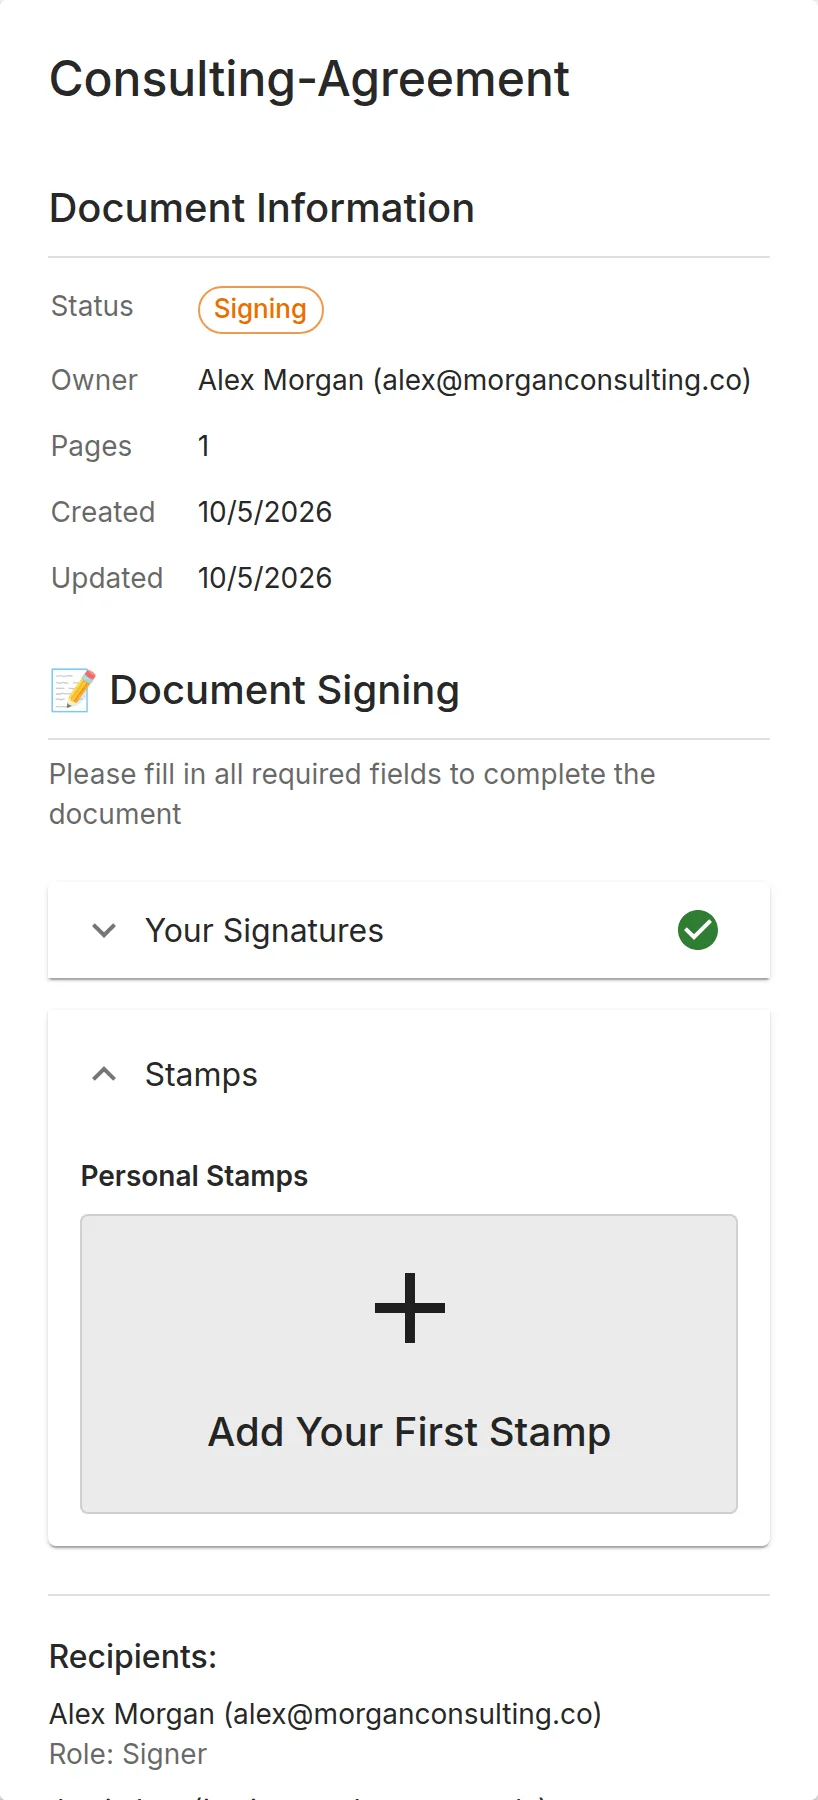
In the panel on the right, click “Add Your First Signature”. Draw it, or type it on the “Type” tab, and click “Save Signature”. Then click your saved signature to select it.
5
Confirm each field and sign
Under “Fields to complete:”, click each field in turn. Your signature, name and the date fill in, and each field gets a tick. When every field is ticked, “Complete All Fields to Sign” becomes “Sign Document”: click it.
6
You're done
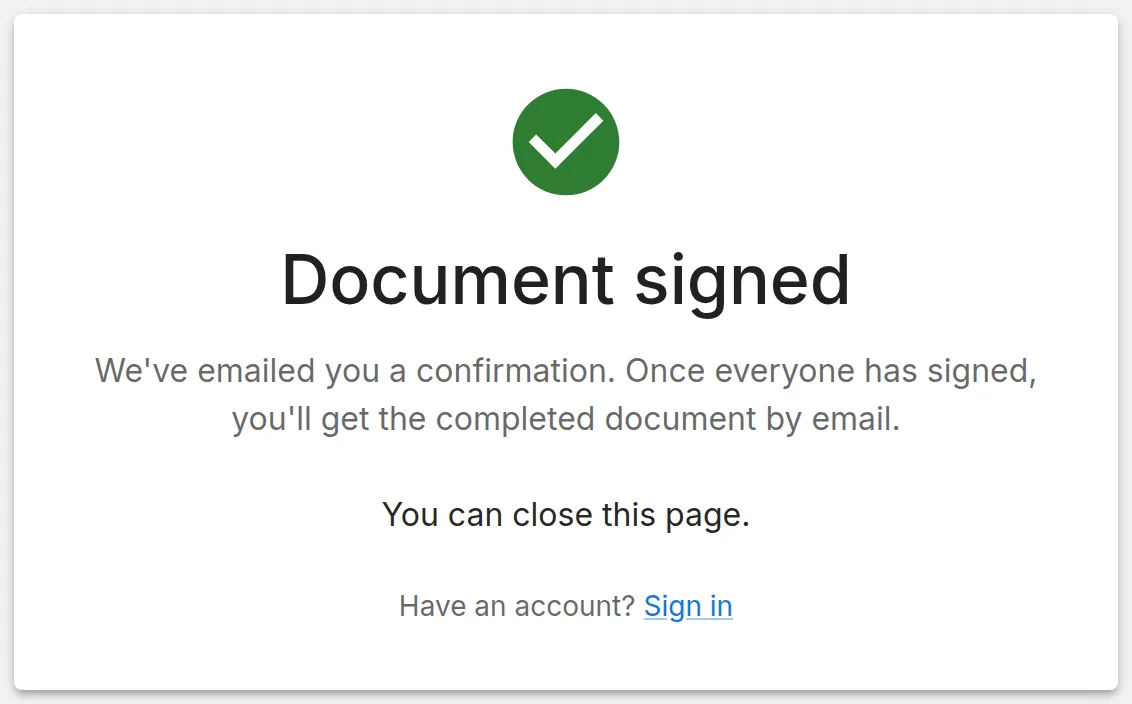
You'll see “Document signed” and get a confirmation email. Once everyone has signed, the completed document is emailed to you.
Upload a template
Save a document you send often, with its signer roles and fields already in place. Templates belong to a business portal.
1
Open Templates on your business portal
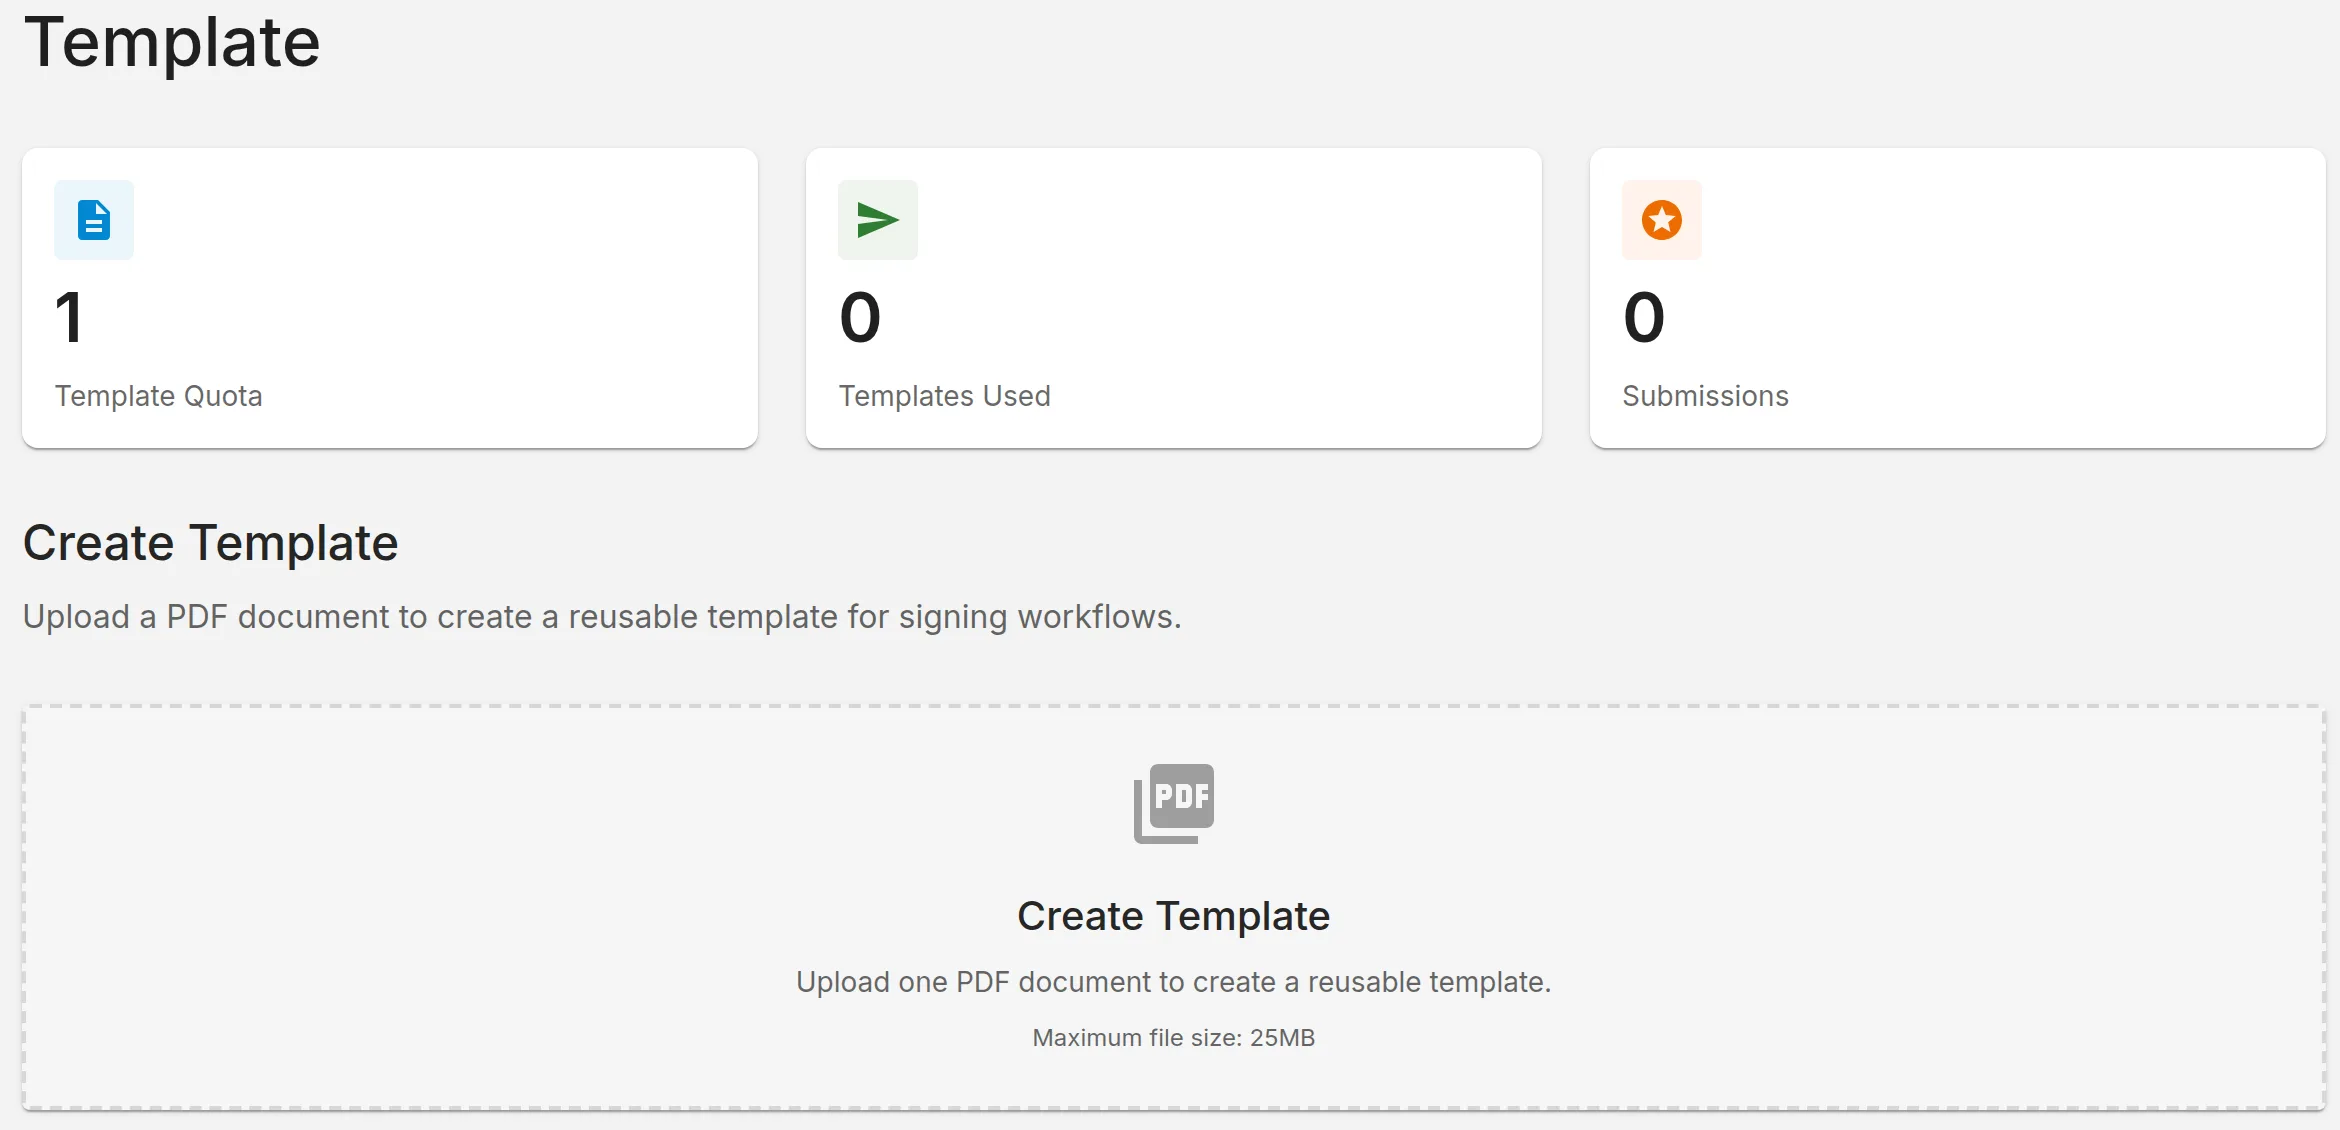
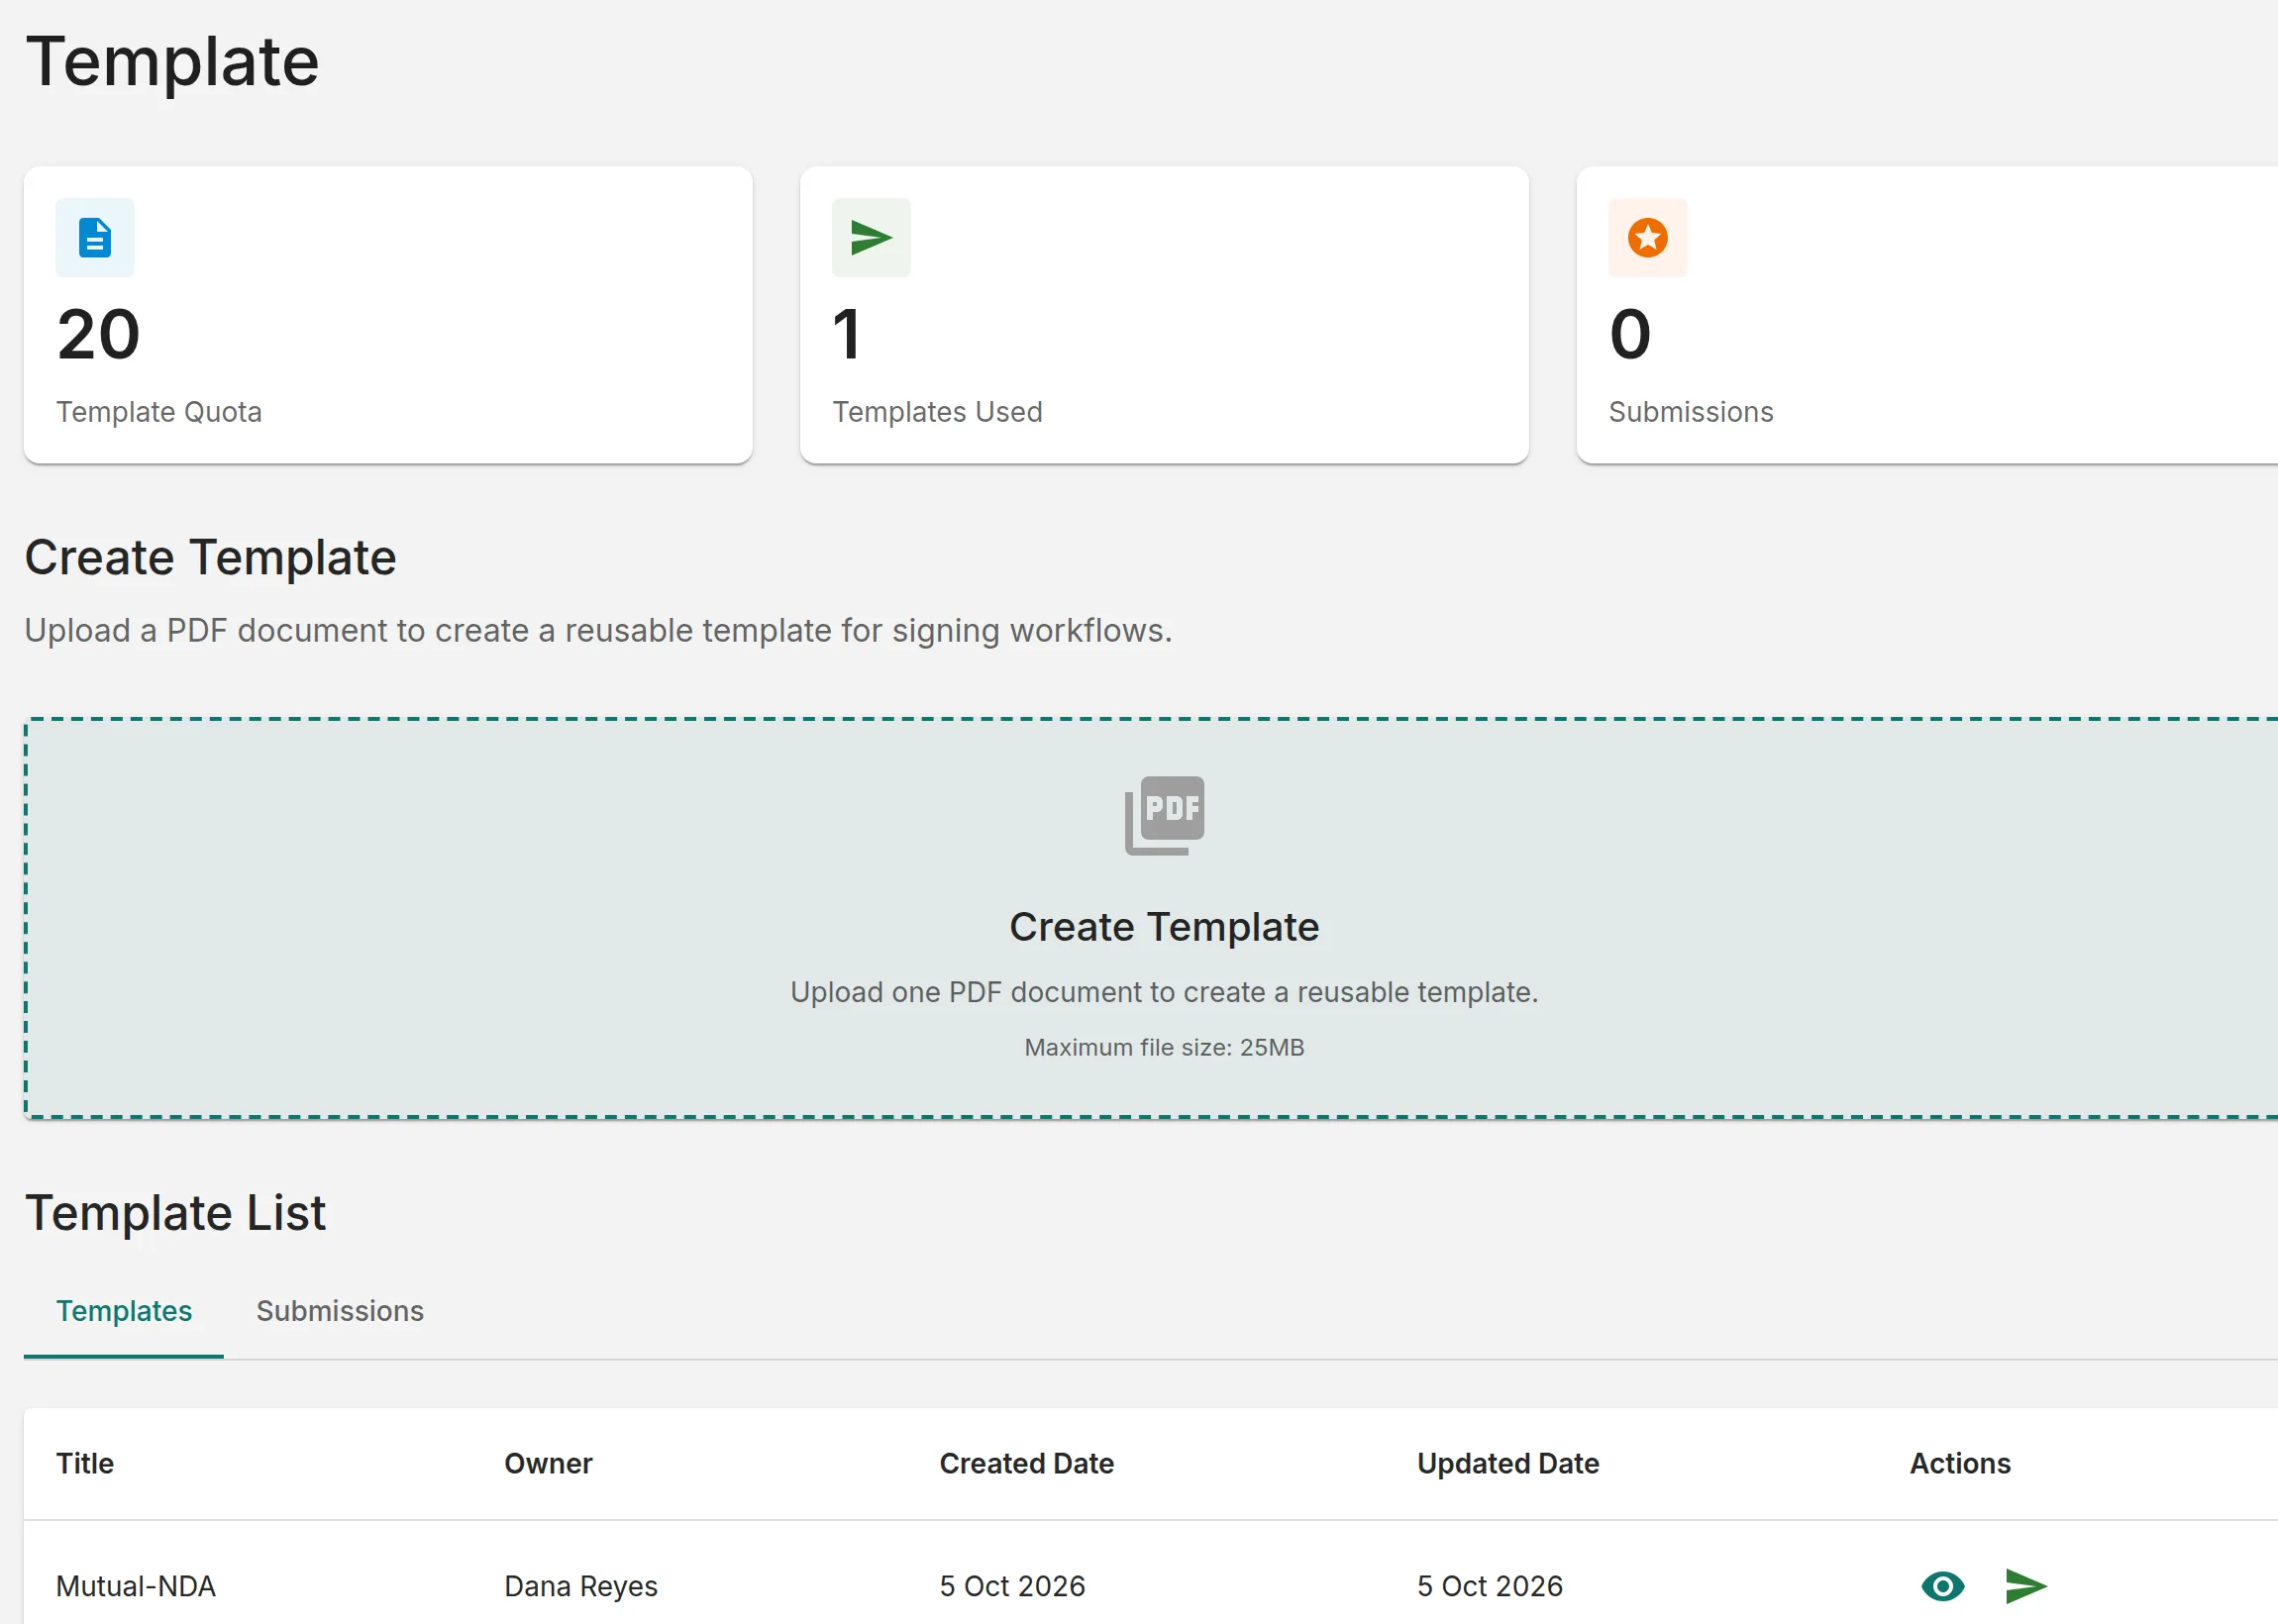
Sign in at yourcompany.sign.net and open “Templates” from the menu. “Template Quota” is how many templates your plan allows, and “Templates Used” how many you've made.
2
Upload the PDF
Drop one PDF, up to 25MB, on “Create Template”. The template editor opens straight away. Check the “Template Name” and click “Continue”.
3
Add signer roles
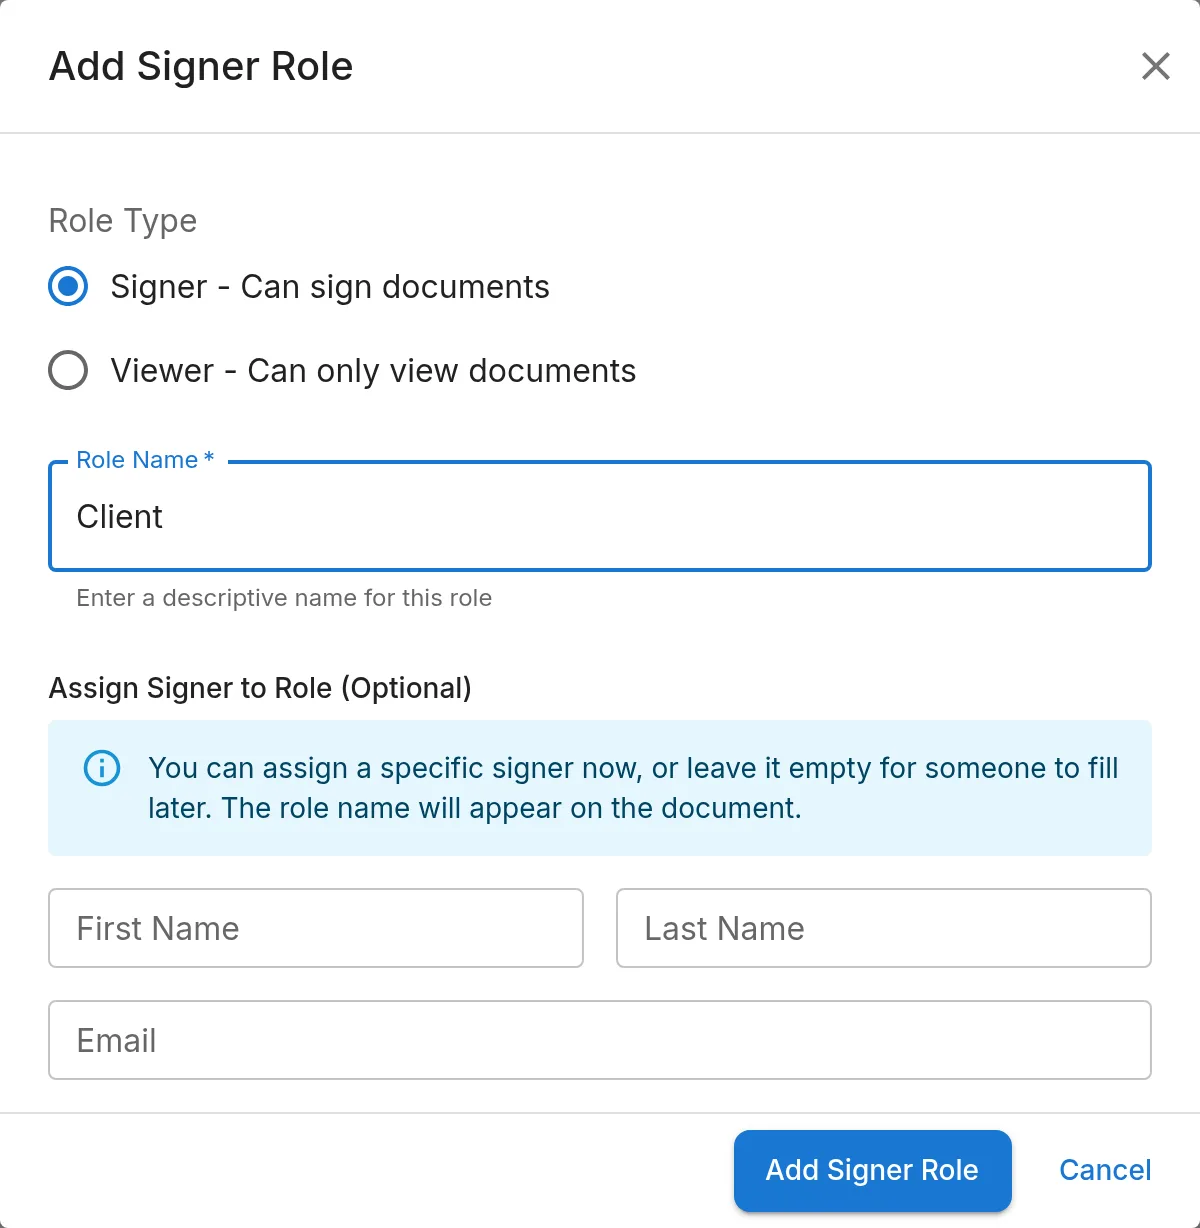
Click “Add Signer or Viewer”. Choose the “Role Type”, give the role a “Role Name” such as Client, and click “Add Signer Role”. Leave “Assign Signer to Role (Optional)” empty to enter the person each time you send.
4
Place the fields
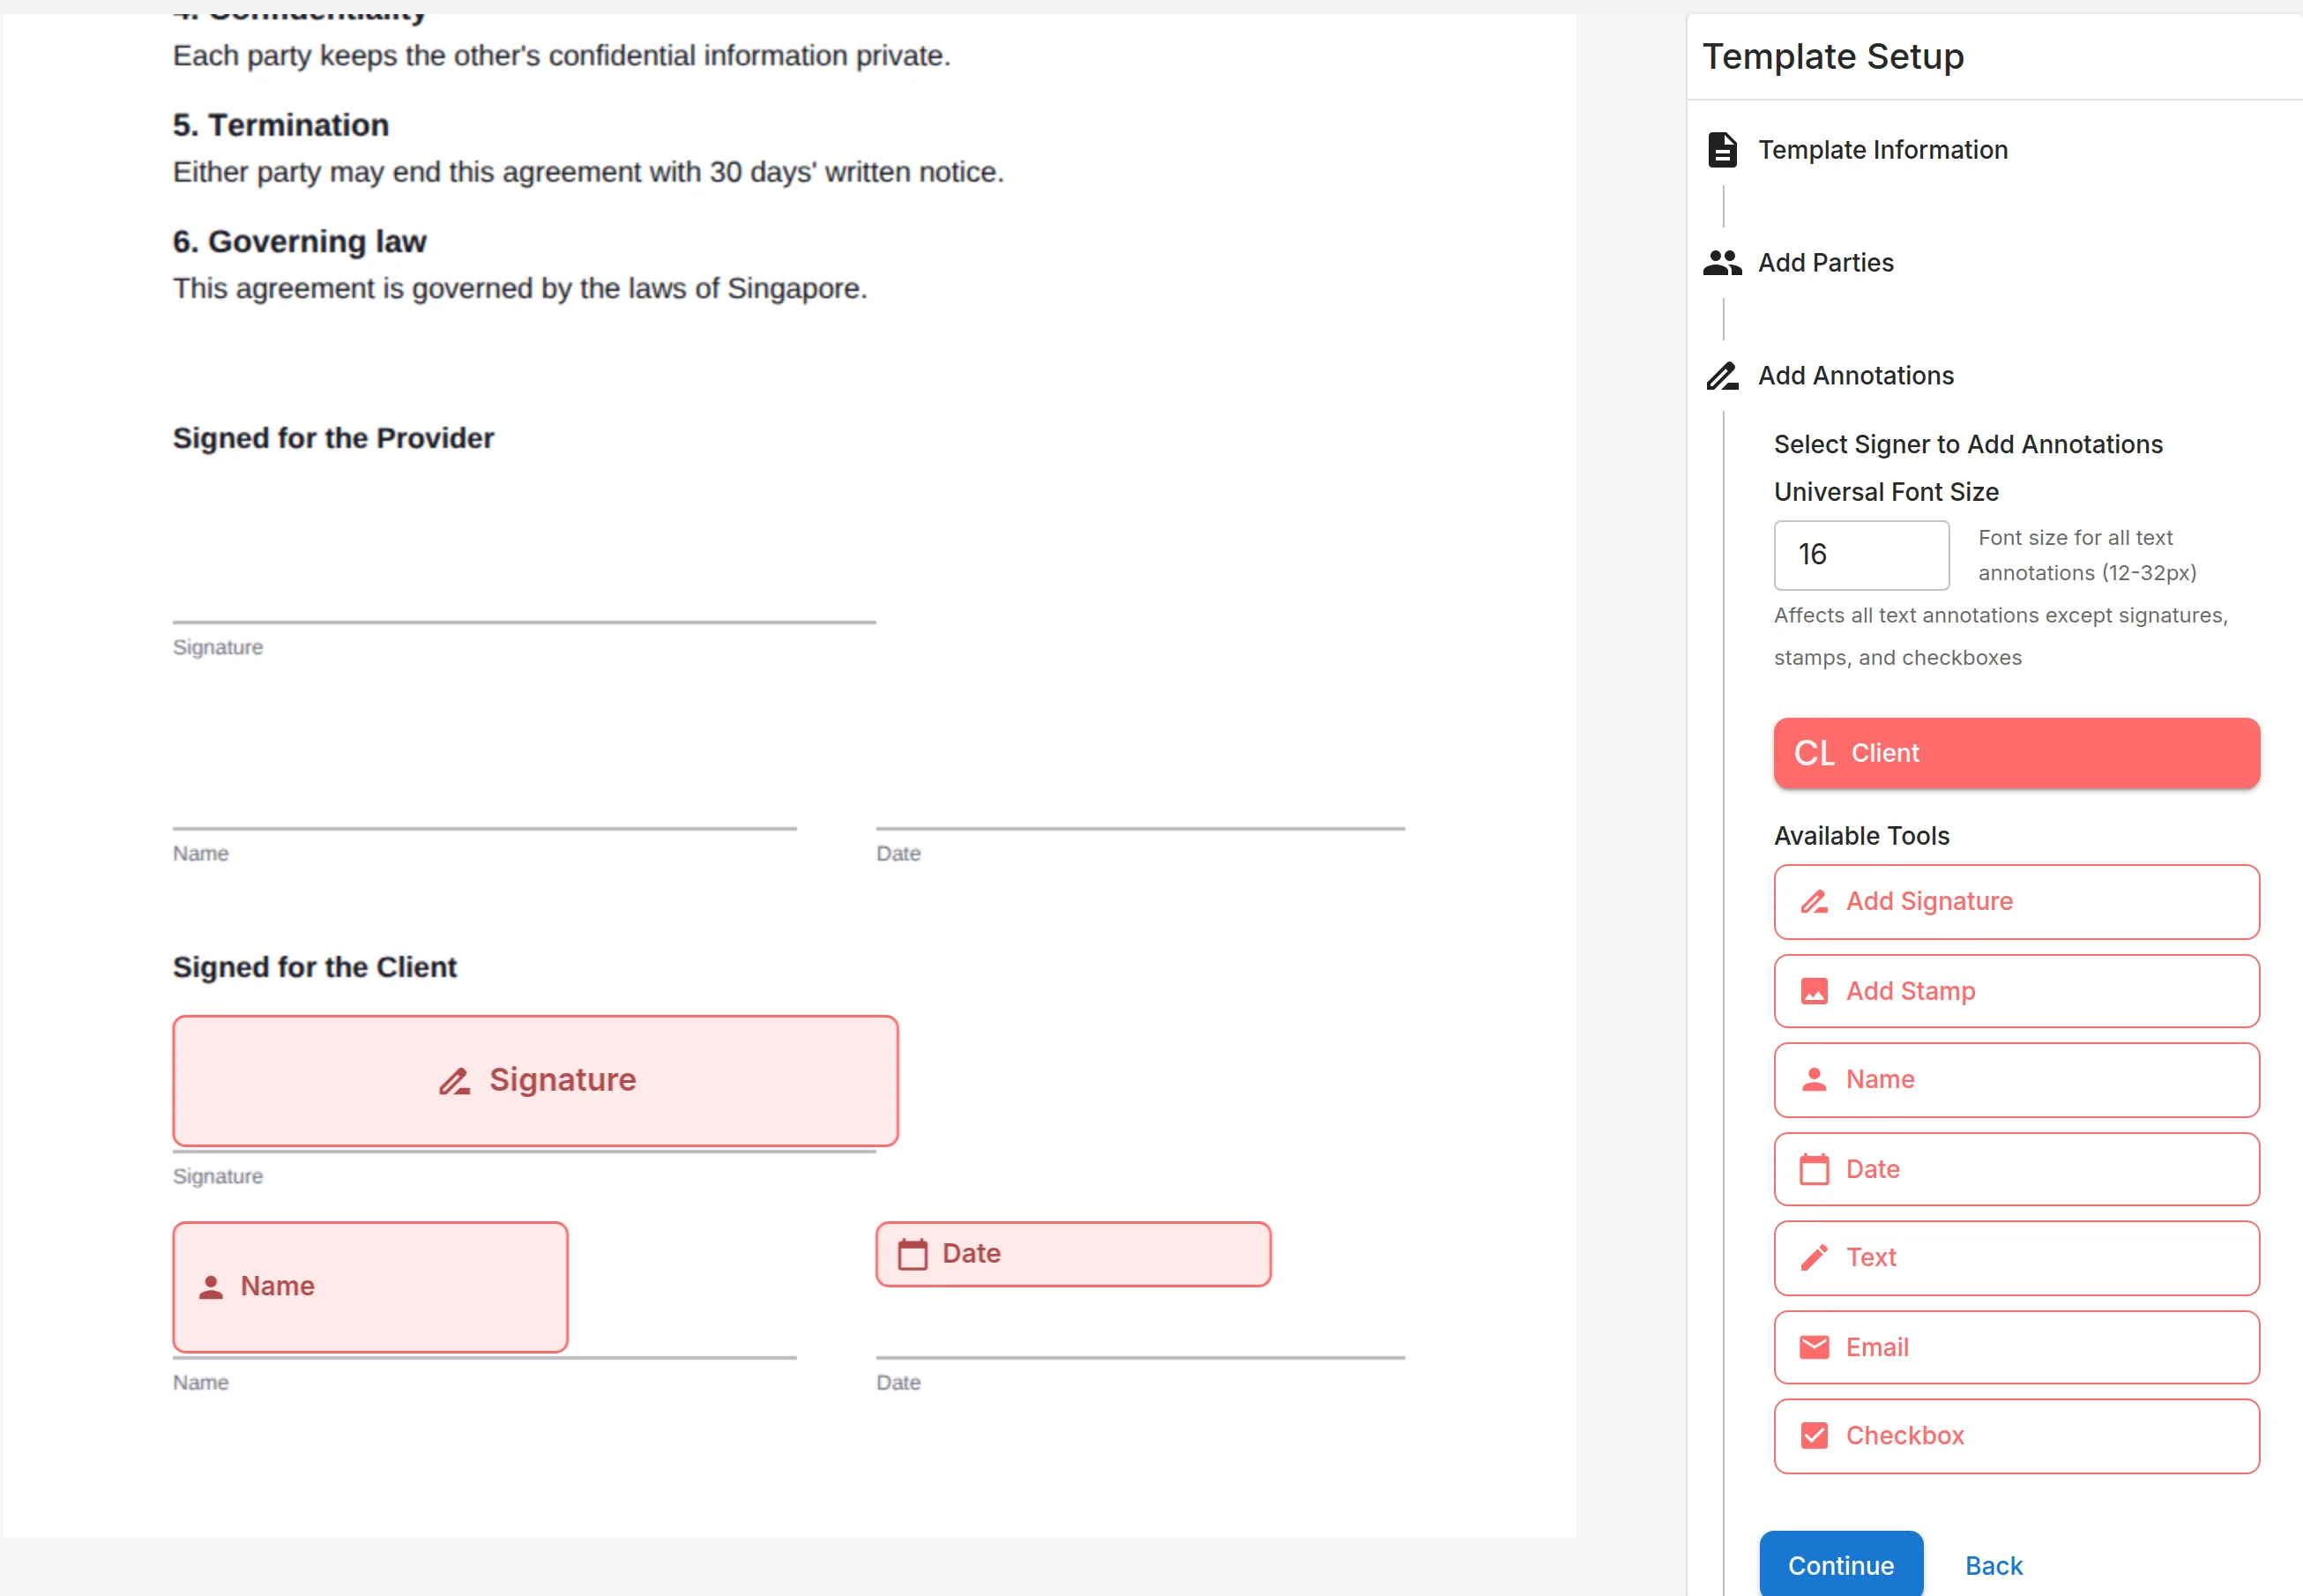
Click “Continue”, choose a role, then pick a field and click where it goes on the page. Every signer role needs a signature field.
5
Save it
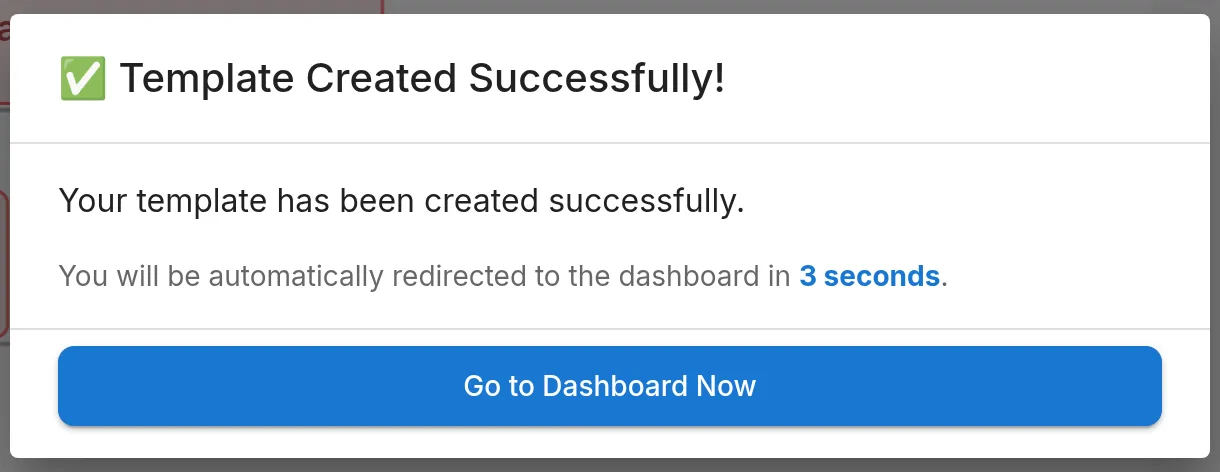
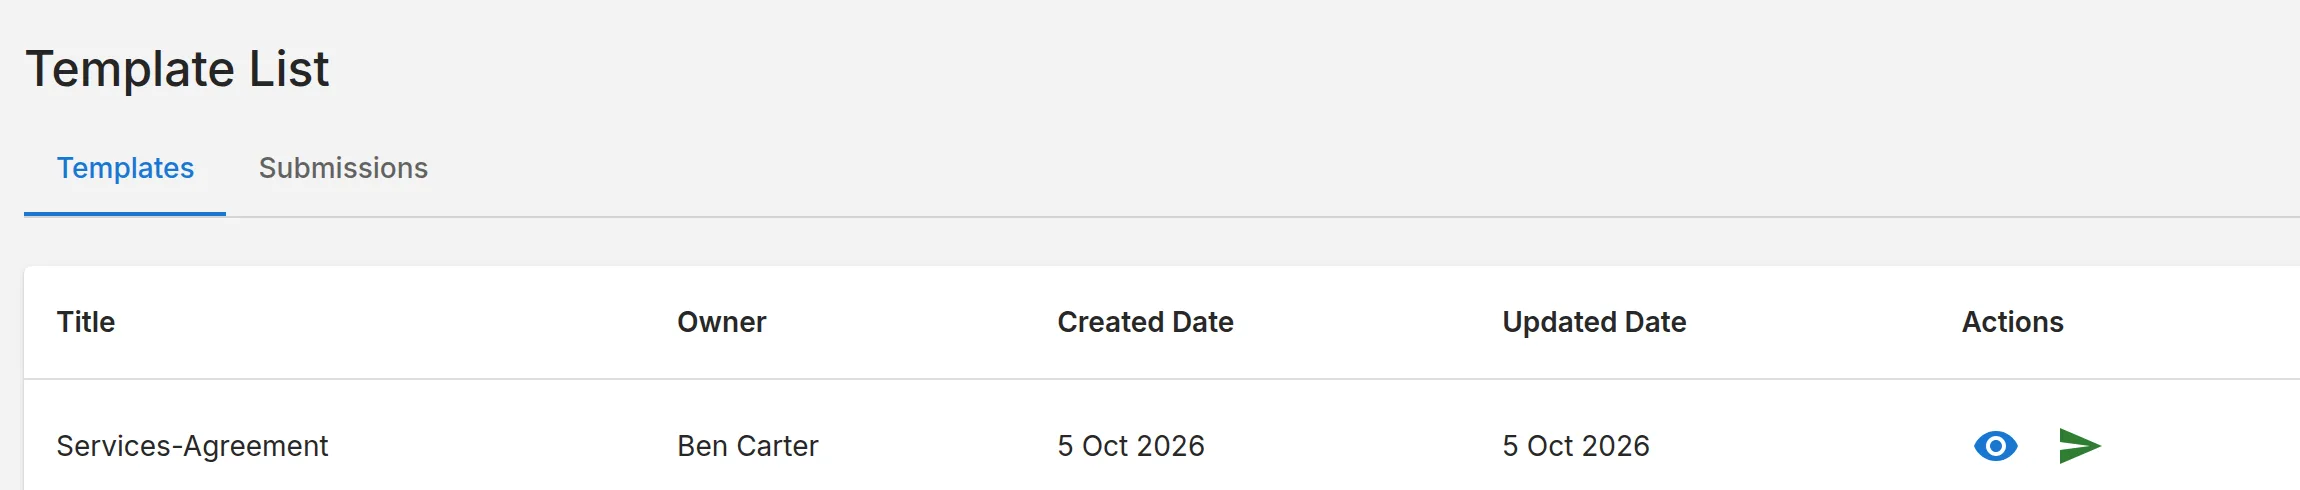
Click “Create Template”. After “Template Created Successfully!”, the template is in your “Template List”.
6
Send from it
In the “Template List”, click the send button next to the template. Enter the name and email for each open role and click “Assign”, then “Continue” and “Submit Form”.
Set your business theme
Put your logo and colour on your business portal so your team and your signers know it's you.
1
Open My Organisation
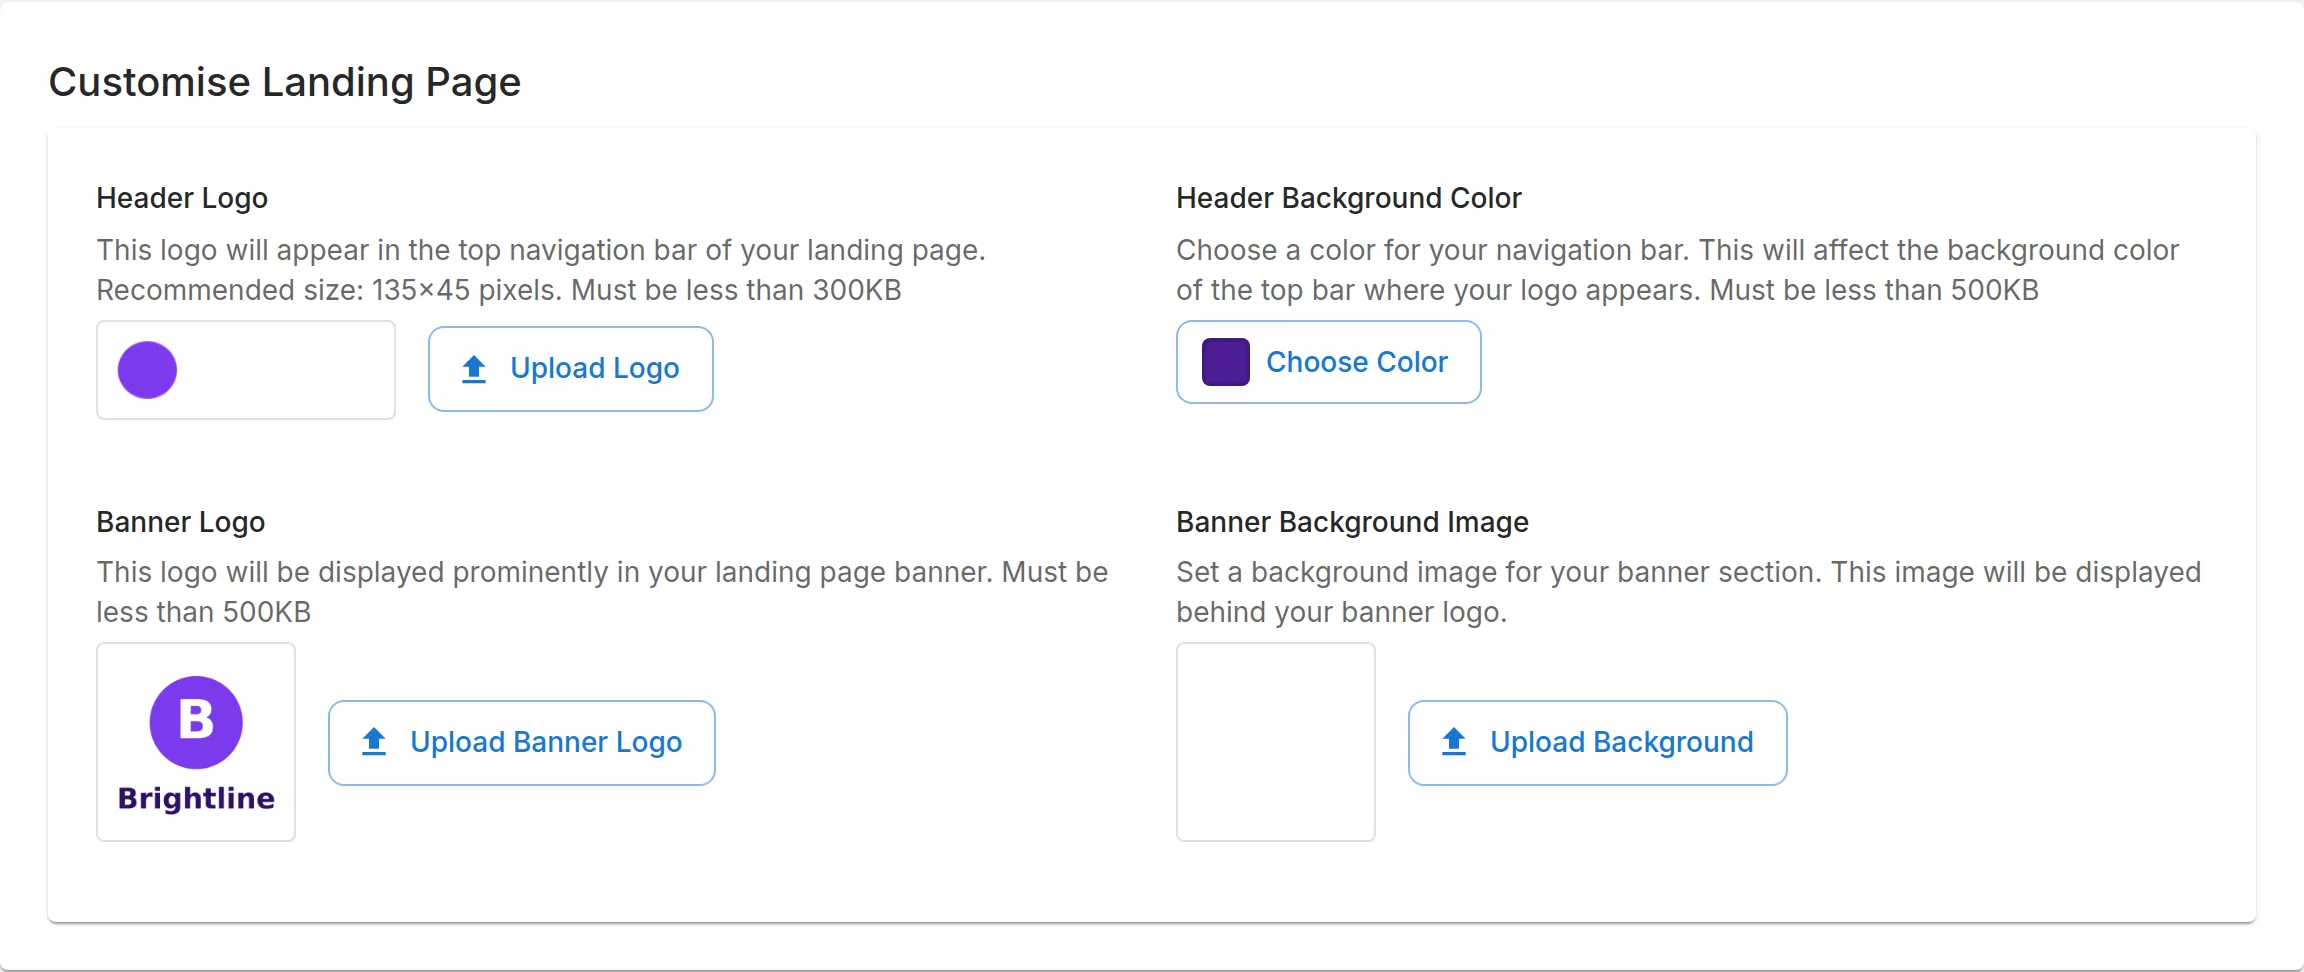
On your business portal, open “My Organisation” from the menu. The “Business Profile” page opens; scroll to “Customise Landing Page”.
2
Upload your header logo
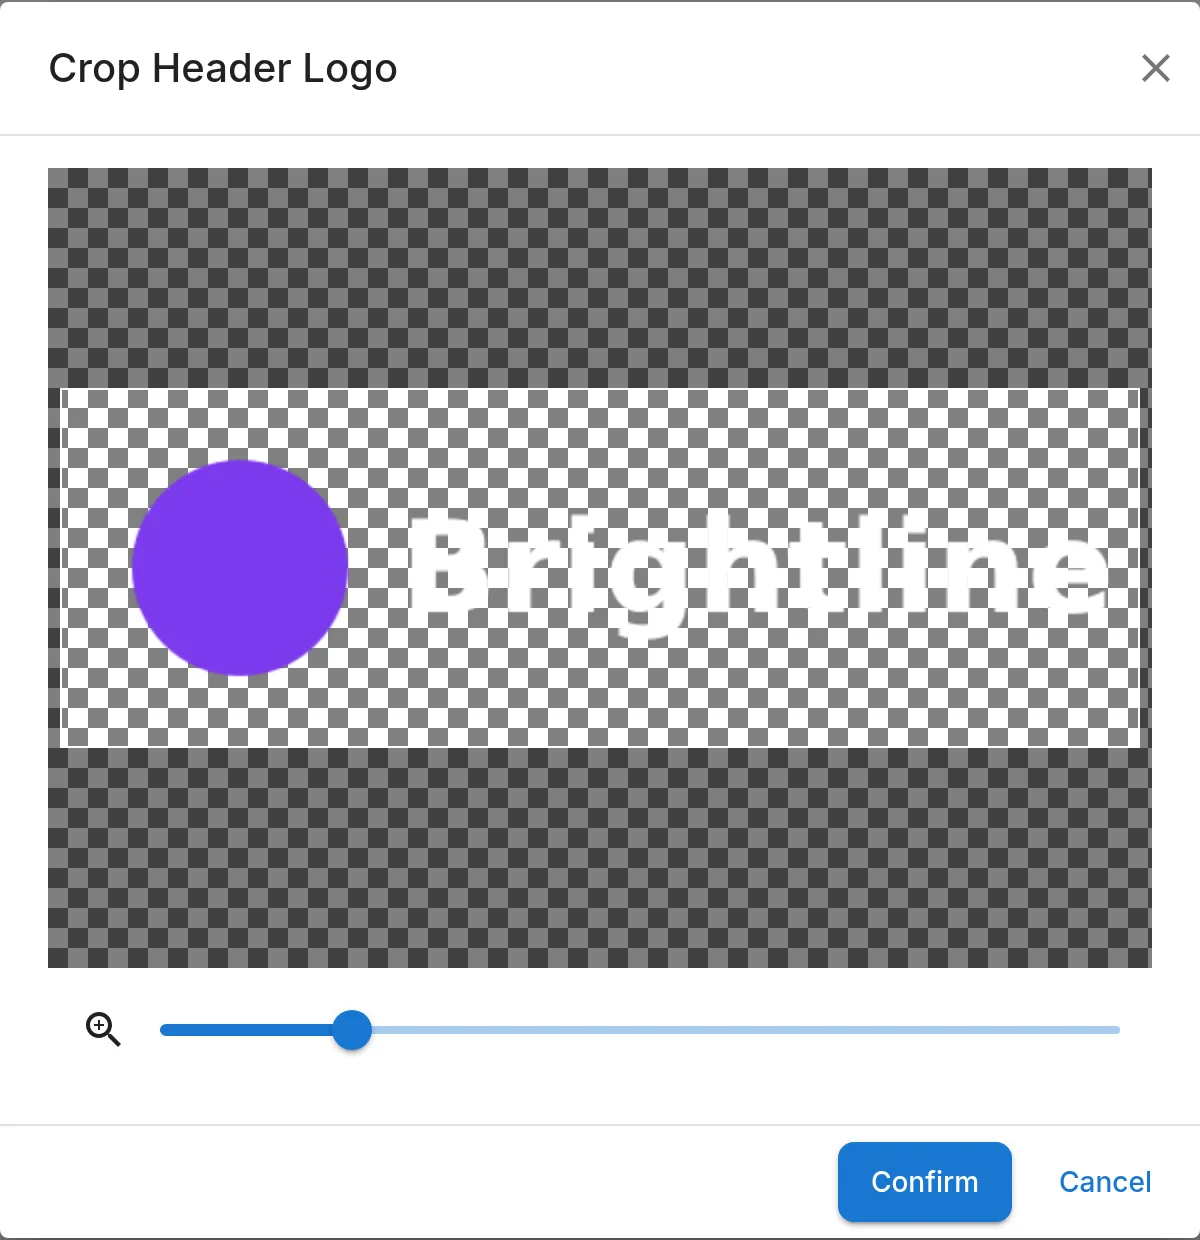
Click “Upload Logo” under “Header Logo” and choose an image under 300KB; 135 × 45 pixels fits best. Crop it and click “Confirm”. You'll see “Theme updated successfully”.
3
Choose your top bar colour
Click “Choose Color” under “Header Background Color” and pick a colour. It's saved as soon as you choose it.
4
Add a banner
“Banner Logo” (under 500KB) and “Banner Background Image” style your landing page banner. Upload and crop them the same way.
5
Check the result
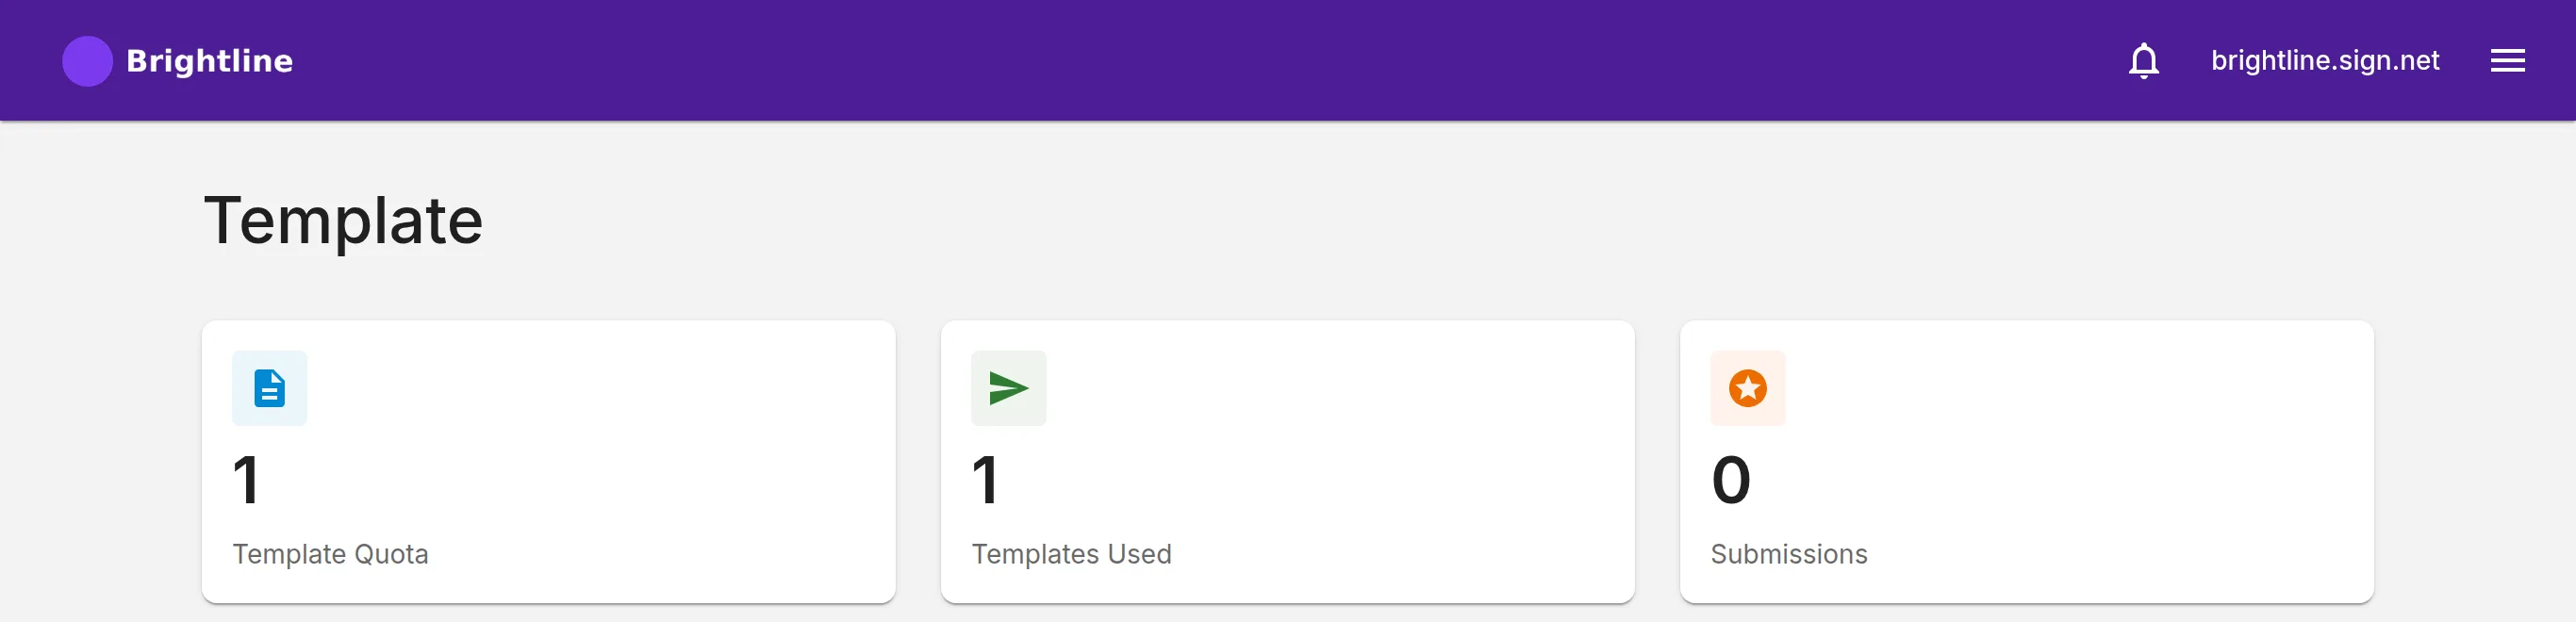
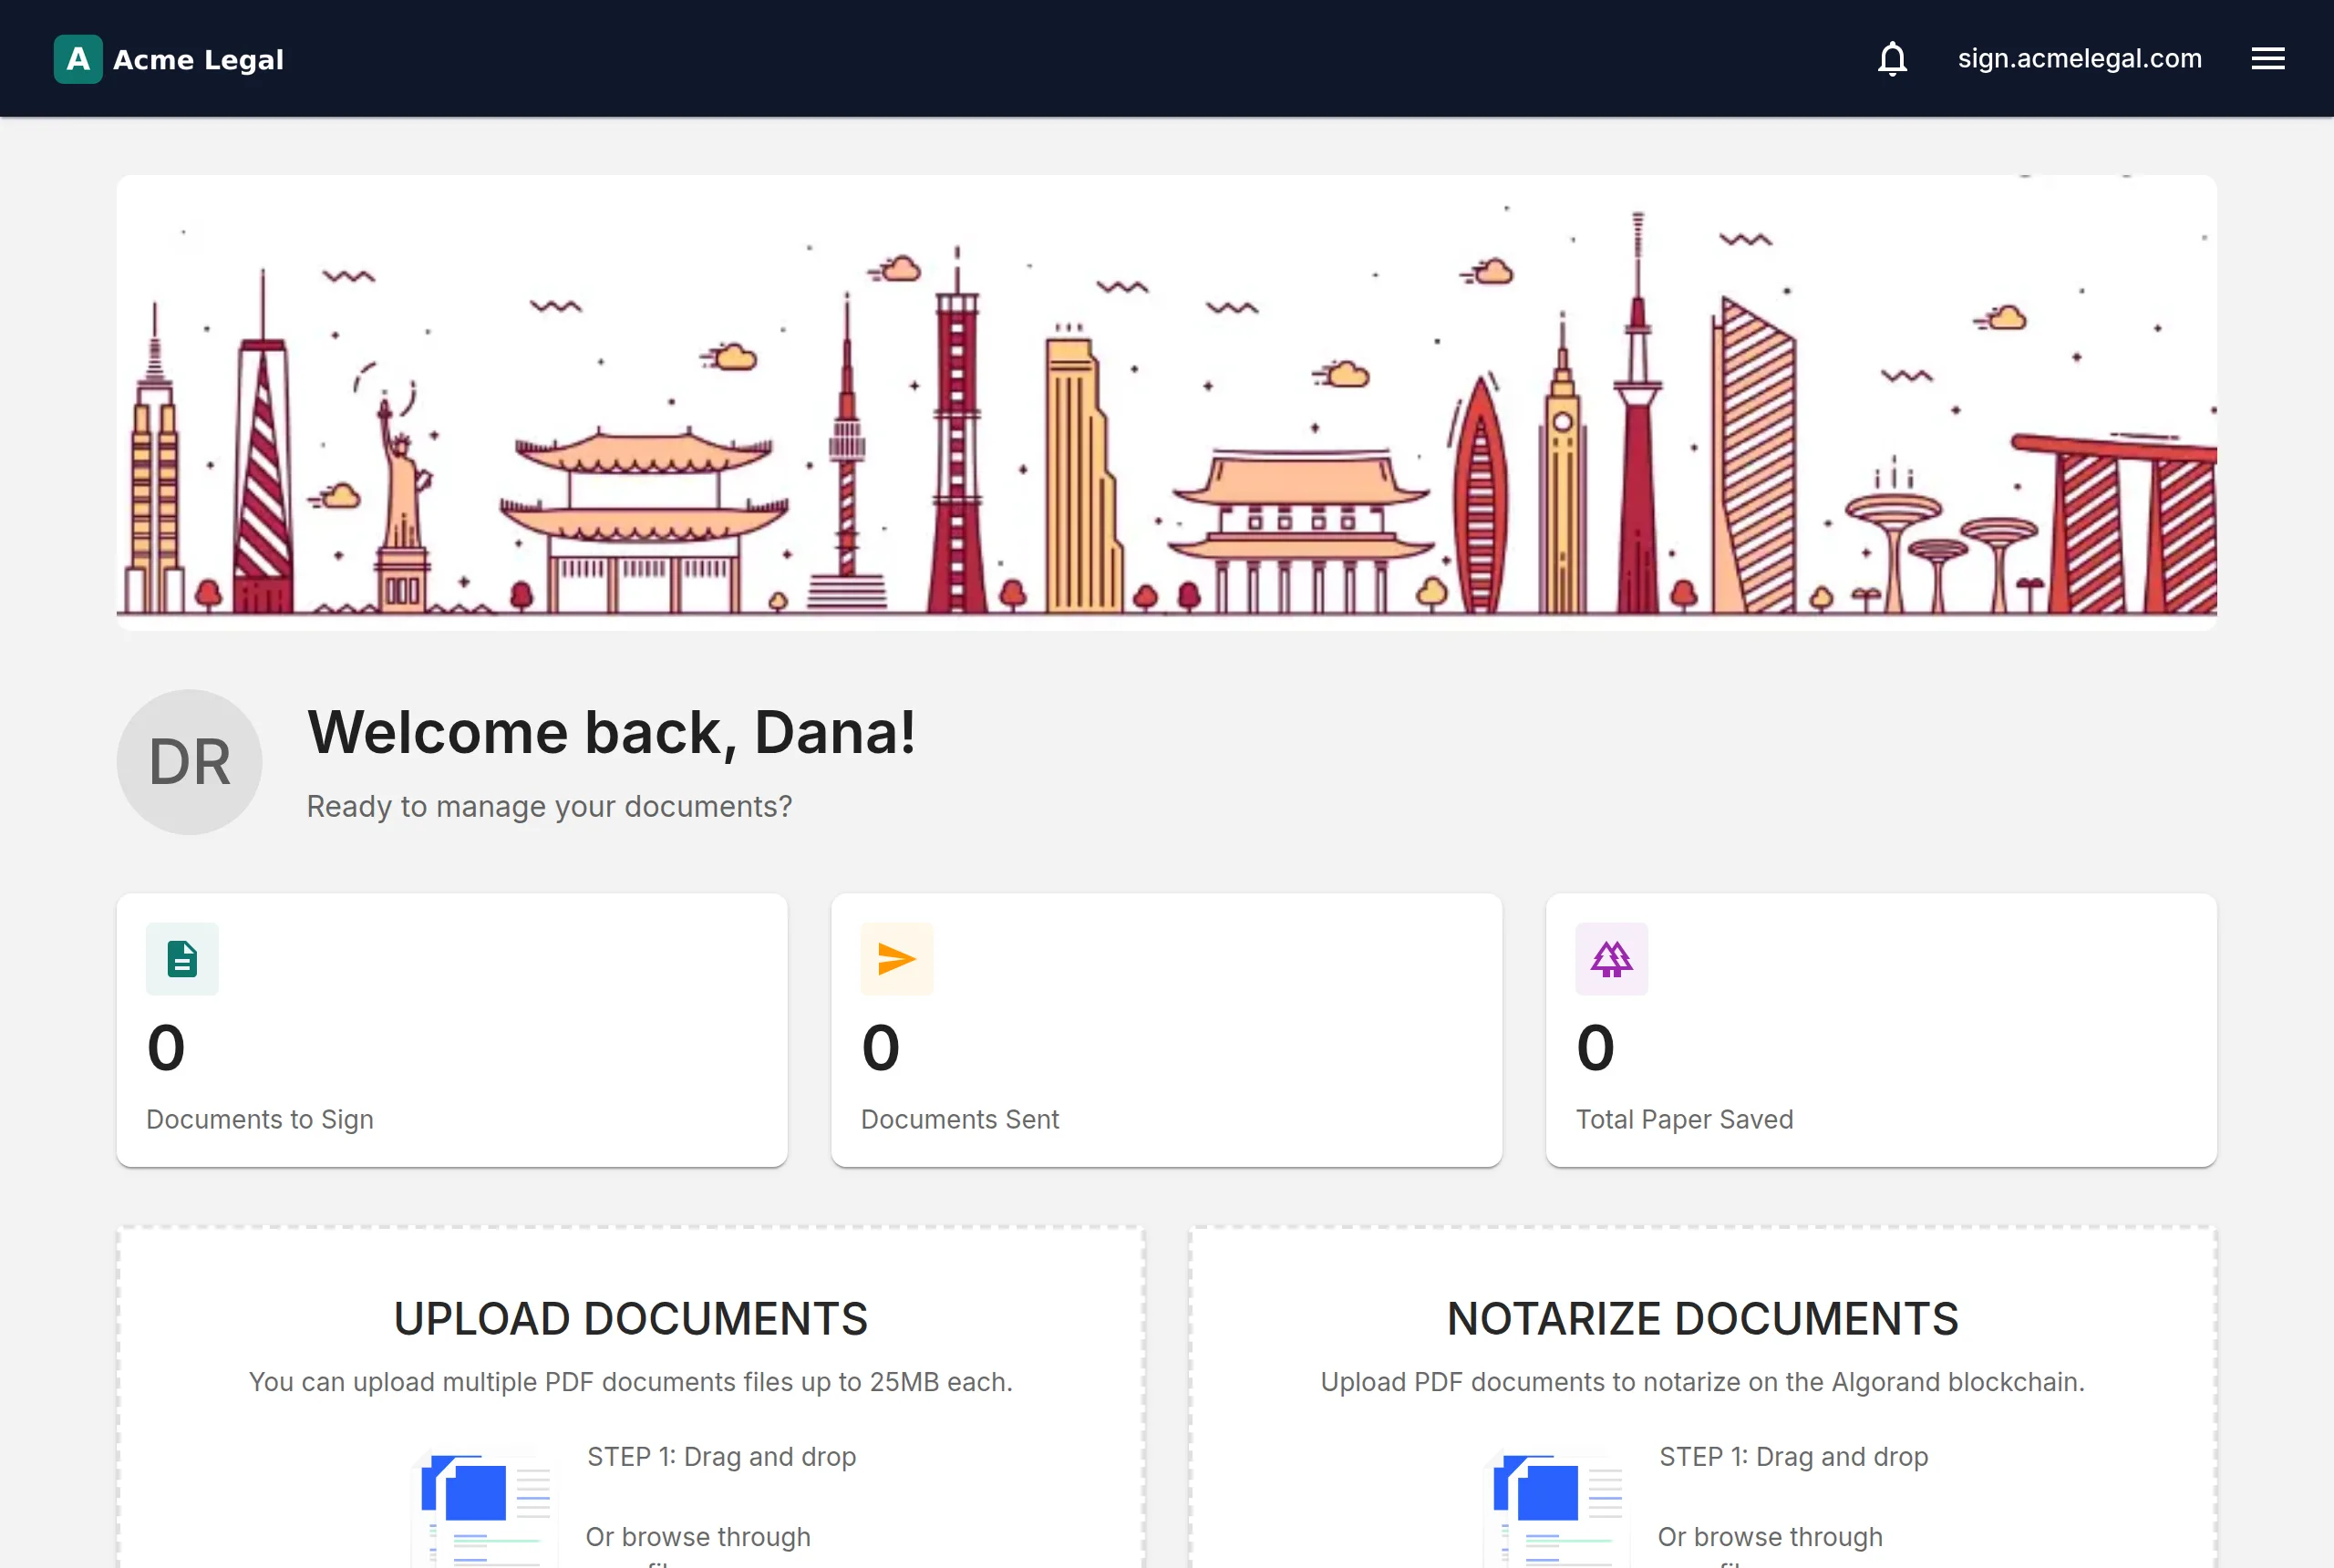
Your logo and colour now appear in the top bar for everyone who signs in to your business portal.
Resellers
Running your reseller console
For Sign.net partners who sell white-label signing portals: build packages, provision your customers' private labels, look after them, and read your usage.
Sign in to your console
Sign.net sets up your reseller account and puts you on a plan. Here's how you get in.
1
Set your password
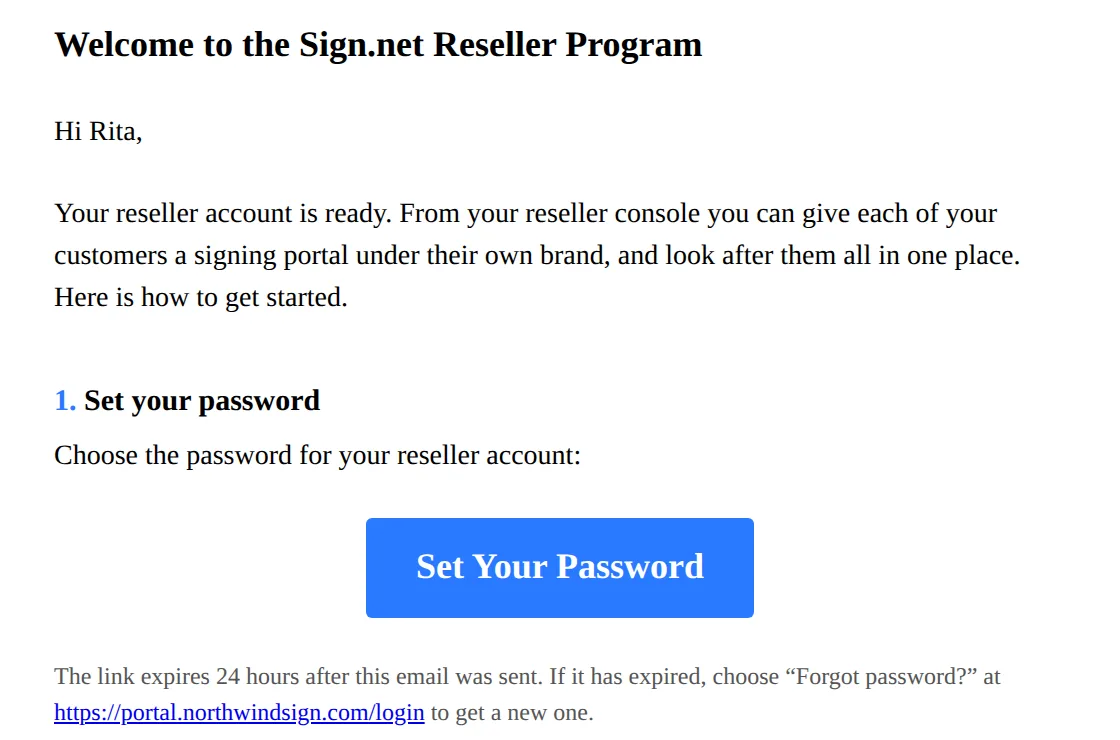
Your welcome email, “Welcome to the Sign.net Reseller Program”, has a “Set Your Password” button. Click it within 24 hours and choose a password. If the link has expired, use “Forgot password?” on the sign-in page it links to.
2
Sign in
Open the console link in the same email, enter your email and password, and click “Sign In”.
3
Check your allowance
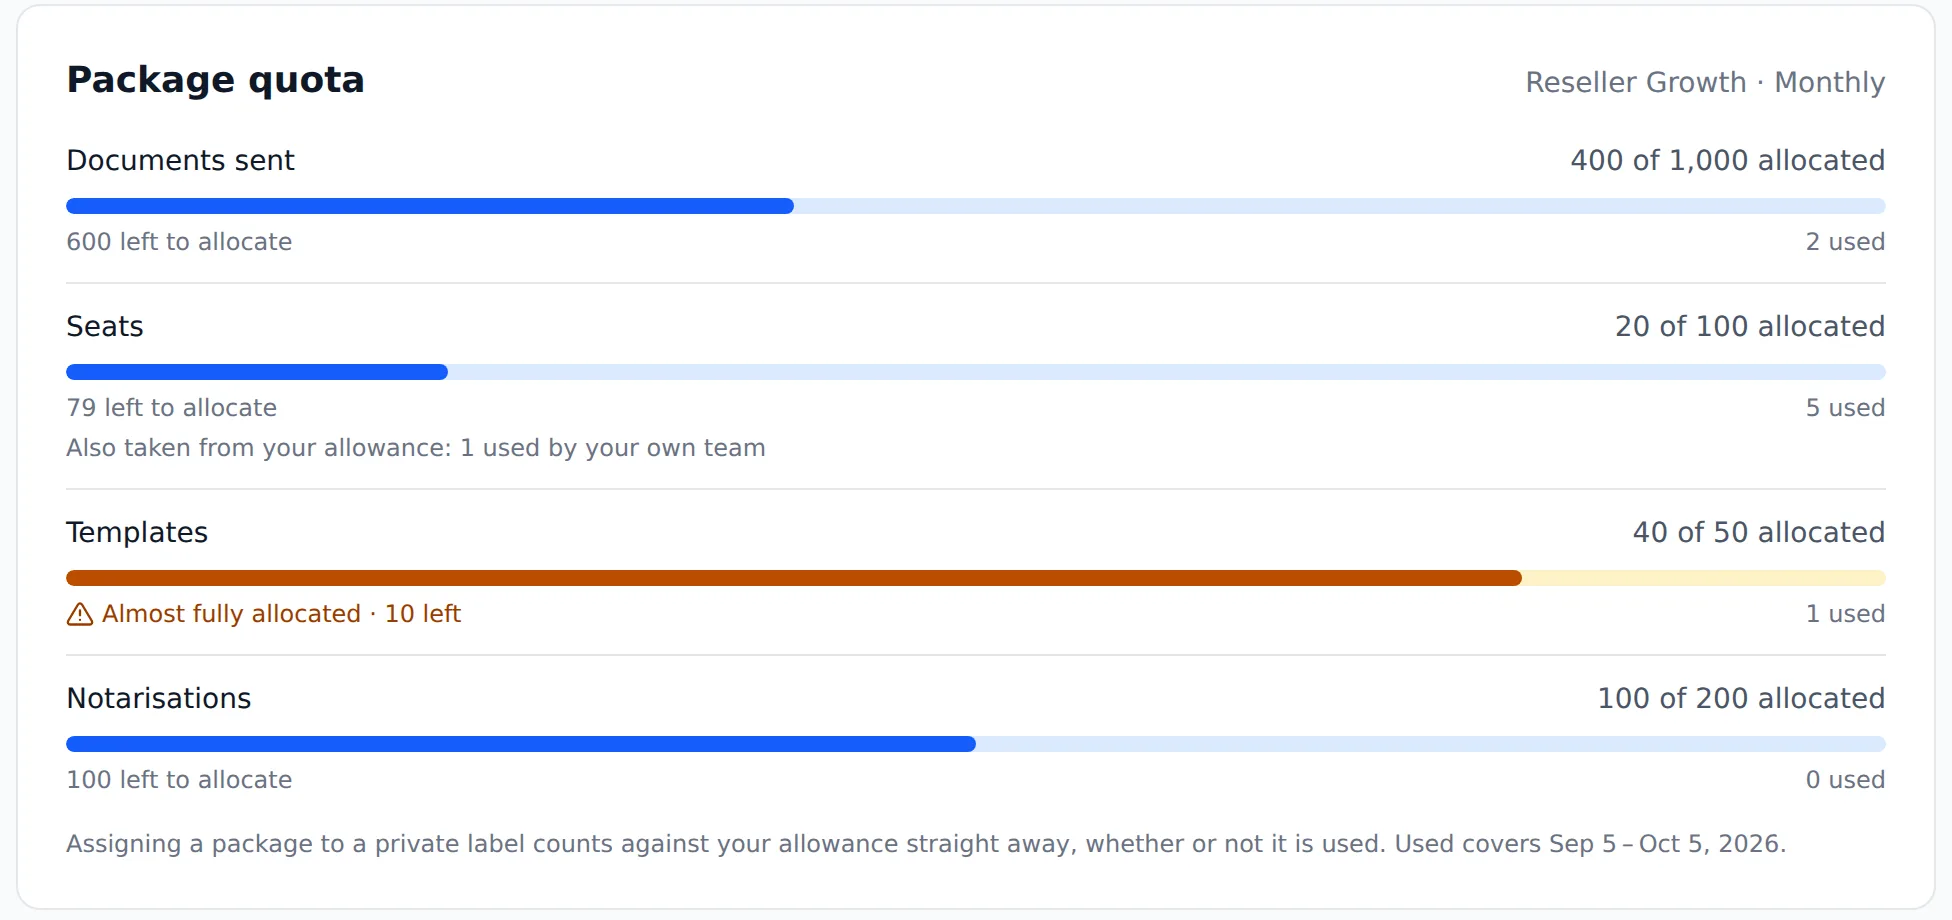
Your “Dashboard” shows your sign.net plan under “Package quota”. For documents, seats, templates and notarisations it shows how much you've allocated to private labels out of what your plan includes, how much is left to allocate, and how much has been used.
Create a package
A package is what you sell to a private label: an allowance of documents, seats, templates and notarisations, at your own price.
1
Start a new package
Open “Packages” and click “New package”.
2
Describe it
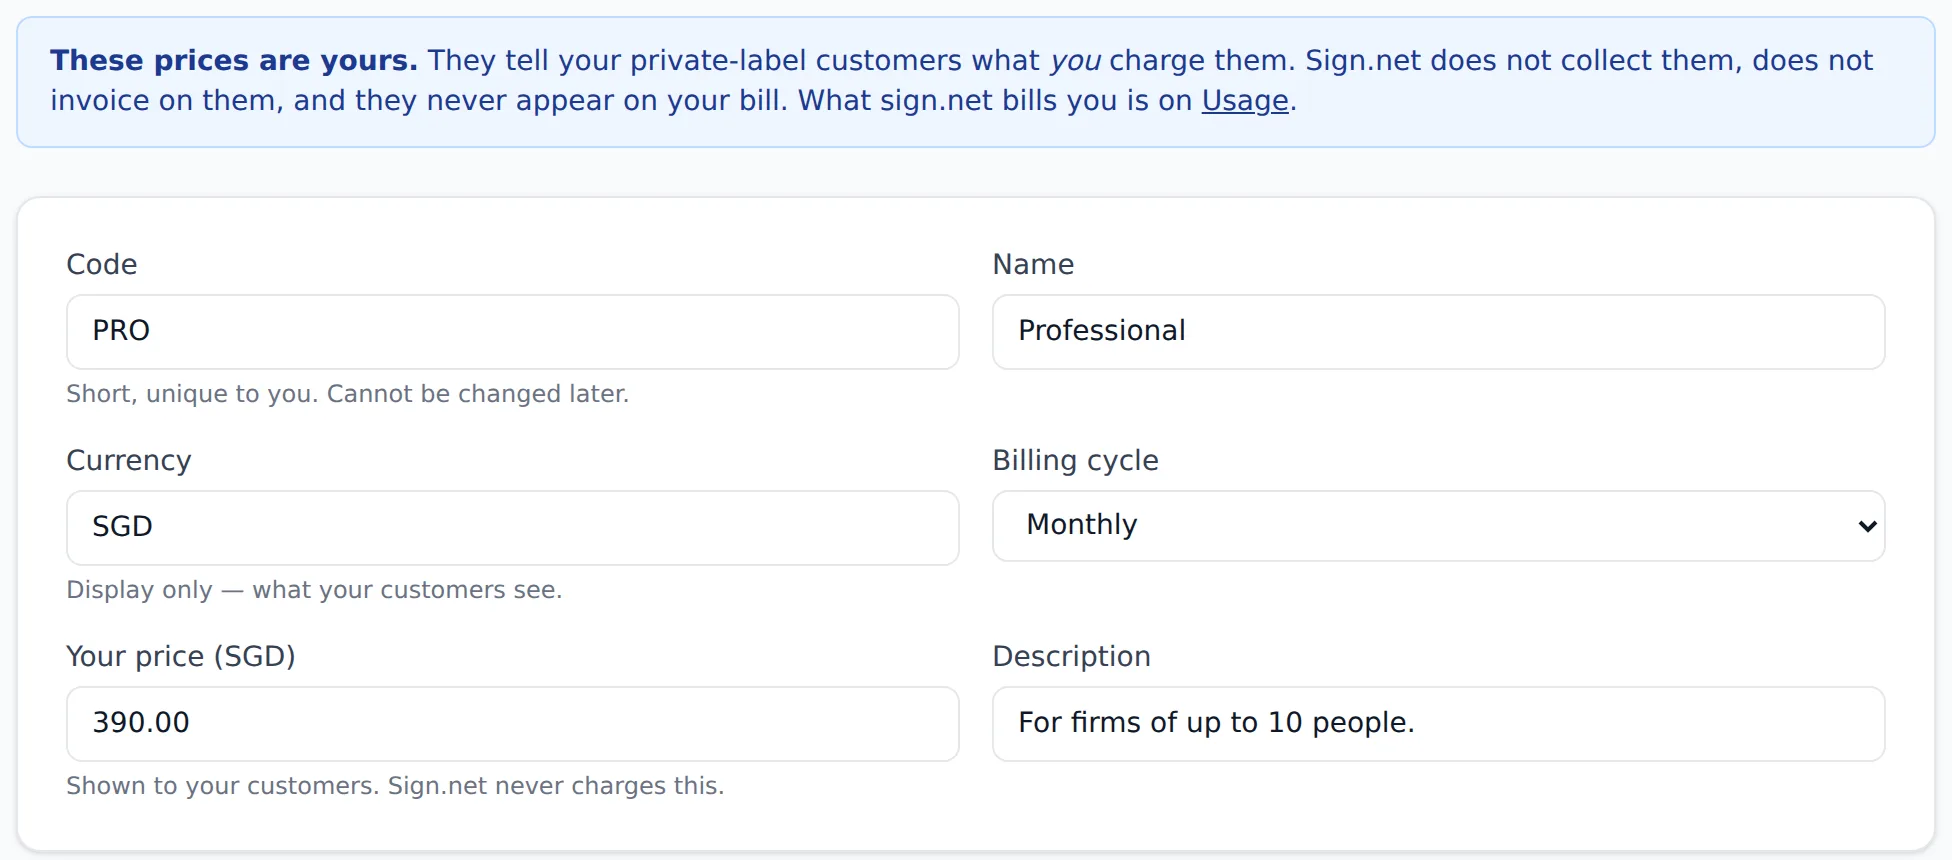
Enter a short “Code” such as PRO (it can't be changed later), a “Name”, the “Currency” and “Billing cycle” your customers see, “Your price” and an optional “Description”. These prices are yours: Sign.net doesn't collect them or put them on your bill.
3
Set what a private label gets
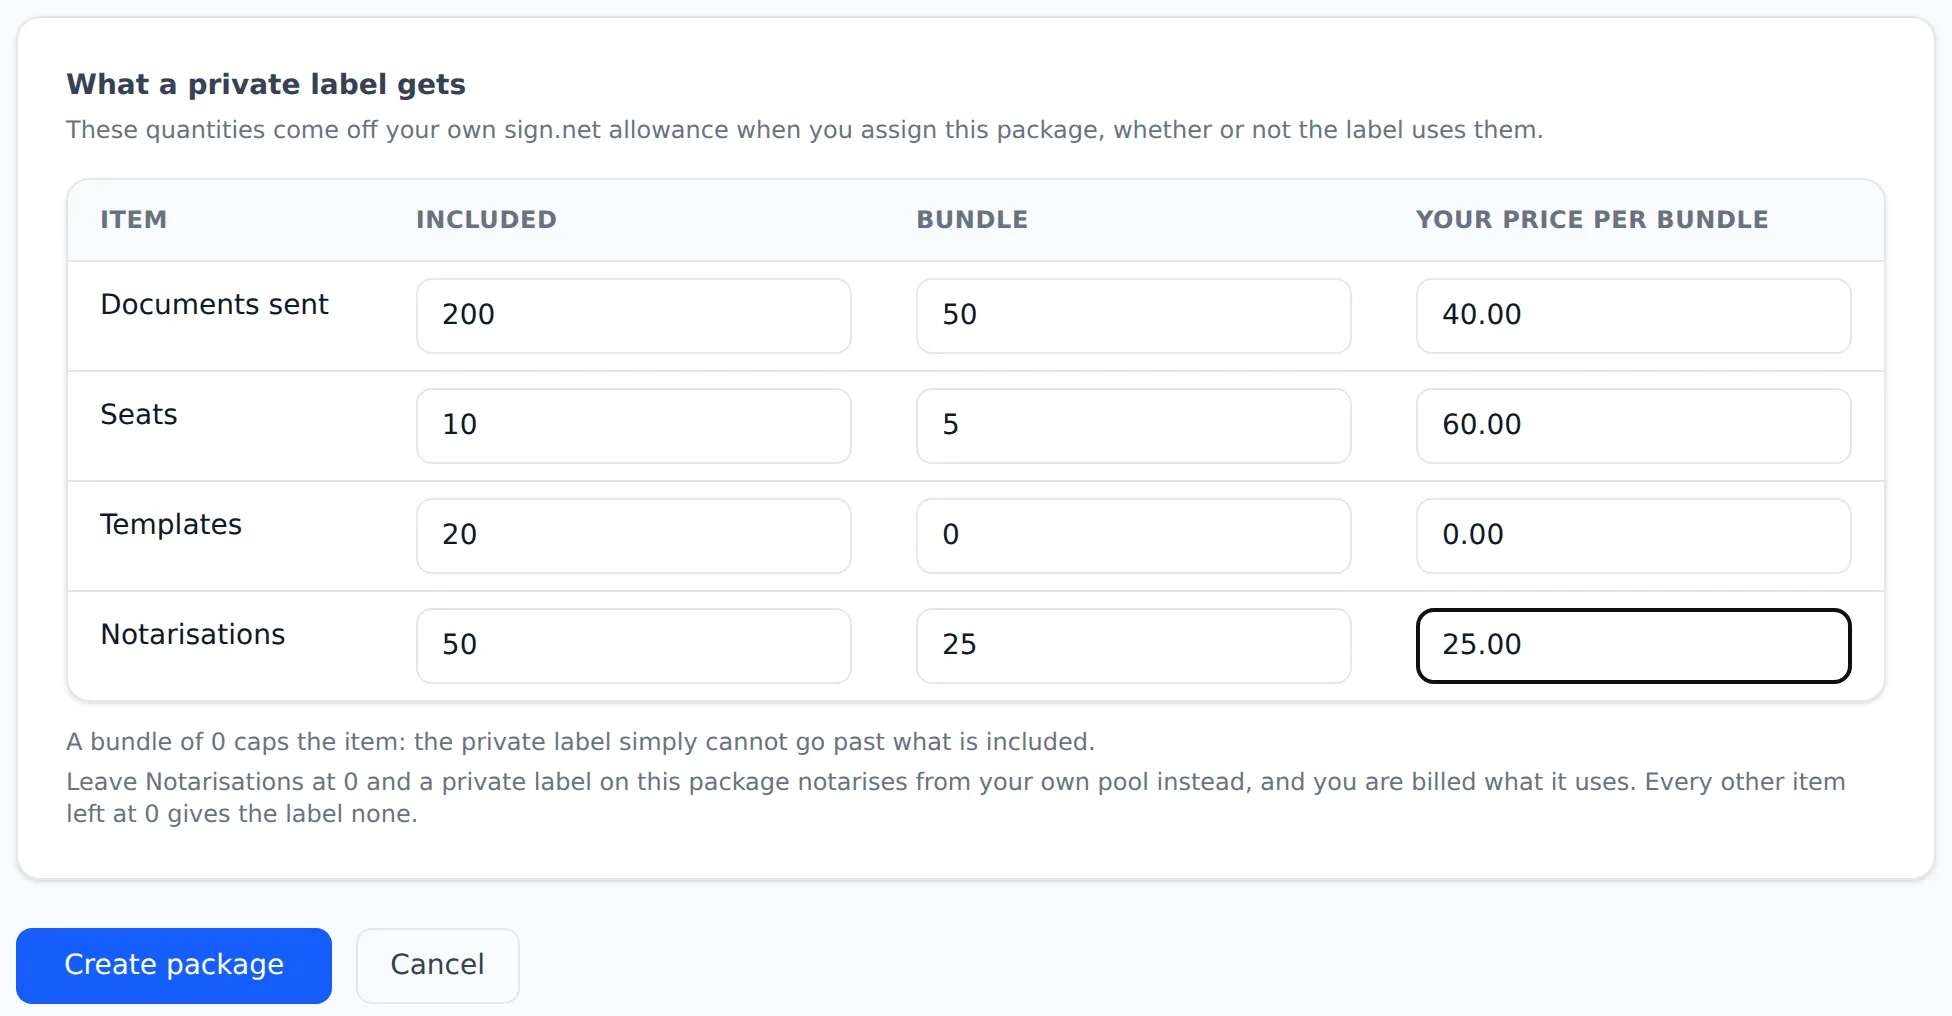
Under “What a private label gets”, enter how many of each item are “Included”. To let a label go past that, set an overage “Bundle” size and “Your price per bundle”; a bundle of 0 caps the item at what's included. Leave “Notarisations” at 0 and a label on this package notarises from your own pool instead.
4
Save it
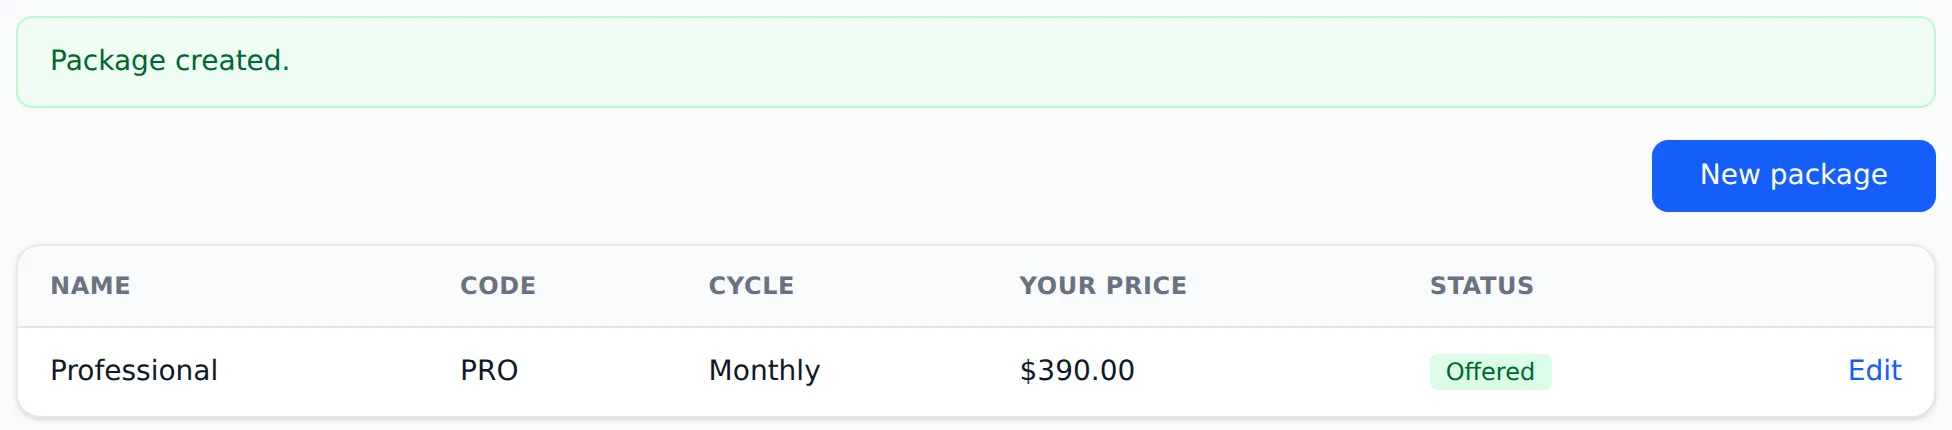
Click “Create package”. It's listed as “Offered”, ready to choose when you provision a private label or assign a package to one.
Provision a new private label
Give a customer their own branded signing portal, with an administrator and a package.
1
Open the form
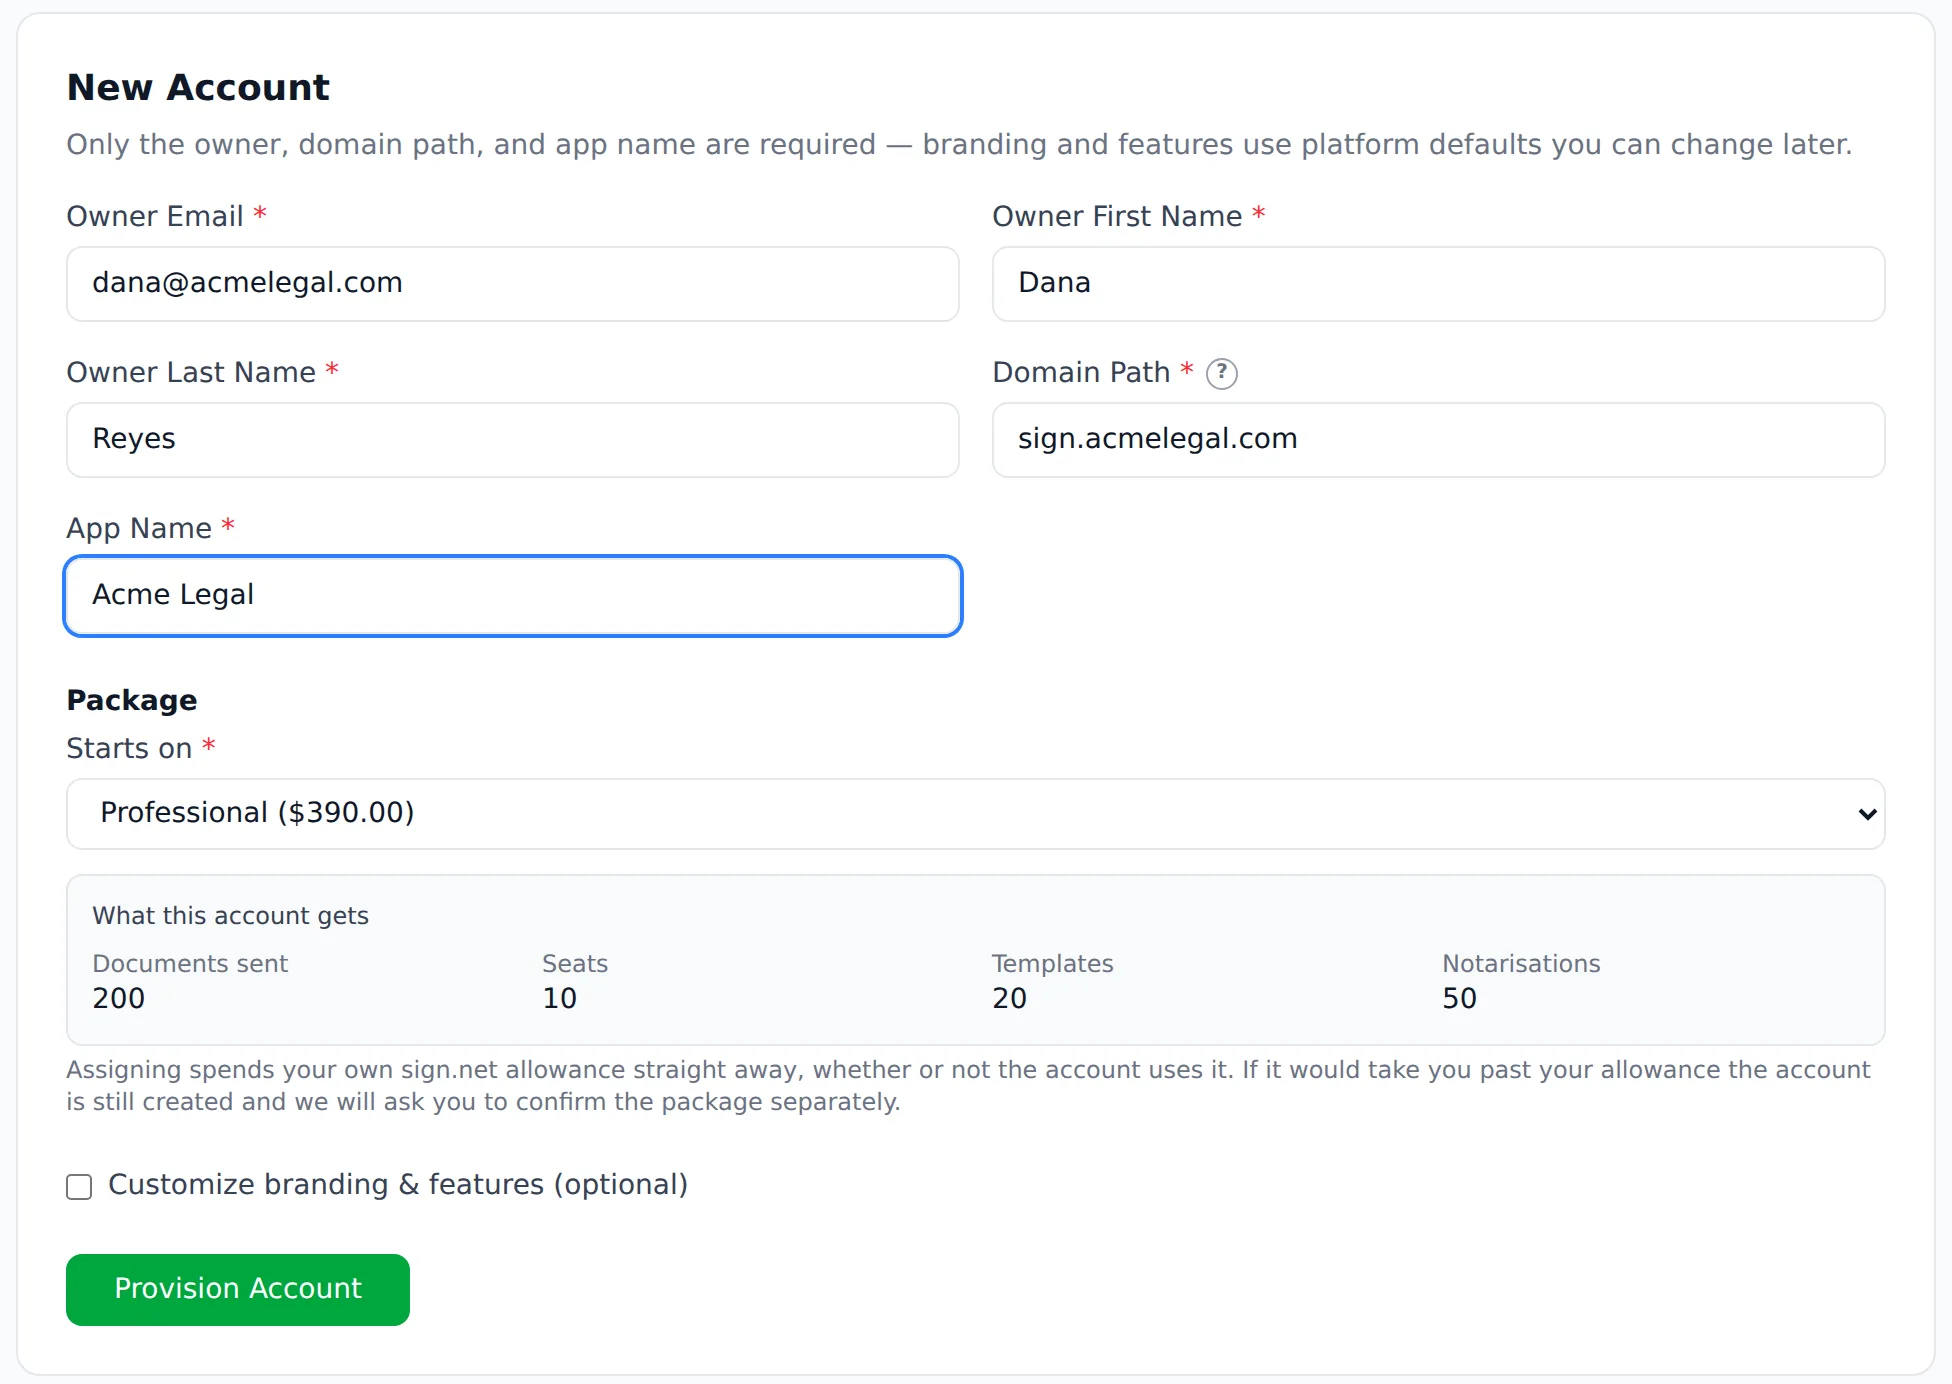
Open “Accounts” and click “Provision Account”.
2
Enter the owner, domain and name
Enter the owner's email, first name and last name. They become the portal's administrator. Under “Domain Path”, enter where the portal will live, such as sign.acmelegal.com: use a dedicated subdomain, not your customer's main website domain, because it can't be changed later. “App Name” is the name the portal and its emails go by.
3
Choose its package
Under “Package”, choose what the account “Starts on”. “What this account gets” shows the allowance it will have.
4
Brand it now, or later
Tick “Customize branding & features (optional)” to set its colours, copyright holder and website now. The portal's administrator can change colours and logos later from the portal itself.
5
Provision it
Click “Provision Account”. You'll see “Account provisioned: <domain>, on its package.” The owner is emailed “Welcome to <App Name>: set up your portal” in the portal's own branding, with the DNS record their domain needs and a link to set their password.
6
Get the domain pointed
Until the domain's DNS is in place, the console shows “domain is not serving yet — DNS is not pointed at us.” with the record to add, usually a CNAME to cname.vercel-dns.com. Share it with whoever manages your customer's DNS; the steps are in Point your domain at your portal.
Add users to a private label
Create accounts for your customer's team. Each one takes a seat from the label's package.
1
Open the account
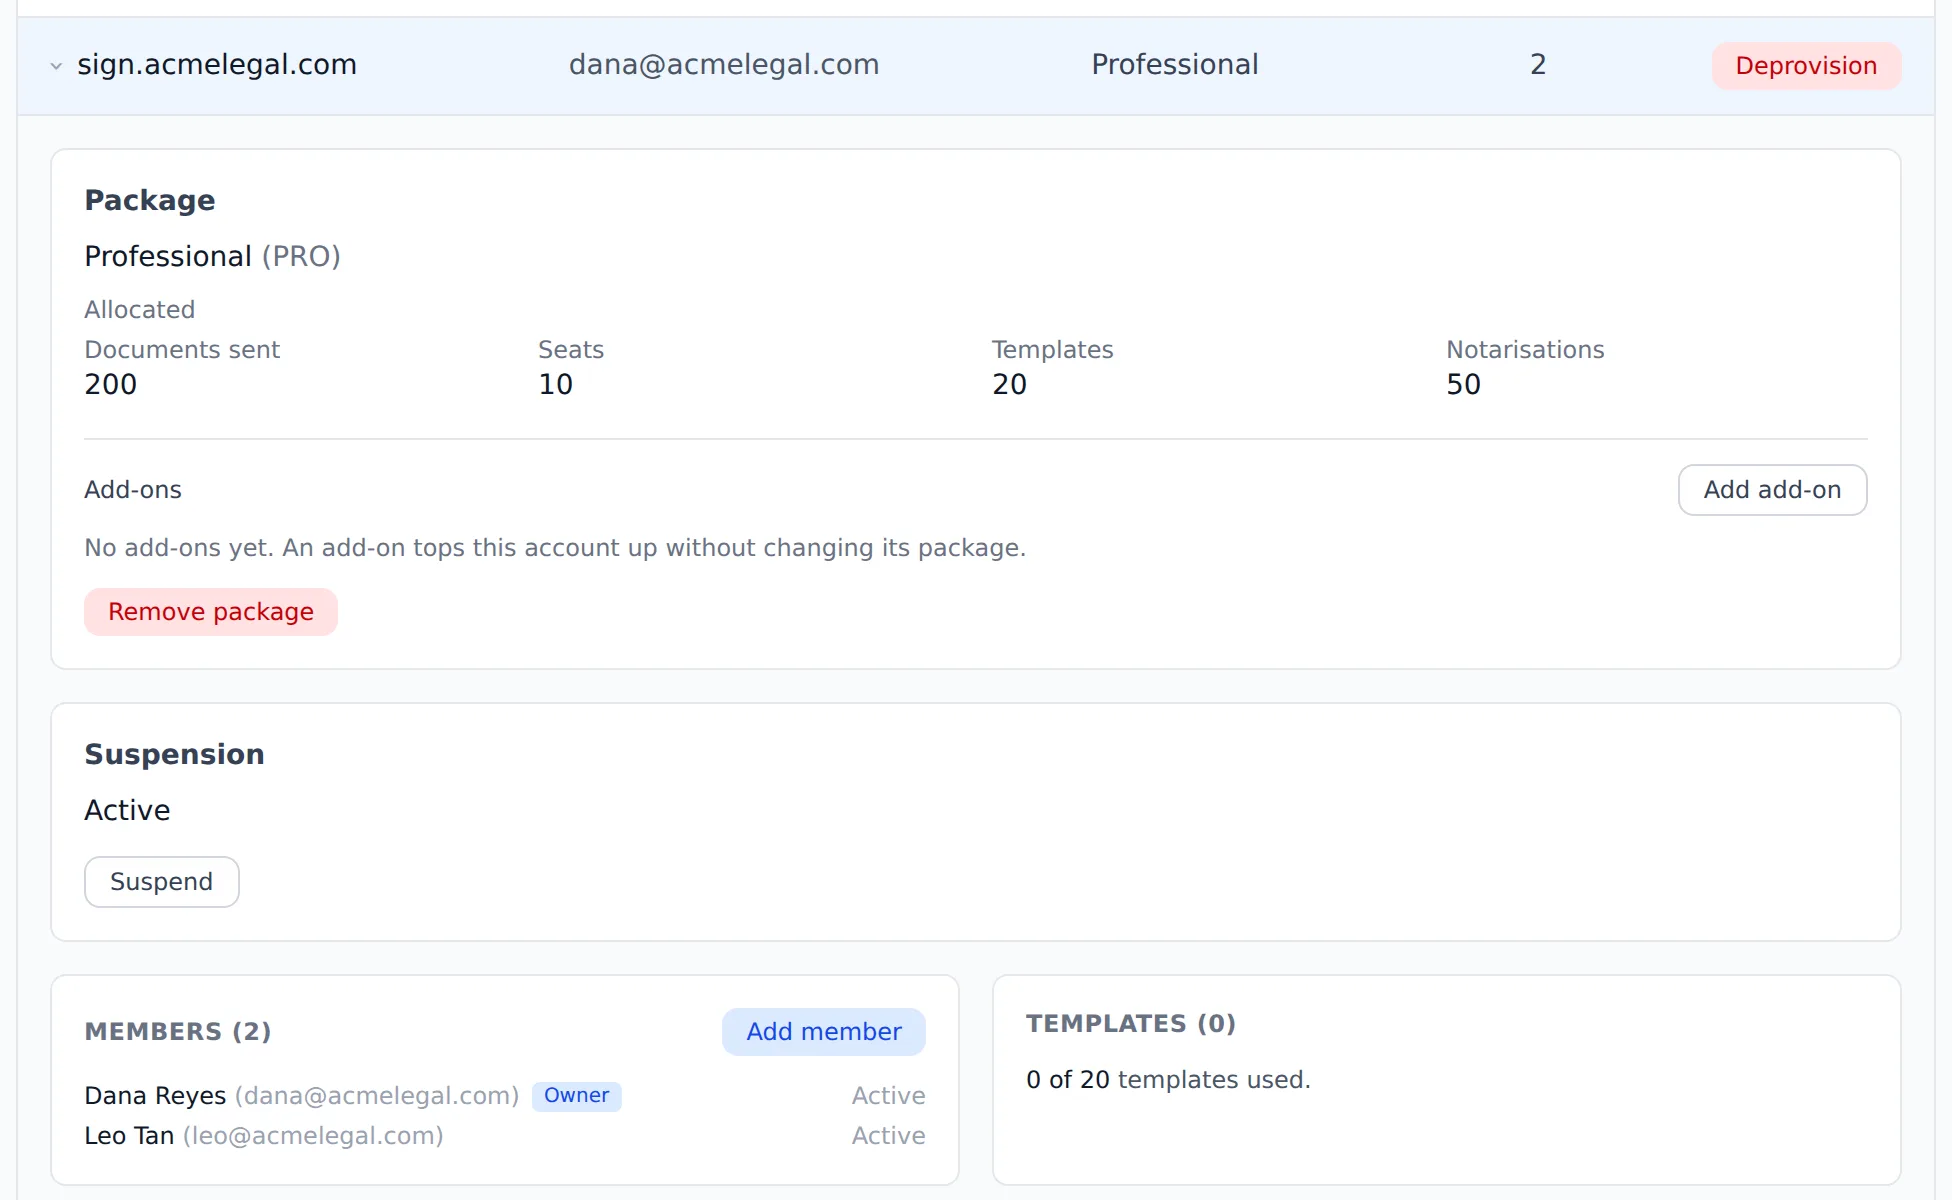
In “Accounts”, click the private label's row. Its details open below it: the package, its suspension status, its members and its templates.
2
Add the member
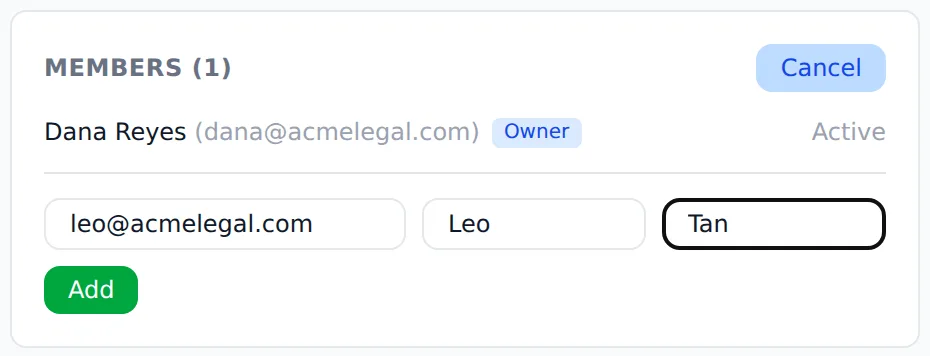
Under “Members”, click “Add member”, enter their email, first name and last name, and click “Add”.
3
They set a password
You'll see “Member created and added: <email>”. They're emailed “Set your password for your new <App Name> account” in the portal's branding, and can sign in on the portal once they've chosen one.
Suspend, unsuspend or deprovision a private label
Pause a customer's portal, for example over an unpaid invoice, or close it for good.
1
Suspend it
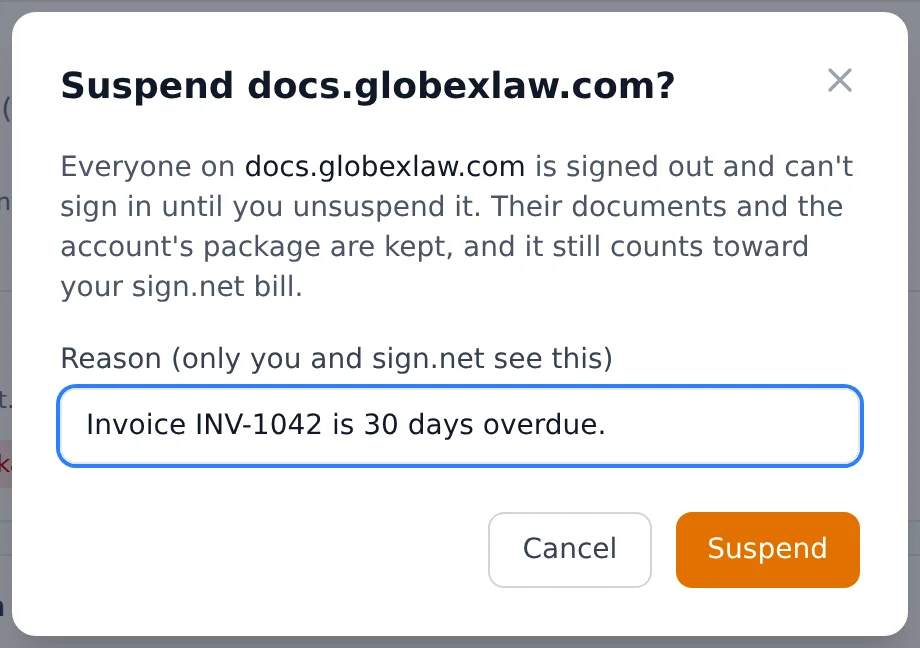
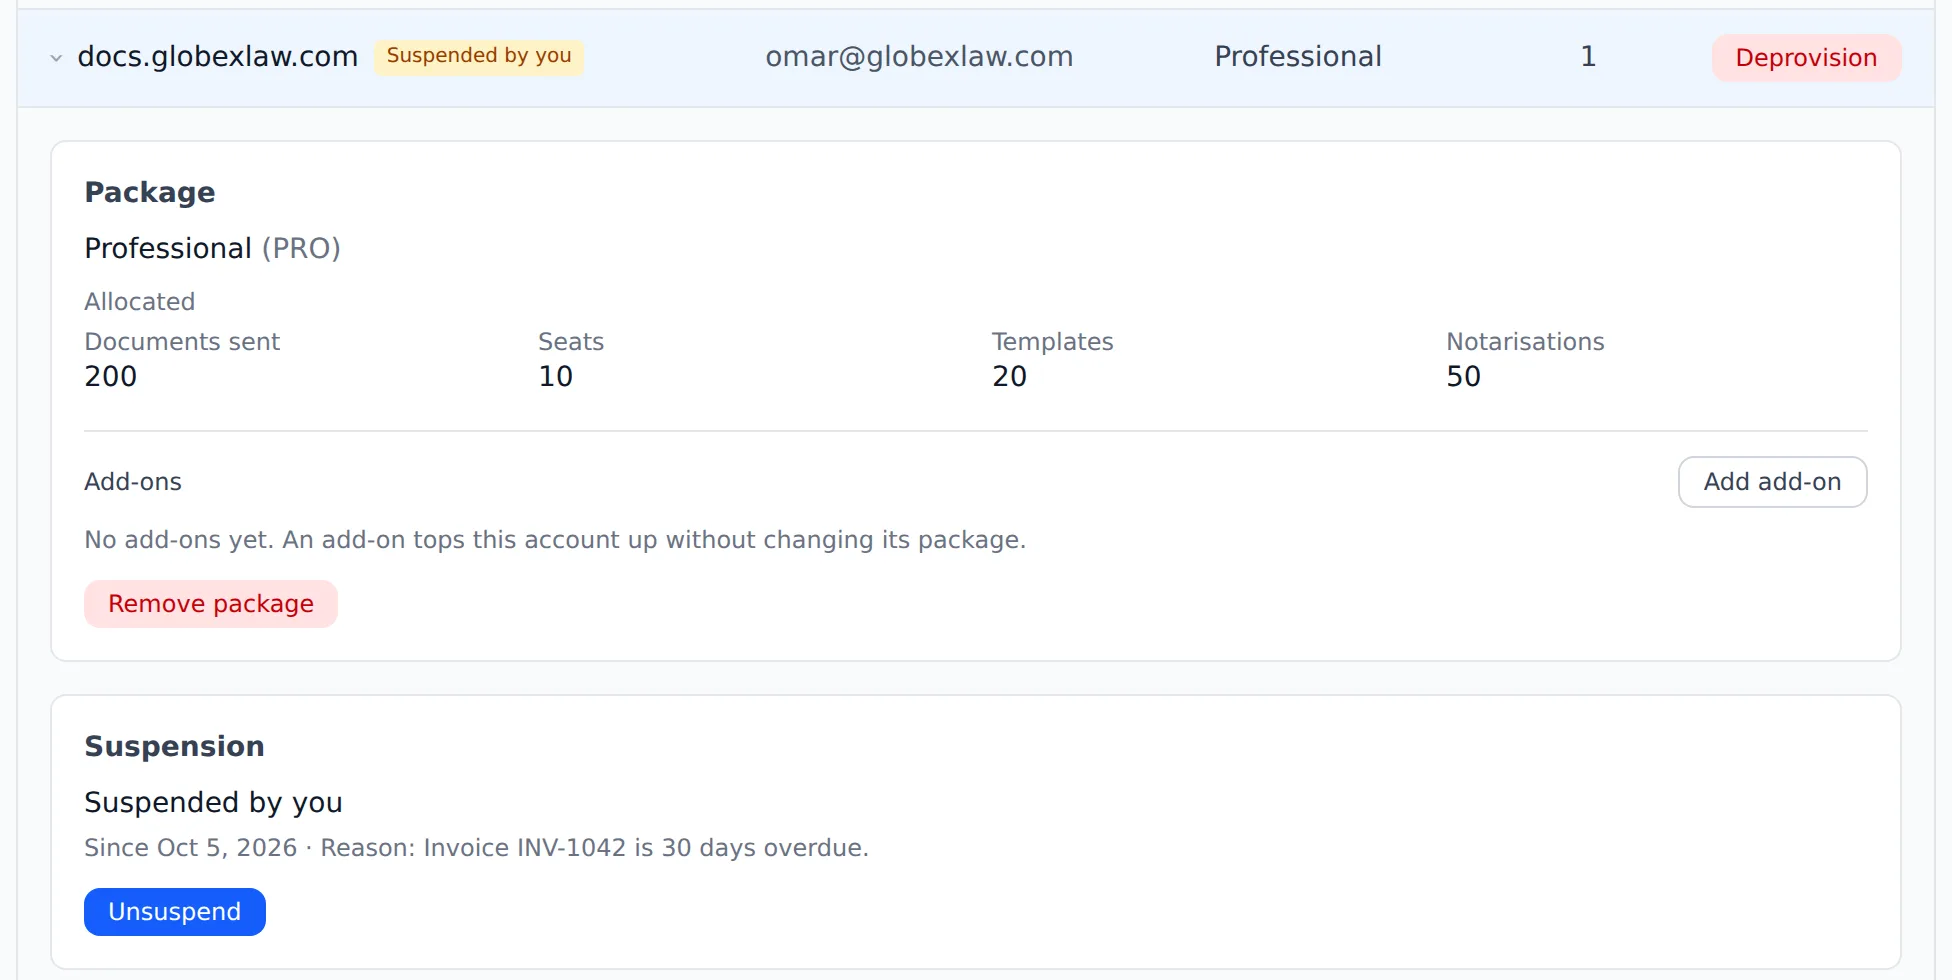
Open the account's details and click “Suspend” under “Suspension”. Add a reason if you like (only you and sign.net see it) and click “Suspend”. Everyone on the portal is signed out and can't sign in until you unsuspend it. Its documents, members and package are kept, and it still counts toward your sign.net bill.
2
Check its status
The row is marked “Suspended by you”, and the details show since when and why.
3
Unsuspend it
Click “Unsuspend” and confirm. Everyone can sign in again straight away. If sign.net suspended the account, the button is disabled: contact sign.net support to restore it.
4
Deprovision it
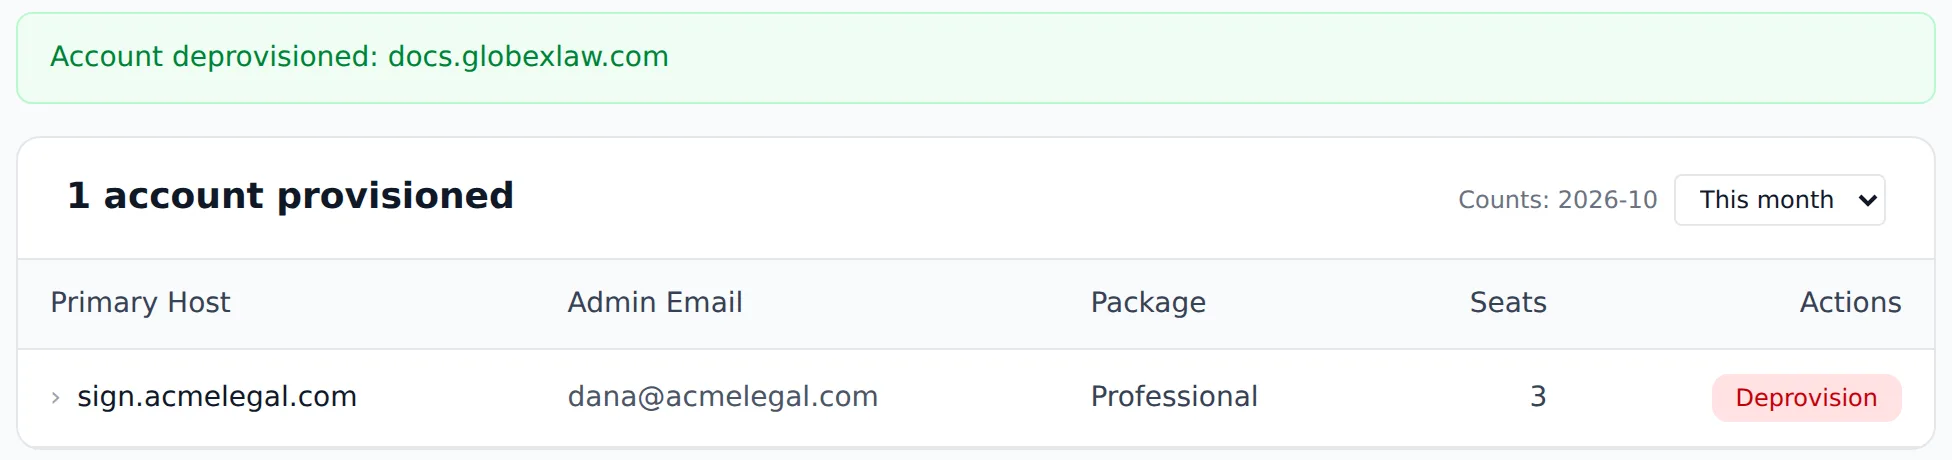
To close an account for good, click “Deprovision” on its row and confirm “Deprovision <domain>? This removes the account and all its members.” Its members lose access, its package ends and the allowance it held comes back to you. It's still billed for the month you deprovision it in, and the console can't undo it.
Track your usage
See what your plan includes, what you've allocated, and what each private label used.
1
Open Usage
Open “Usage” under “Dashboard”. “Period” picks the month for the private-label figures and starts on the current month.
2
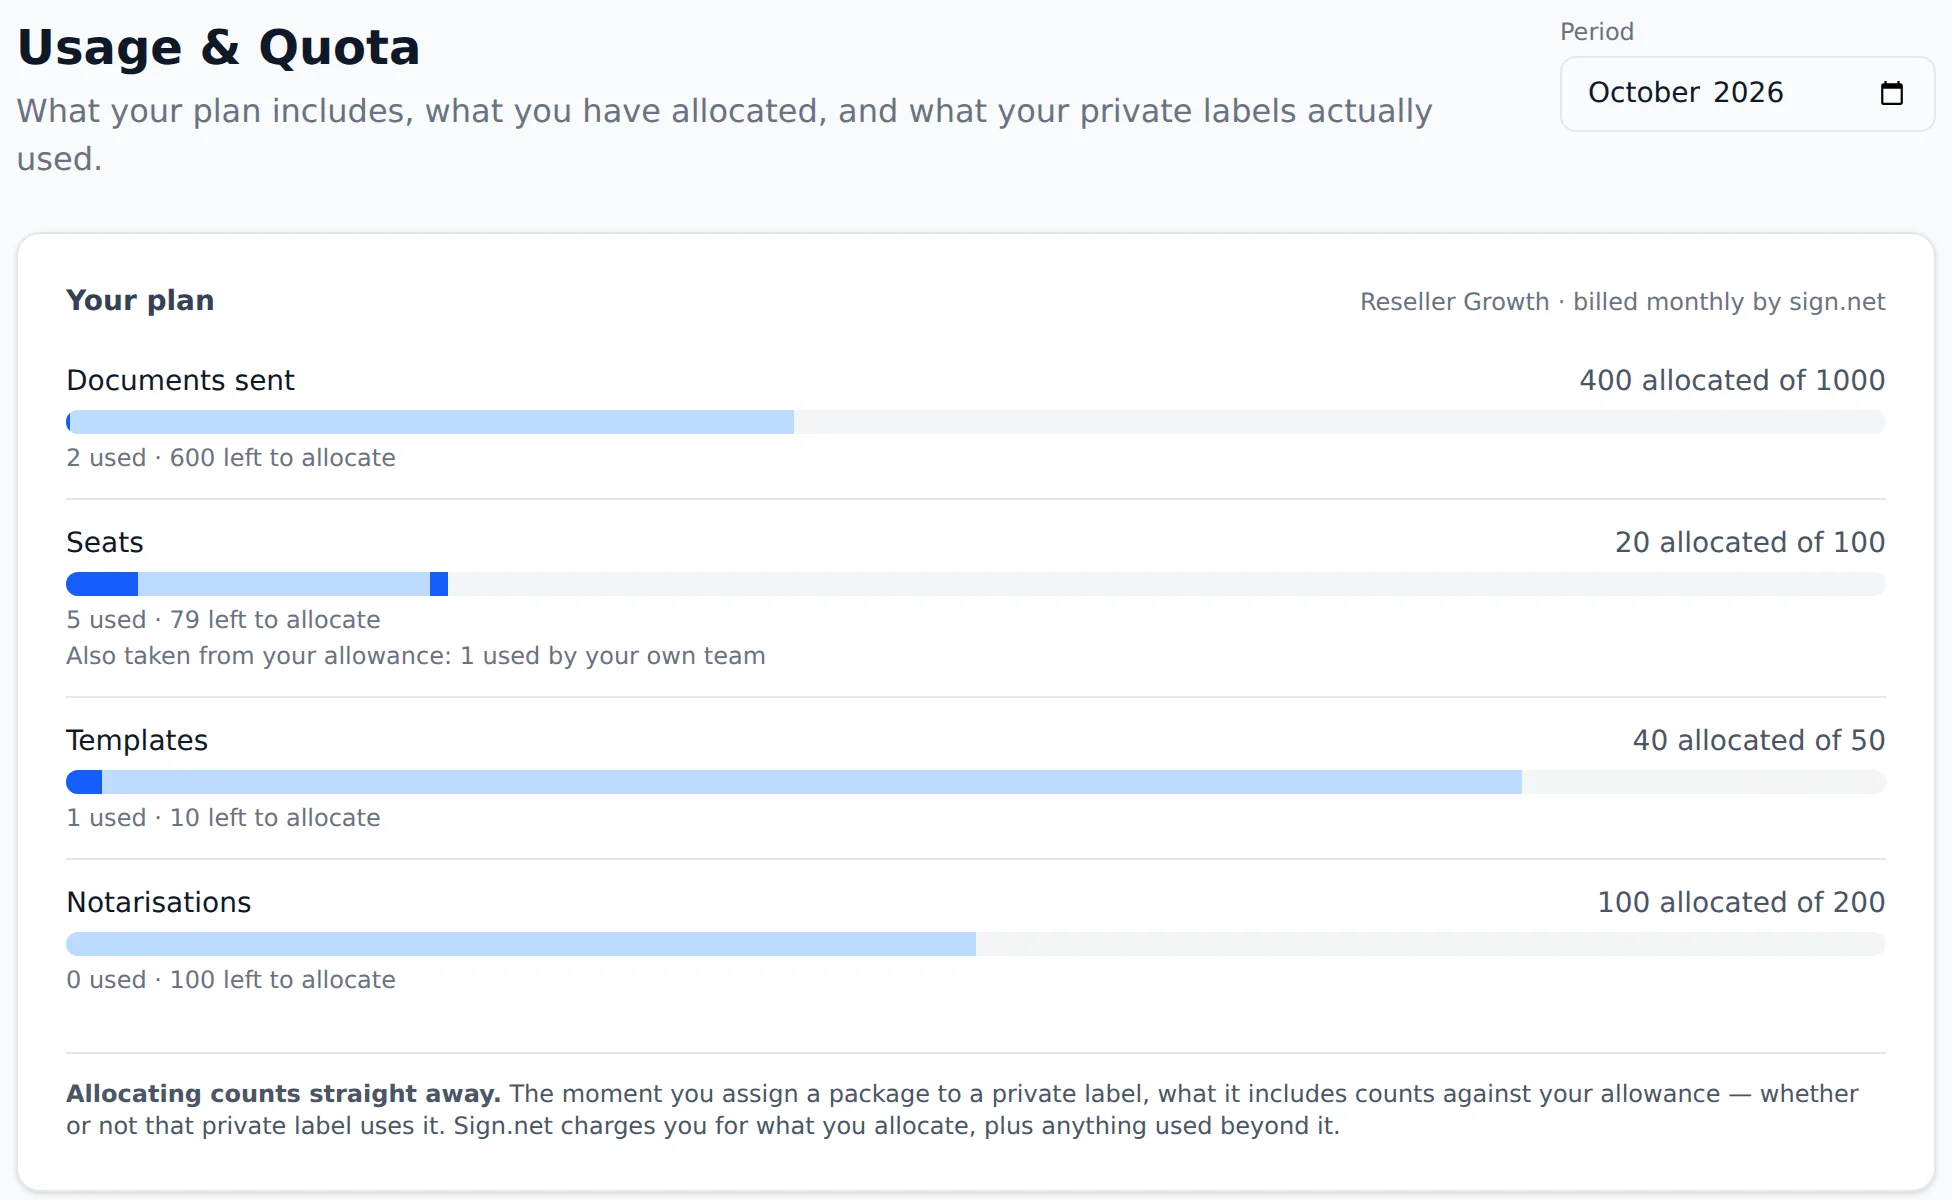
Read “Your plan”
Each row is one item of your sign.net plan:
“allocated of” is how much you've committed to private labels' packages, out of what your plan includes.
The bar shows that allocation in light blue, what's been used in dark blue, and anything over your allowance in amber.
“used” is what was actually used over your current billing cycle, your own team included.
“left to allocate” is what you can still assign.
“Also taken from your allowance” is what your own team used, and what labels used beyond their packages.
Sign.net bills you for what you allocate, plus anything used beyond it.
3
Read “Your private labels”
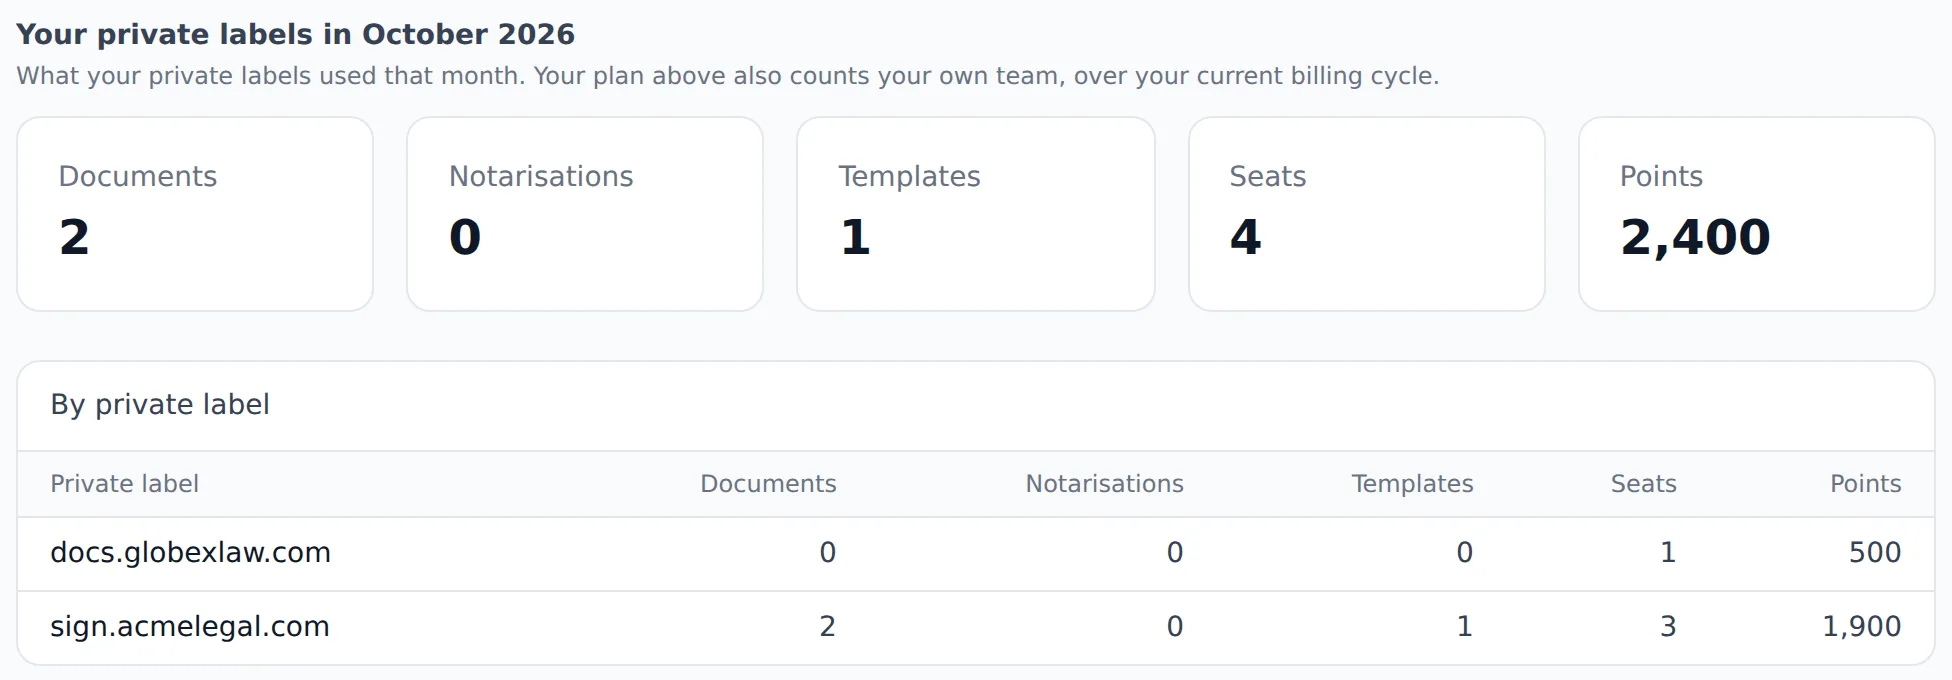
The totals and the “By private label” table cover the month you picked:
Documents: documents sent that month.
Notarisations: documents anchored on the blockchain that month.
Templates and Seats: held at the end of the month. People who were only sent a document to sign don't take a seat.
Points: what the label took from its points pool, less what it gave back.
These leave out your own team, so your plan's figures can read higher.
4
Follow your points pool
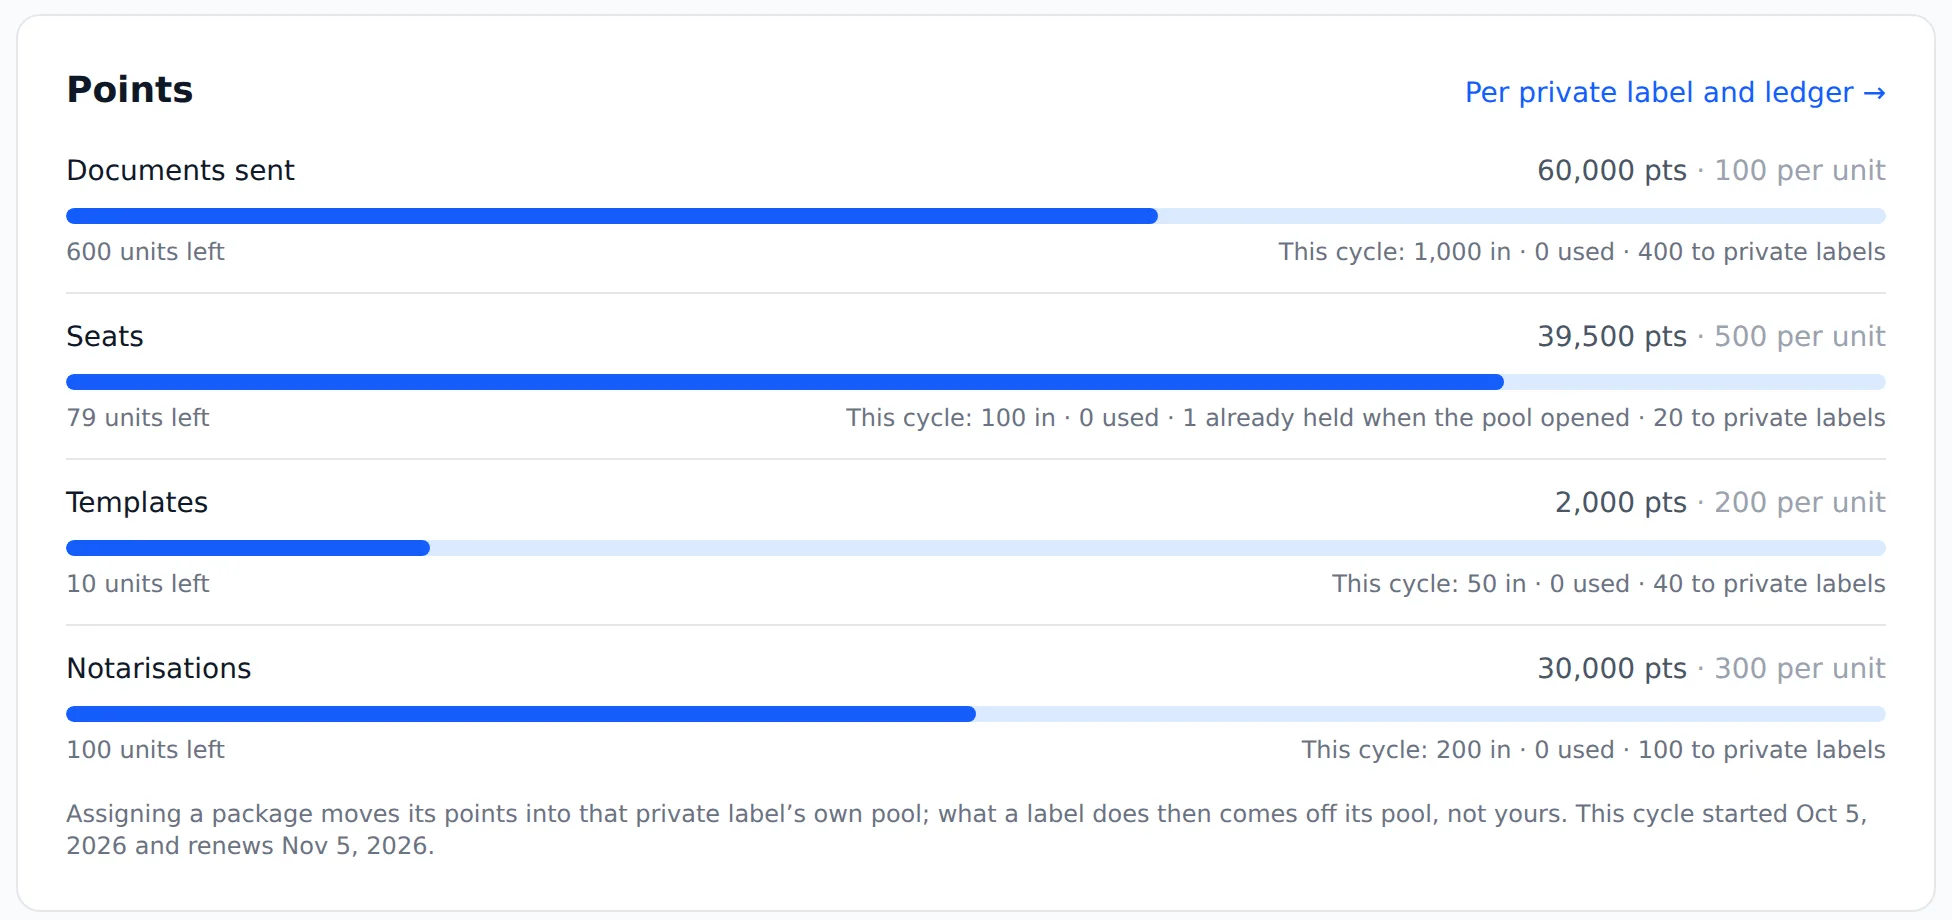
On the “Dashboard”, “Points” shows the points and units left for each item, and what came in and went out this cycle. “Per private label and ledger” opens the detail.
Private labels
Running your private-label portal
For the administrator of a branded portal set up by a reseller: get it live on your domain, invite your team, brand it, choose who emails come from, and follow your usage.
Set up your portal
Your welcome email walks you through three steps: point your domain, set your password, then sign in.
1
Open your welcome email
When your provider creates your portal, you get “Welcome to <your app name>: set up your portal”. You're the portal's administrator. Its first step is the DNS record your domain needs.
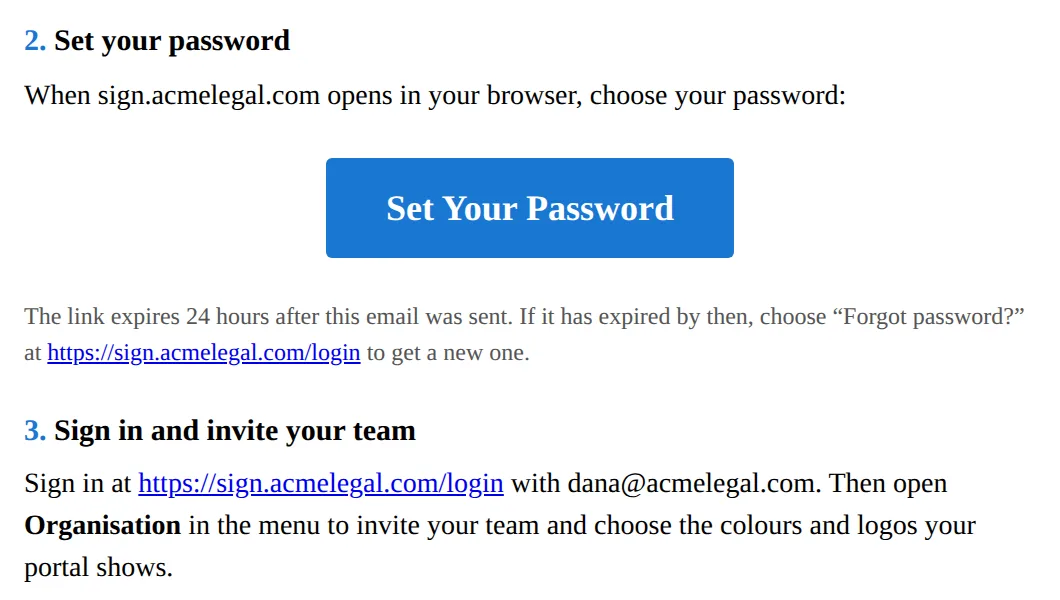
Once your domain opens, click “Set Your Password” and choose a password. The link lasts 24 hours; after that, use “Forgot password?” on your portal's sign-in page. Then sign in at your domain.
Point your domain at your portal
Add one DNS record so your portal opens on your own domain, with a security certificate issued for you.
1
Find your record
Your welcome email gives the record your domain needs, and your provider's console shows it too. Use exactly what it says; it's usually a CNAME to cname.vercel-dns.com.
2
Add it at your DNS provider
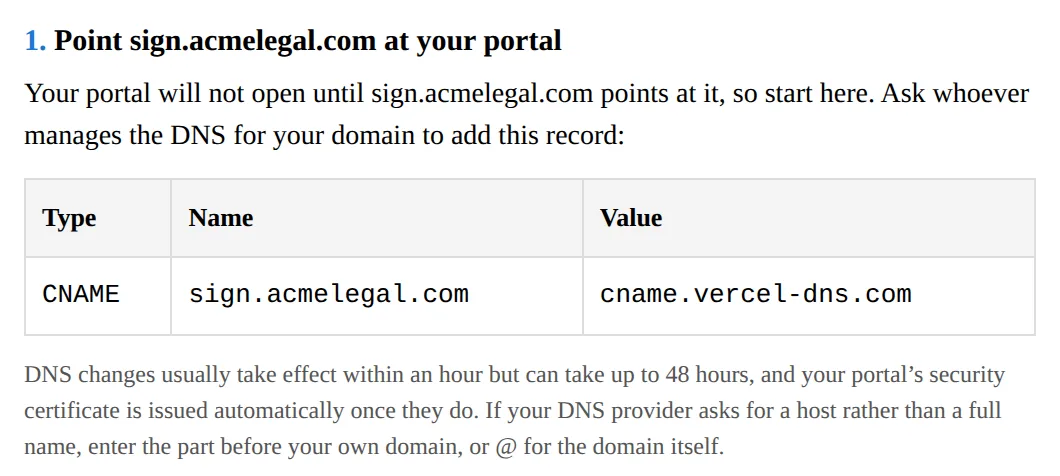
Sign in wherever your domain's DNS is managed (your registrar, Cloudflare, Route 53 and so on) and add the record. For a portal at sign.acmelegal.com:
Type
Name / Host
Value / Target
CNAME
sign
cname.vercel-dns.com
Most providers want only the part before your own domain under “Name”, so sign here. If yours asks for the full name, enter sign.acmelegal.com. Leave the TTL at its default.
3
Wait for it to go live
DNS changes usually take effect within an hour, but can take up to 48 hours. Your portal's security certificate is issued automatically once they do, and https://sign.acmelegal.com opens your sign-in page.
Add members to your organisation
Invite your team. Each member gets their own sign-in and takes one of your package's seats.
1
Open Organisation
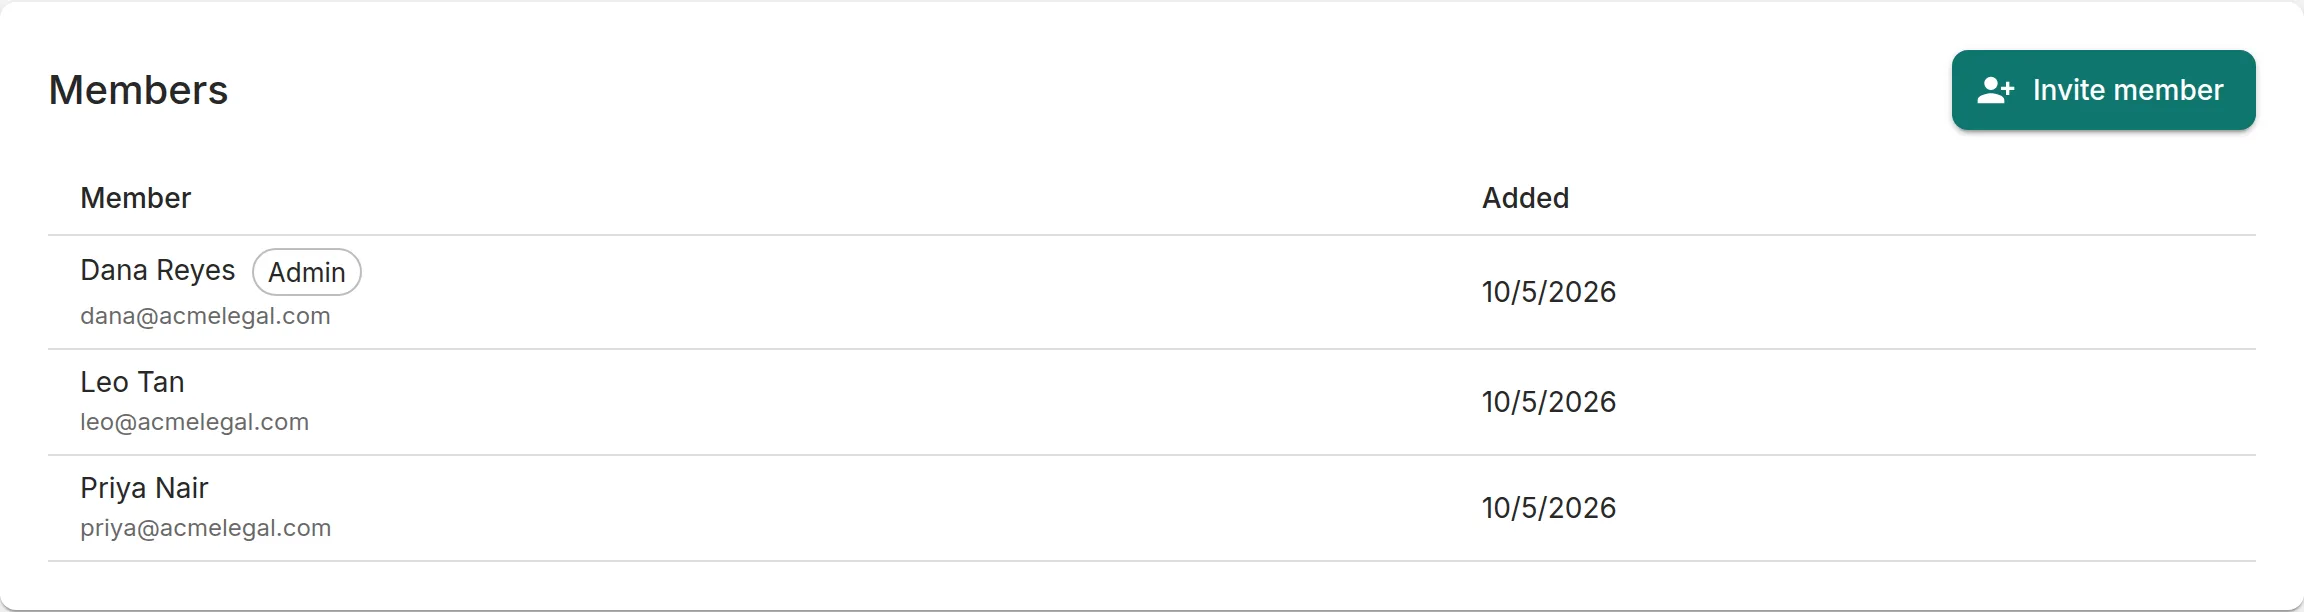
Open “Organisation” from the menu (only administrators see it). “Members” lists everyone with a seat.
2
Invite someone
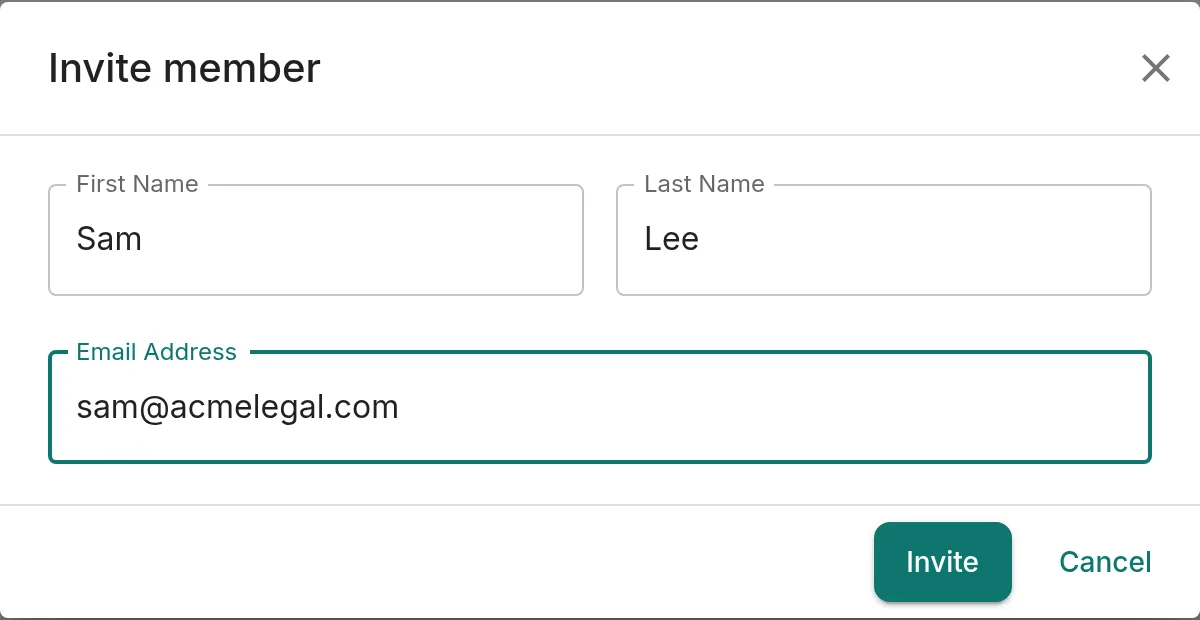
Click “Invite member”, enter their first name, last name and email address, and click “Invite”.
3
They set their password
You'll see “Invitation sent to <email>.” They're emailed “Set your password for your new <your app name> account”, and the link lasts 24 hours. If you've used every seat, you'll see “Your organisation has used every seat its package grants. Ask your provider for more seats.”
Send, sign and use templates
Everything works as on Sign.net, under your name. Documents and templates count toward your package instead of costing Sign points.
1
Send a document
Drop PDFs on “UPLOAD DOCUMENTS”, click “Upload All”, add the people involved, place their fields and click “Submit Document(s)”. The full steps are in Send a document for signature. Each document counts toward your package's documents.
2
Your signers see your brand
Signing requests, reminders and completion emails carry your app name, logo and colours, and link to your domain. Signing works as in Sign a document.
3
Create templates
Open “Templates” from the menu. “Template Quota” is how many templates your package includes, and each one you create uses one. The steps are in Upload a template.
Set up your theme
Choose your colours and logos. Your portal, sign-in page and emails all pick them up.
1
Choose your colours
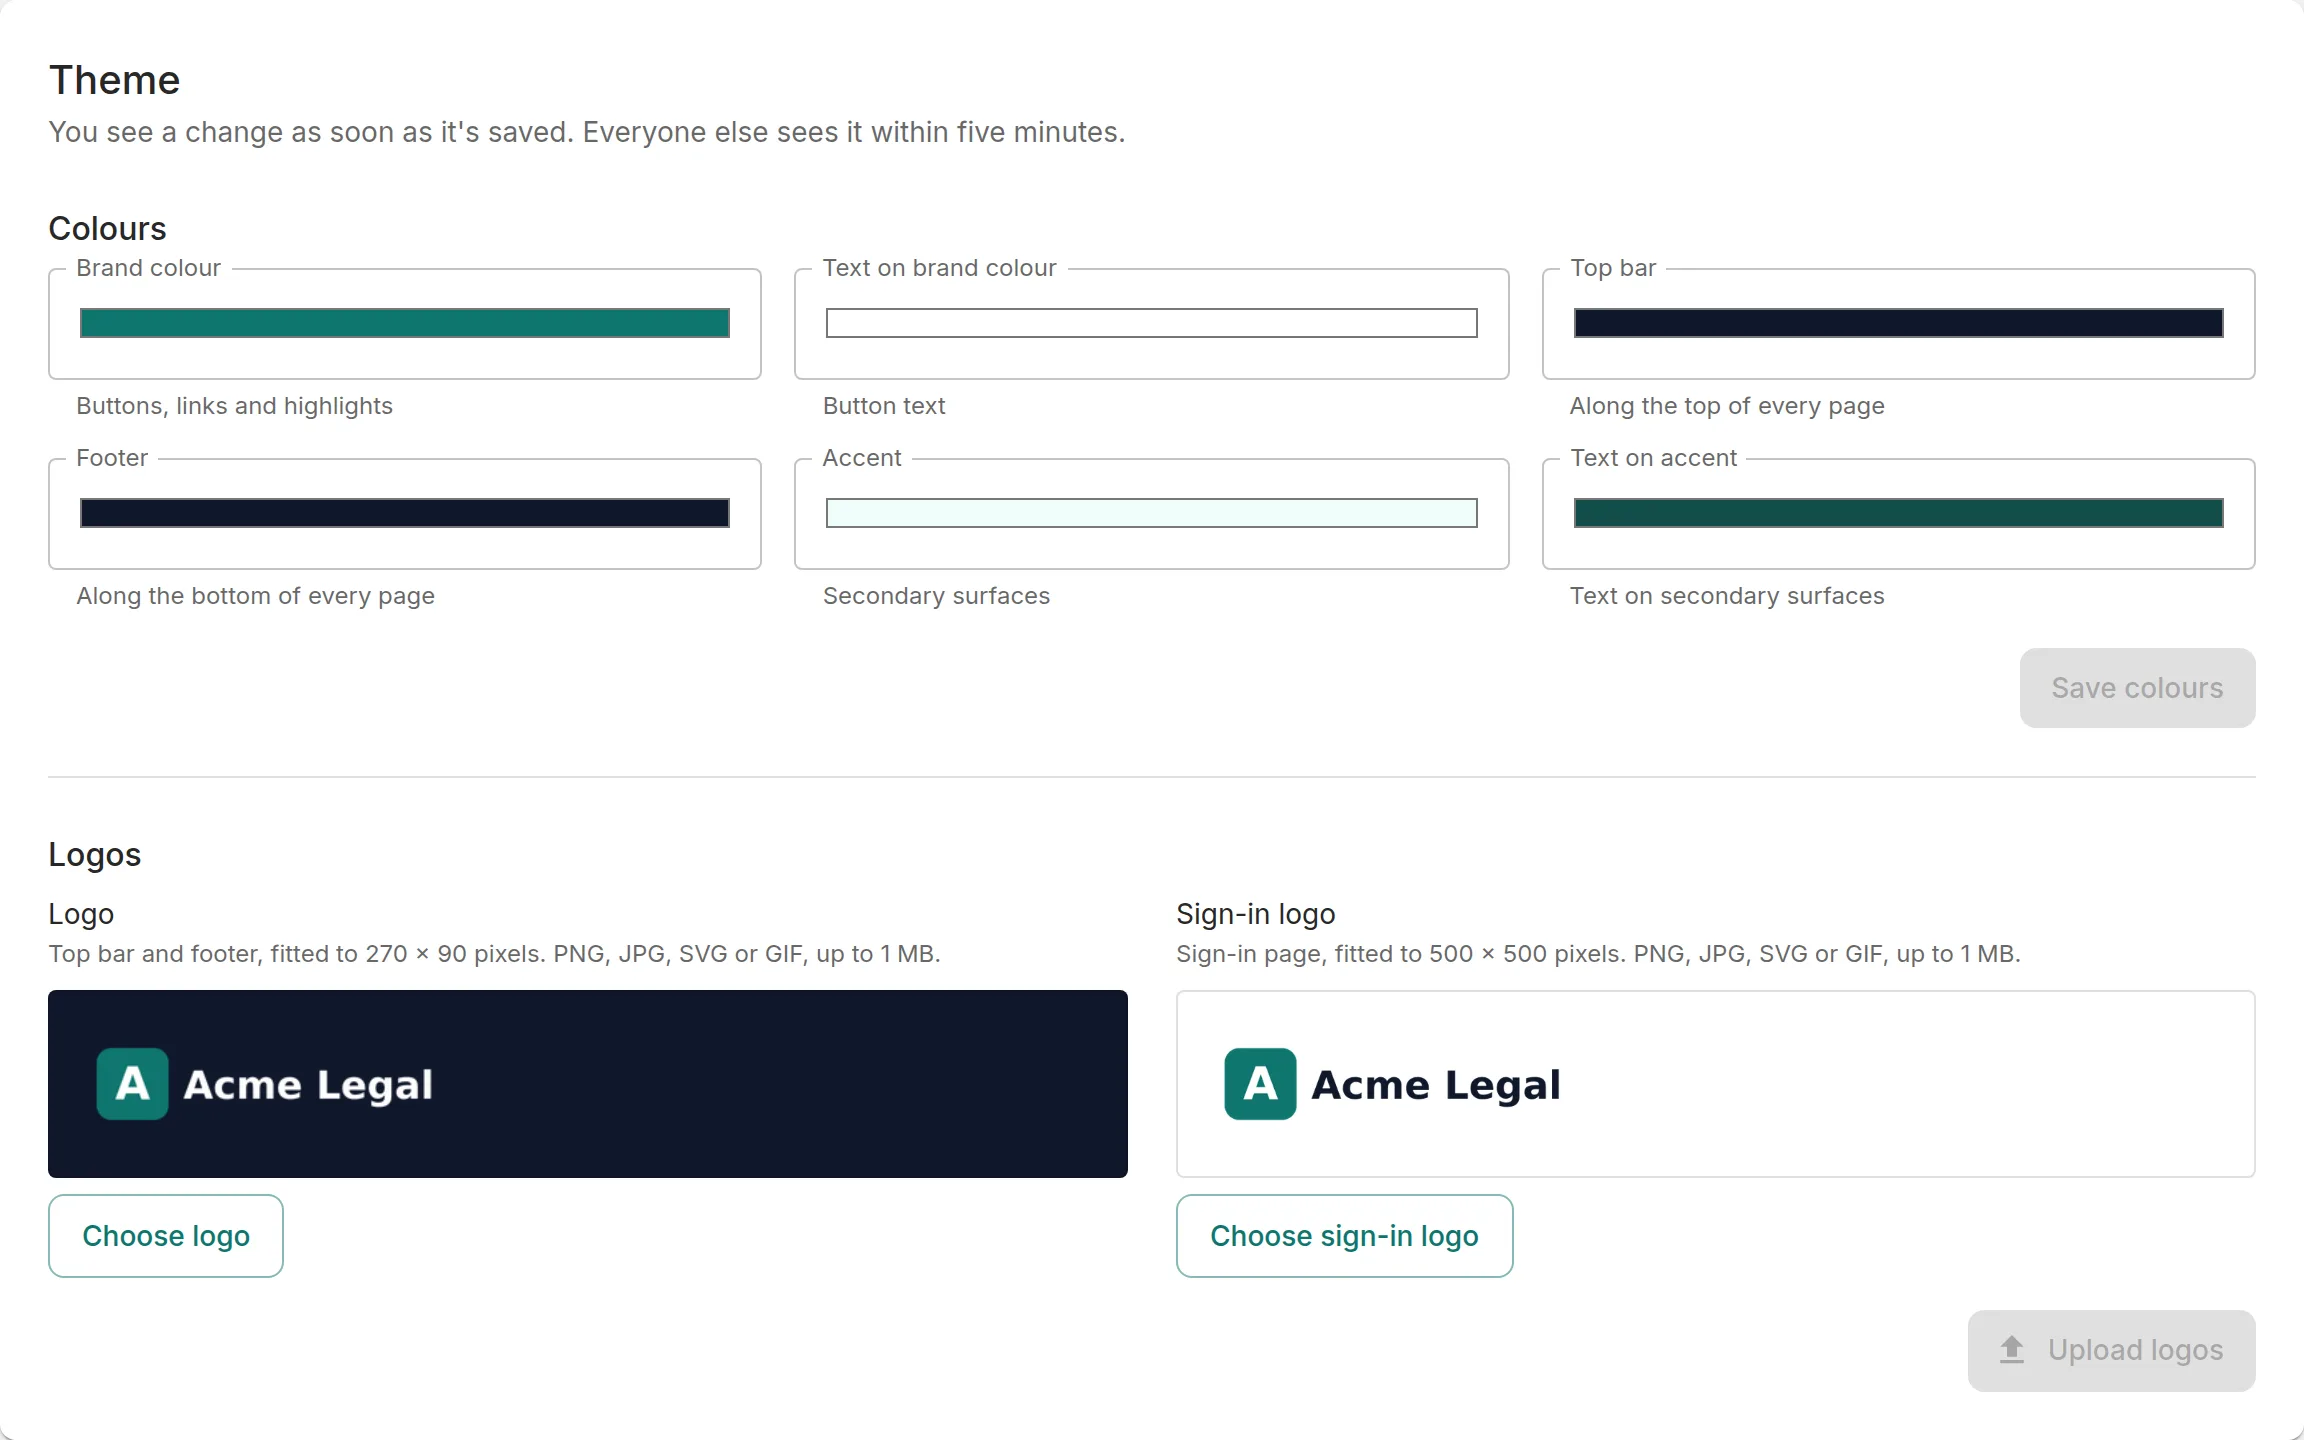
Open “Organisation” and find “Theme”. Set “Brand colour” (buttons, links and highlights), “Text on brand colour”, “Top bar”, “Footer”, “Accent” and “Text on accent”, then click “Save colours”.
2
Upload your logos
Under “Logos”, click “Choose logo” for the top bar and footer (fitted to 270 × 90 pixels) and “Choose sign-in logo” for the sign-in page (fitted to 500 × 500). Use a PNG, JPG, SVG or GIF of up to 1 MB, then click “Upload logos”.
3
See it live
You see the change straight away, and everyone else within five minutes.
Choose who your emails come from
Send signing requests and sign-in links from Sign.net's address, from your own domain, or through your own mail server.
1
Open the Email settings
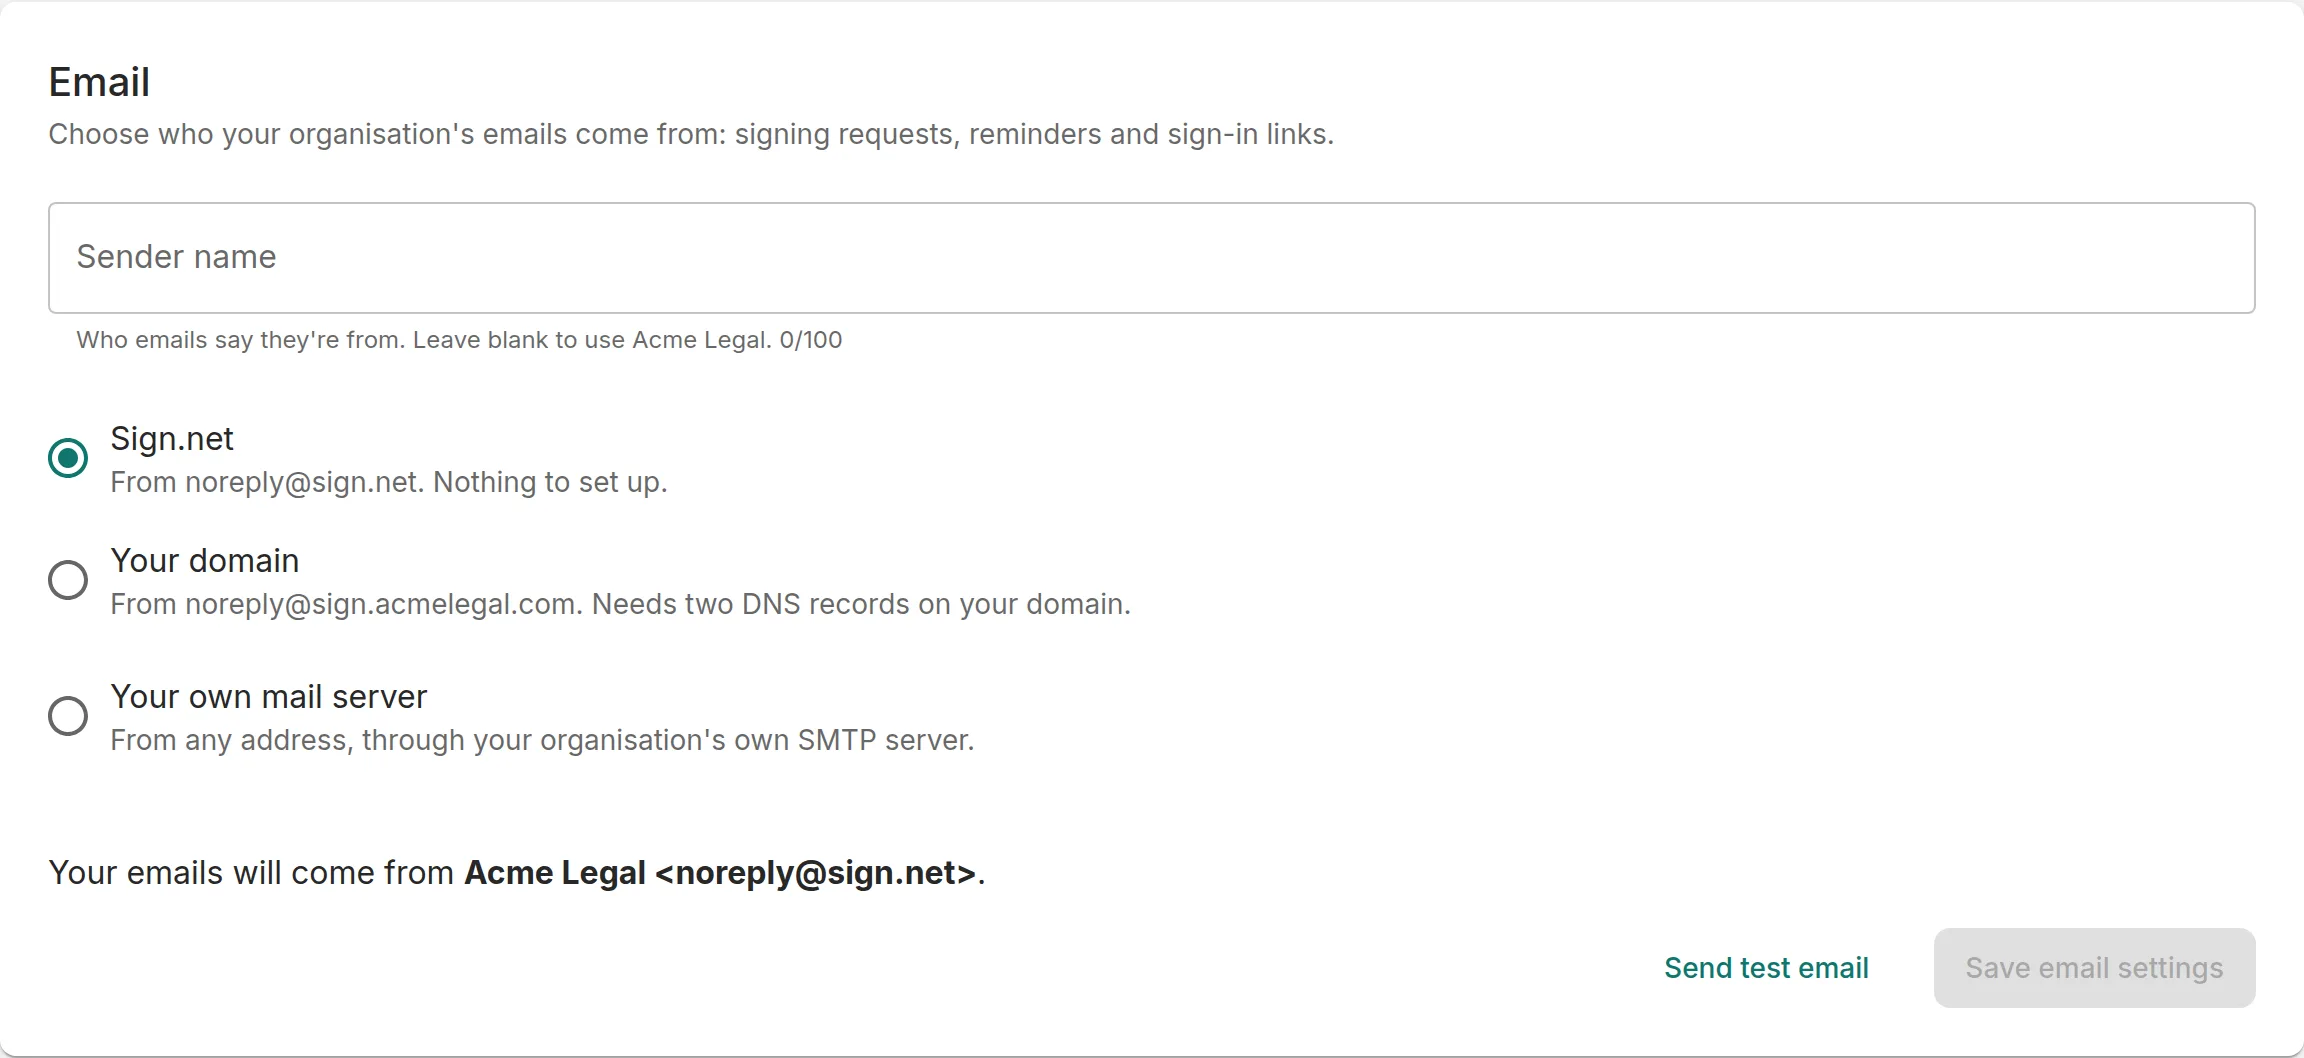
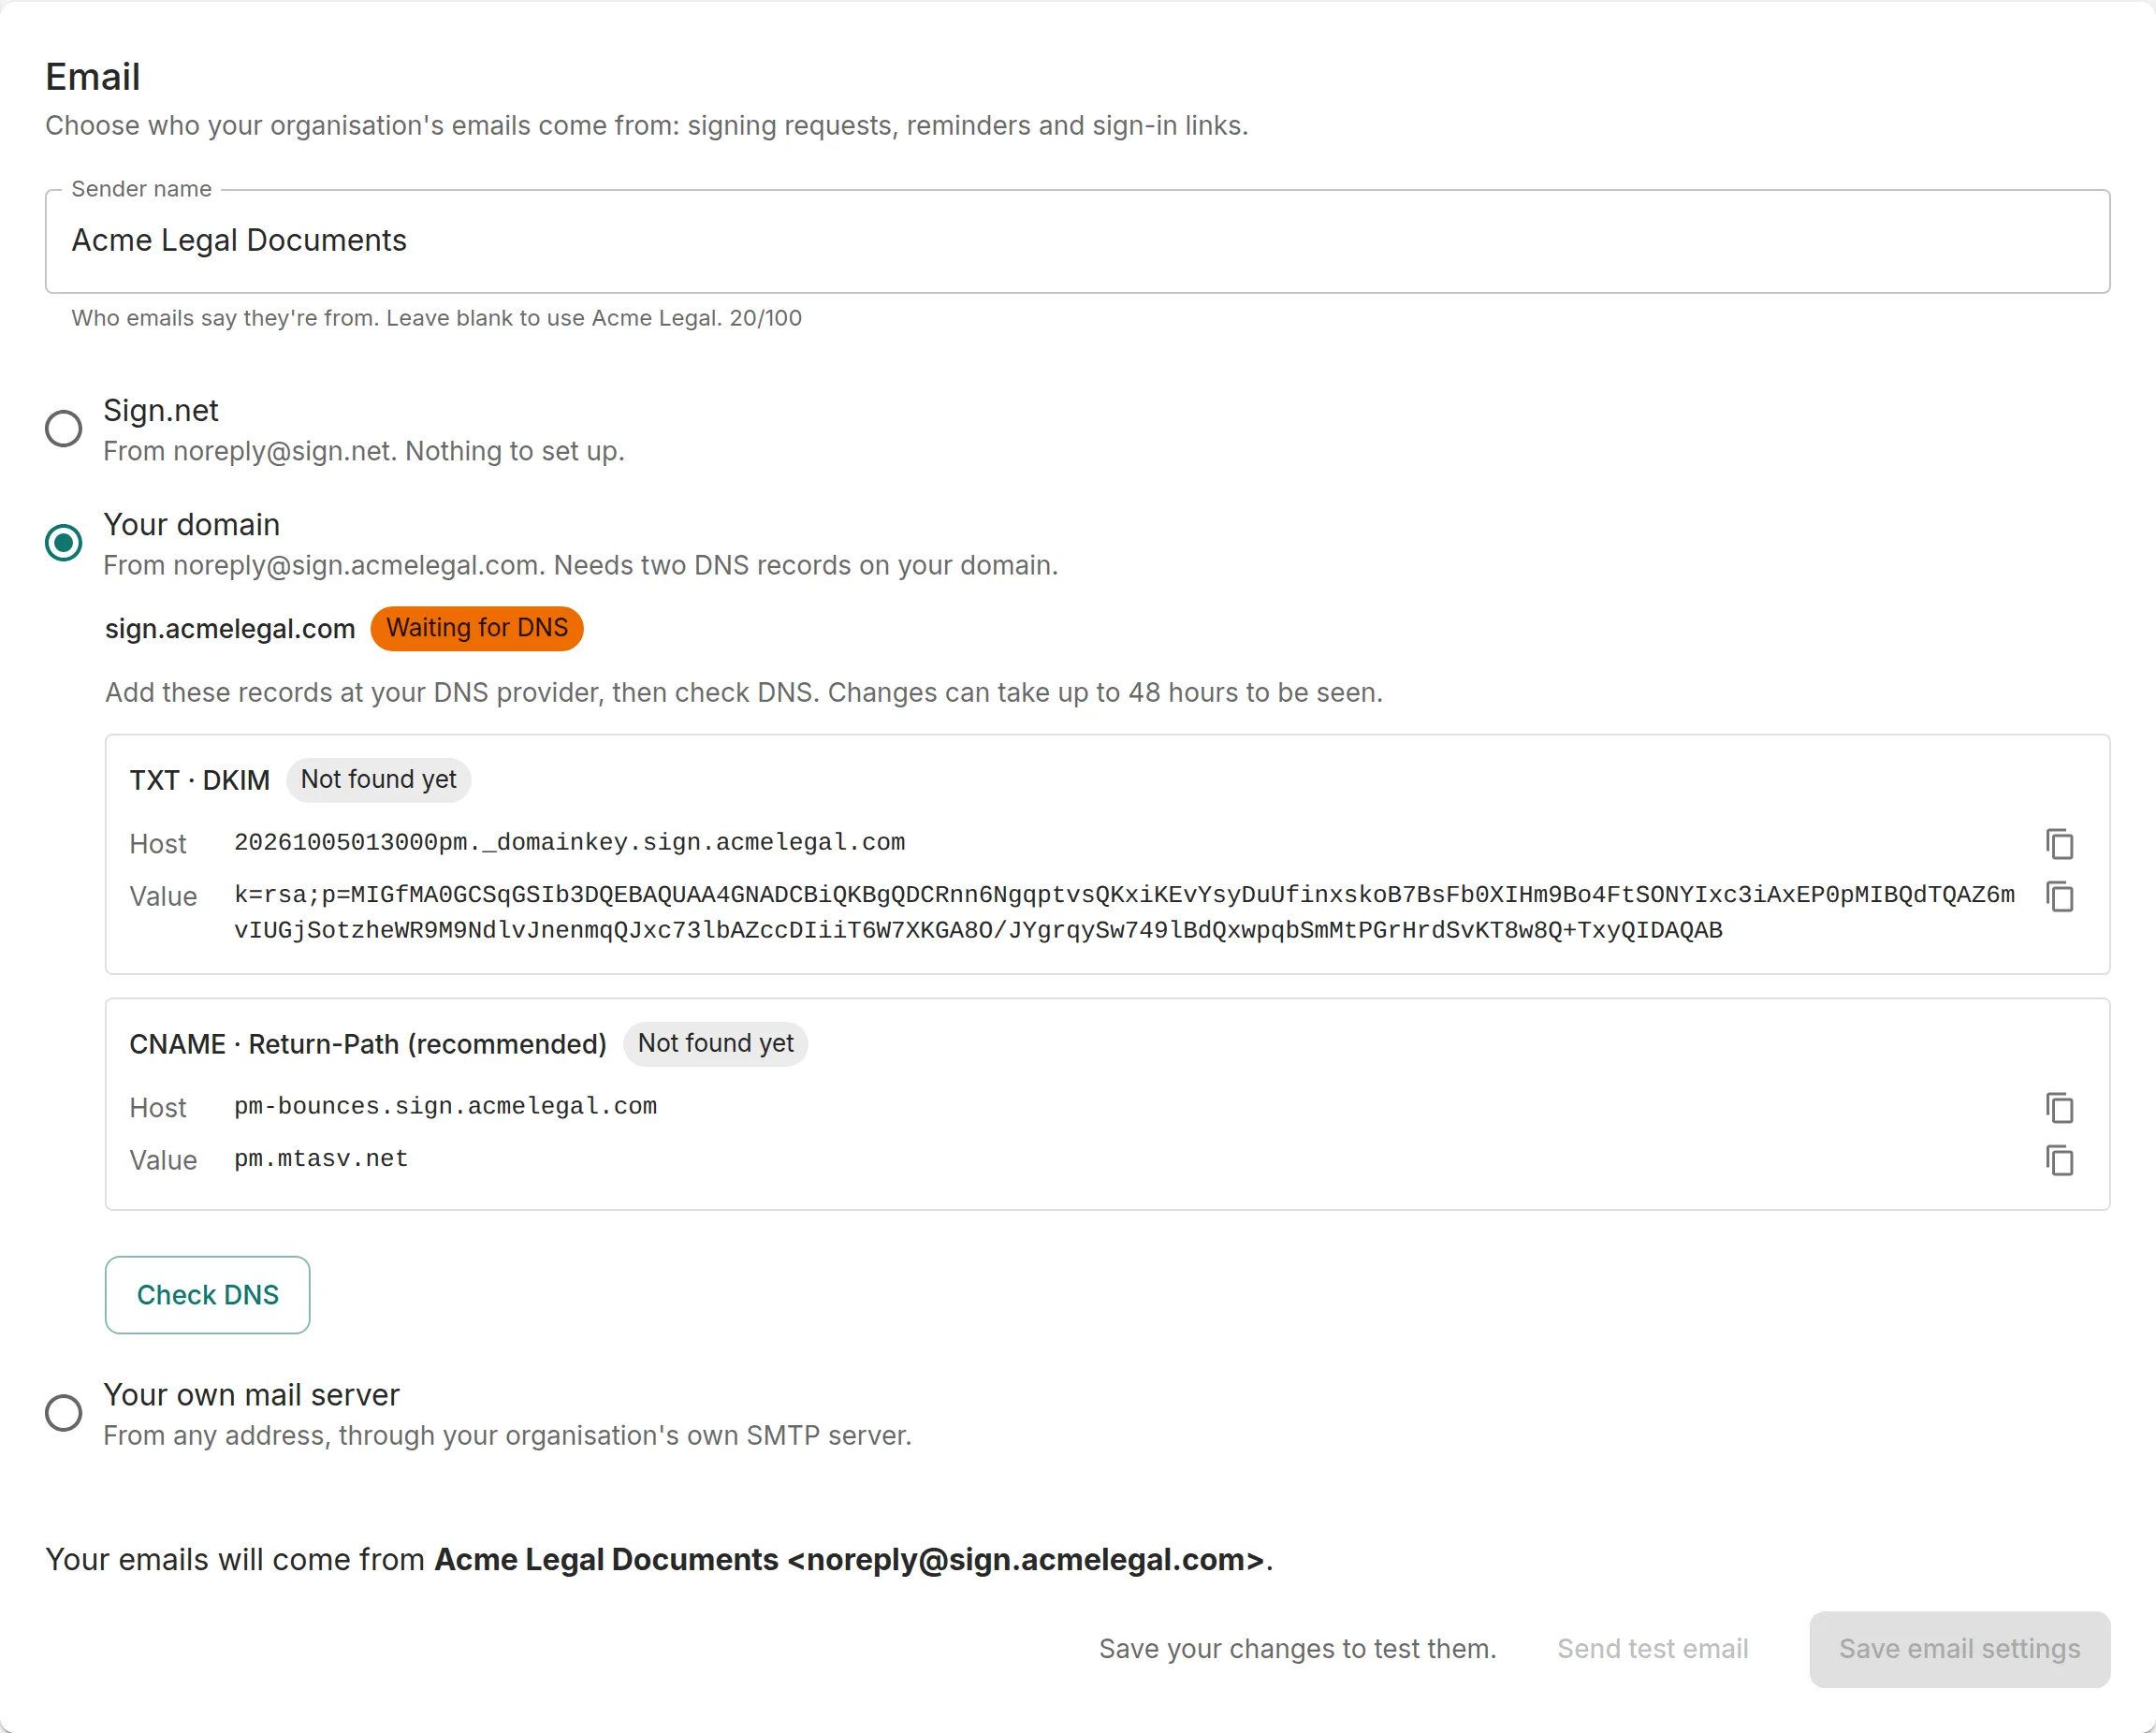
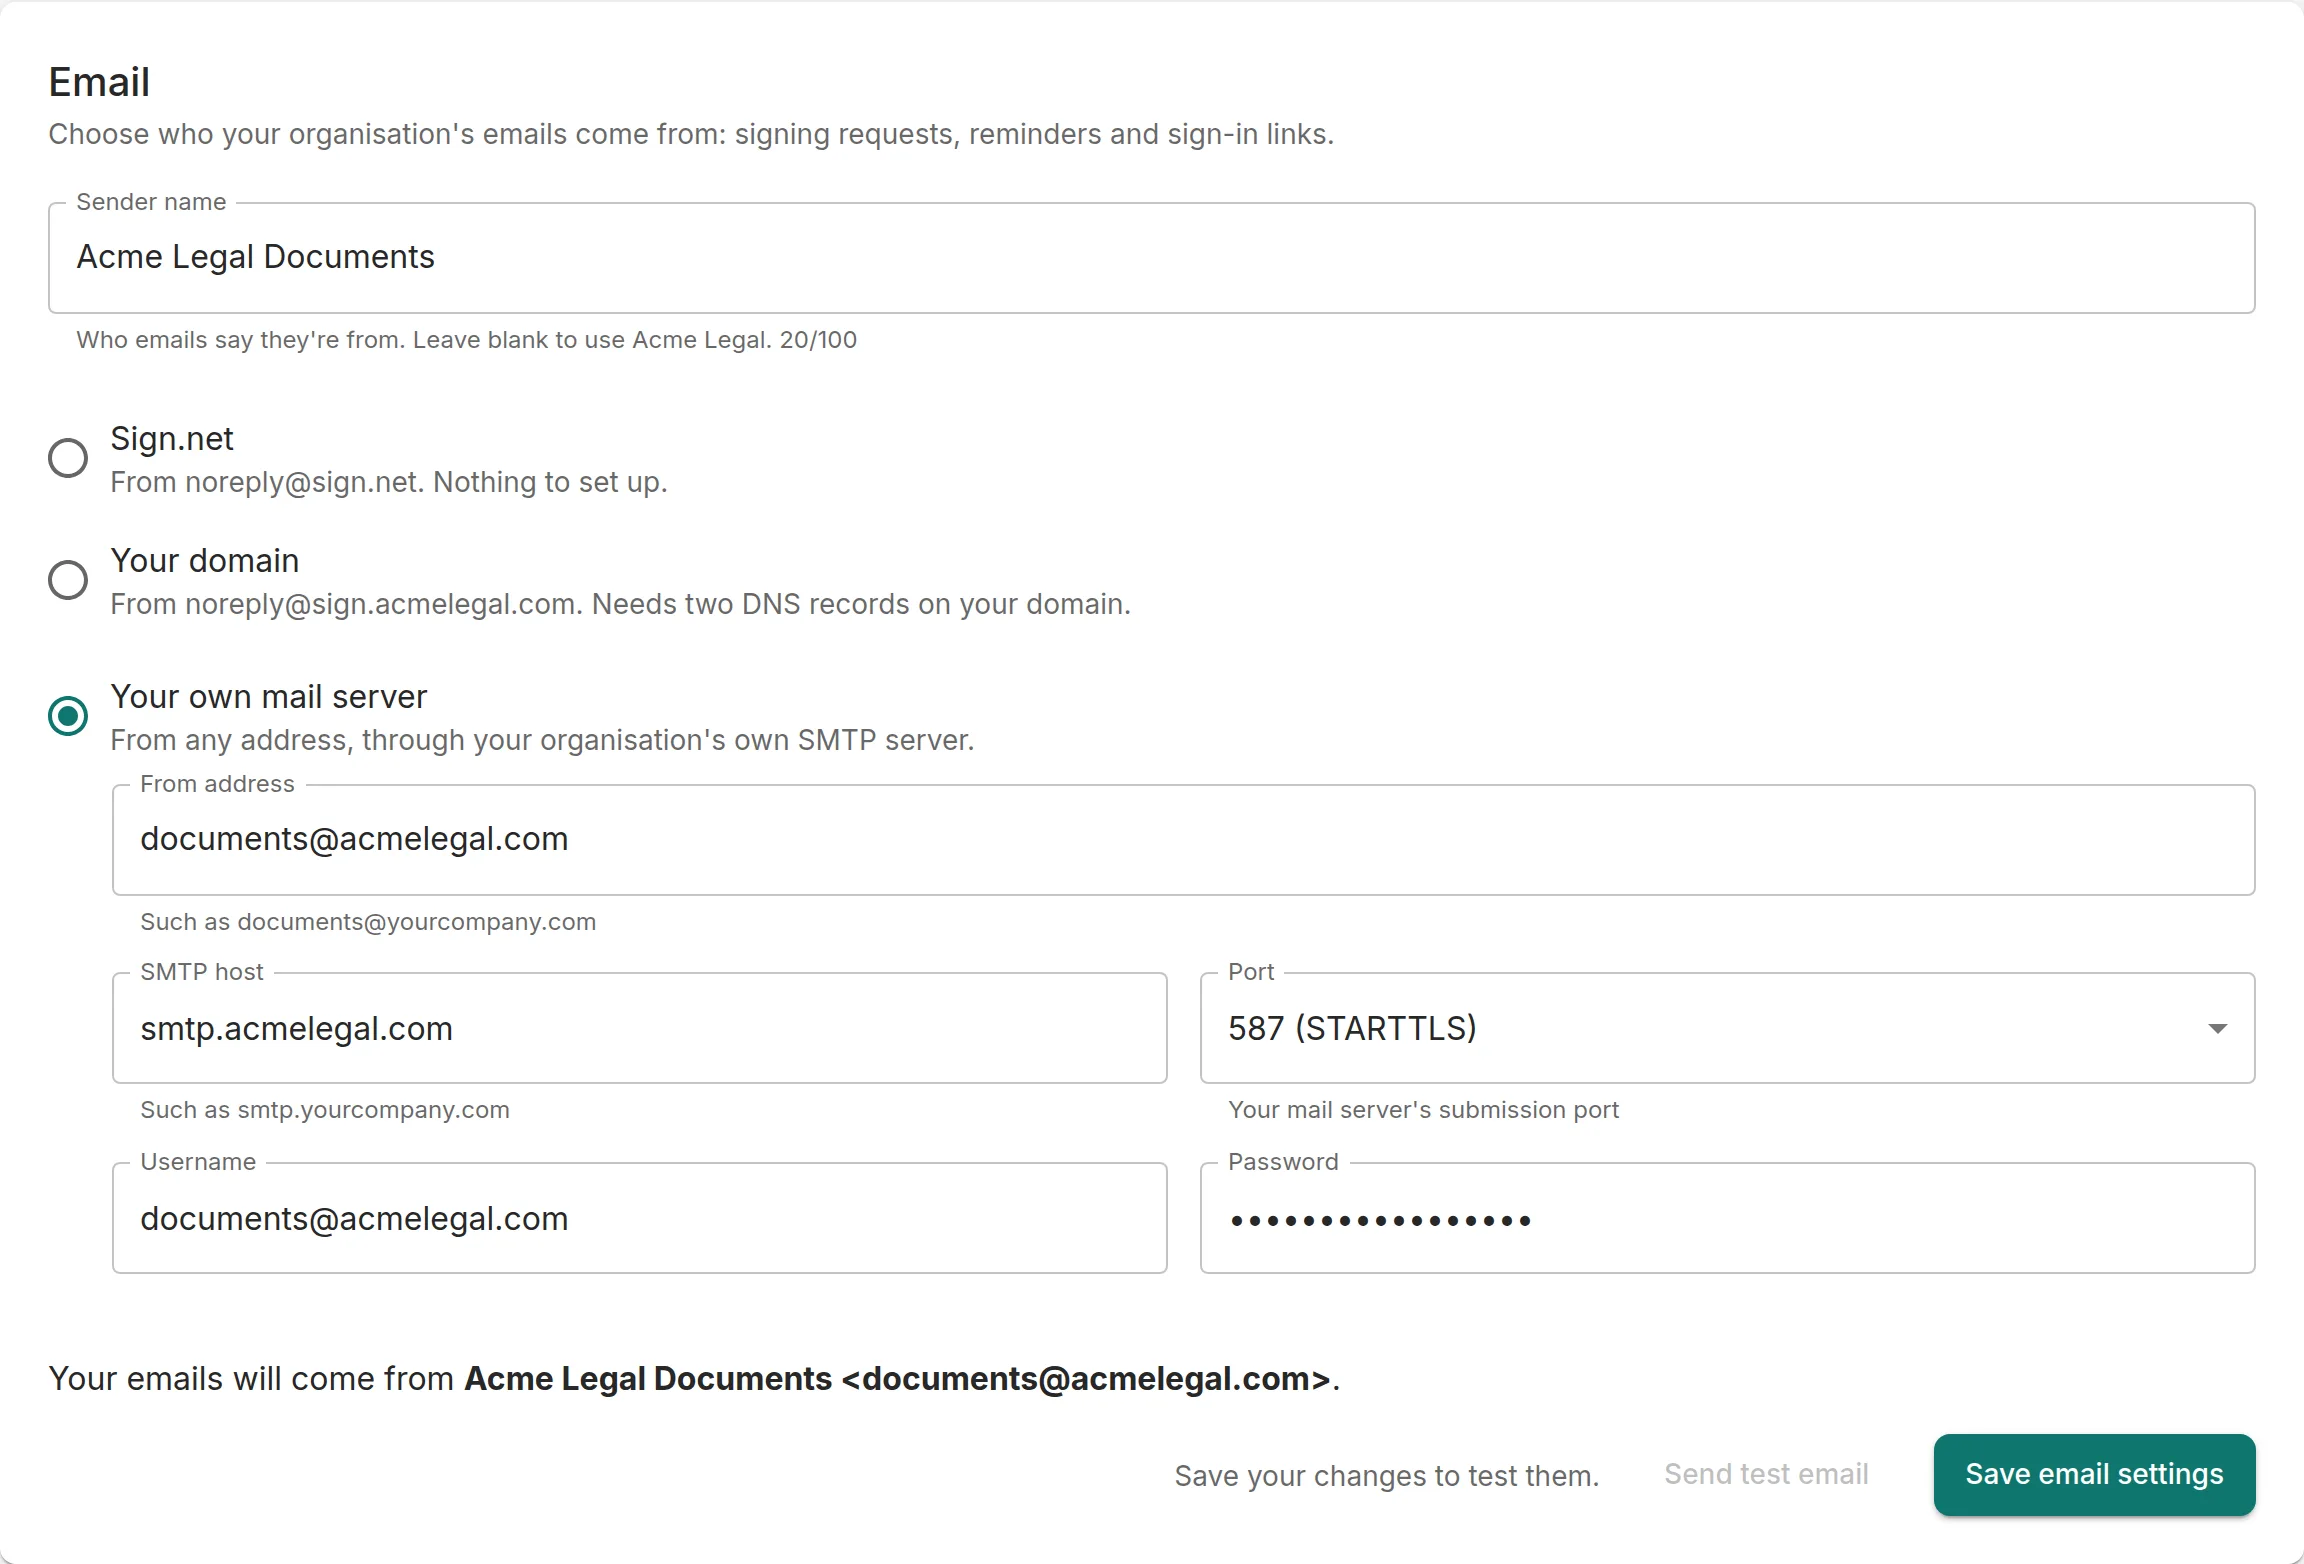
Open “Organisation” and find “Email”. “Sender name” is the name your emails show; leave it blank to use your app name. Then choose where emails come from: “Sign.net” (from noreply@sign.net, nothing to set up), “Your domain” or “Your own mail server”.
2
Send from your domain
Choose “Your domain” and click “Set up domain”. Your emails will come from noreply@ your portal's domain. You get two records to add at your DNS provider: a TXT record for DKIM, which is required, and a CNAME for Return-Path, which is recommended (it keeps bounces aligned for DMARC). Use the copy buttons rather than retyping them.
3
Check DNS and save
Once the records are in, click “Check DNS”. Changes can take up to 48 hours to be seen. When the domain shows “Verified”, click “Save email settings”.
4
Or use your own mail server
Choose “Your own mail server” and enter the “From address” (such as documents@yourcompany.com), your “SMTP host”, the “Port” (587 or 2525 with STARTTLS, or 465 with SSL/TLS), “Username” and “Password”. Click “Save email settings”: we connect and sign in first, and tell you if your server refuses. Your server needs a valid TLS certificate for its host name and must be reachable from the internet.
5
Send a test
Click “Send test email” to check the saved settings.
See your organisation's usage
Follow what your package allows, what everyone has used, and what you've used yourself.
1
Check your quotas
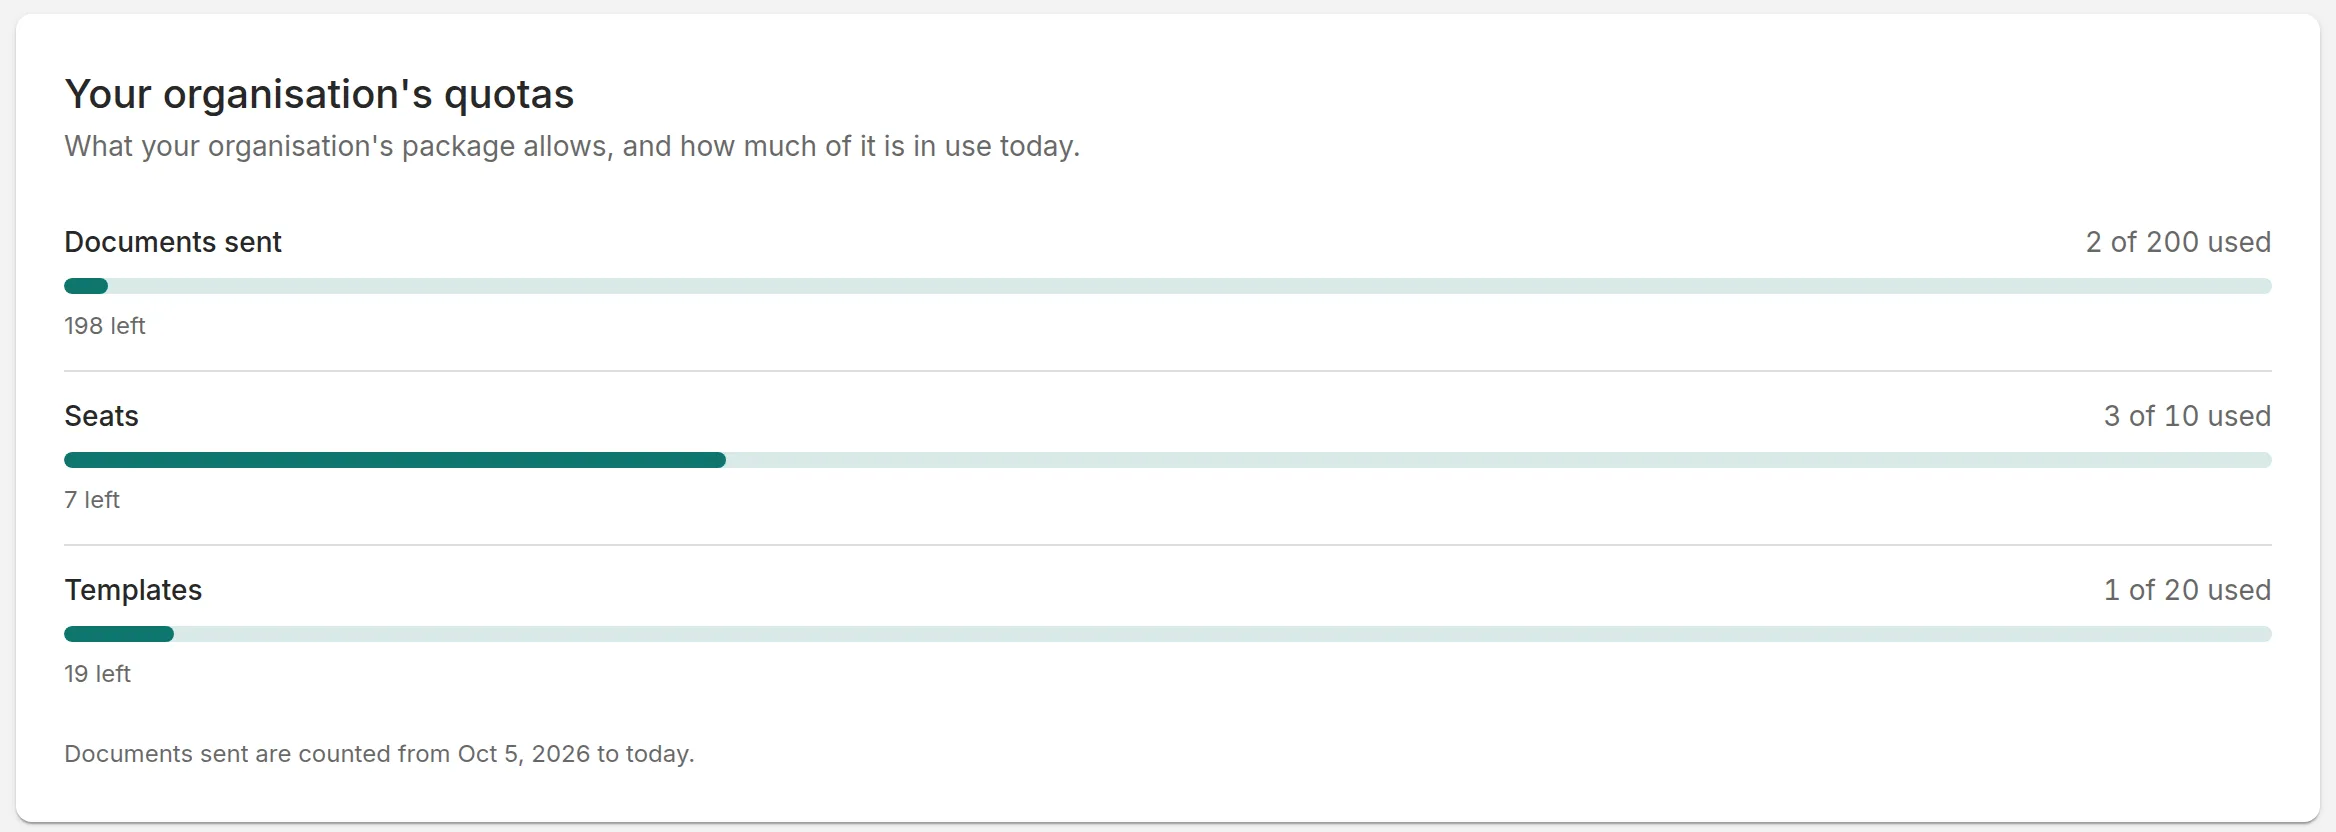
Open “Usage” from the menu; every member can see it. “Your organisation's quotas” shows what your package allows and how much is in use today: “Documents sent” over your current billing period (the dates are under the card), and “Seats” and “Templates” held now. “Almost used up” appears at 80%, and “Unlimited” means your package doesn't cap it.
2
Look at a month
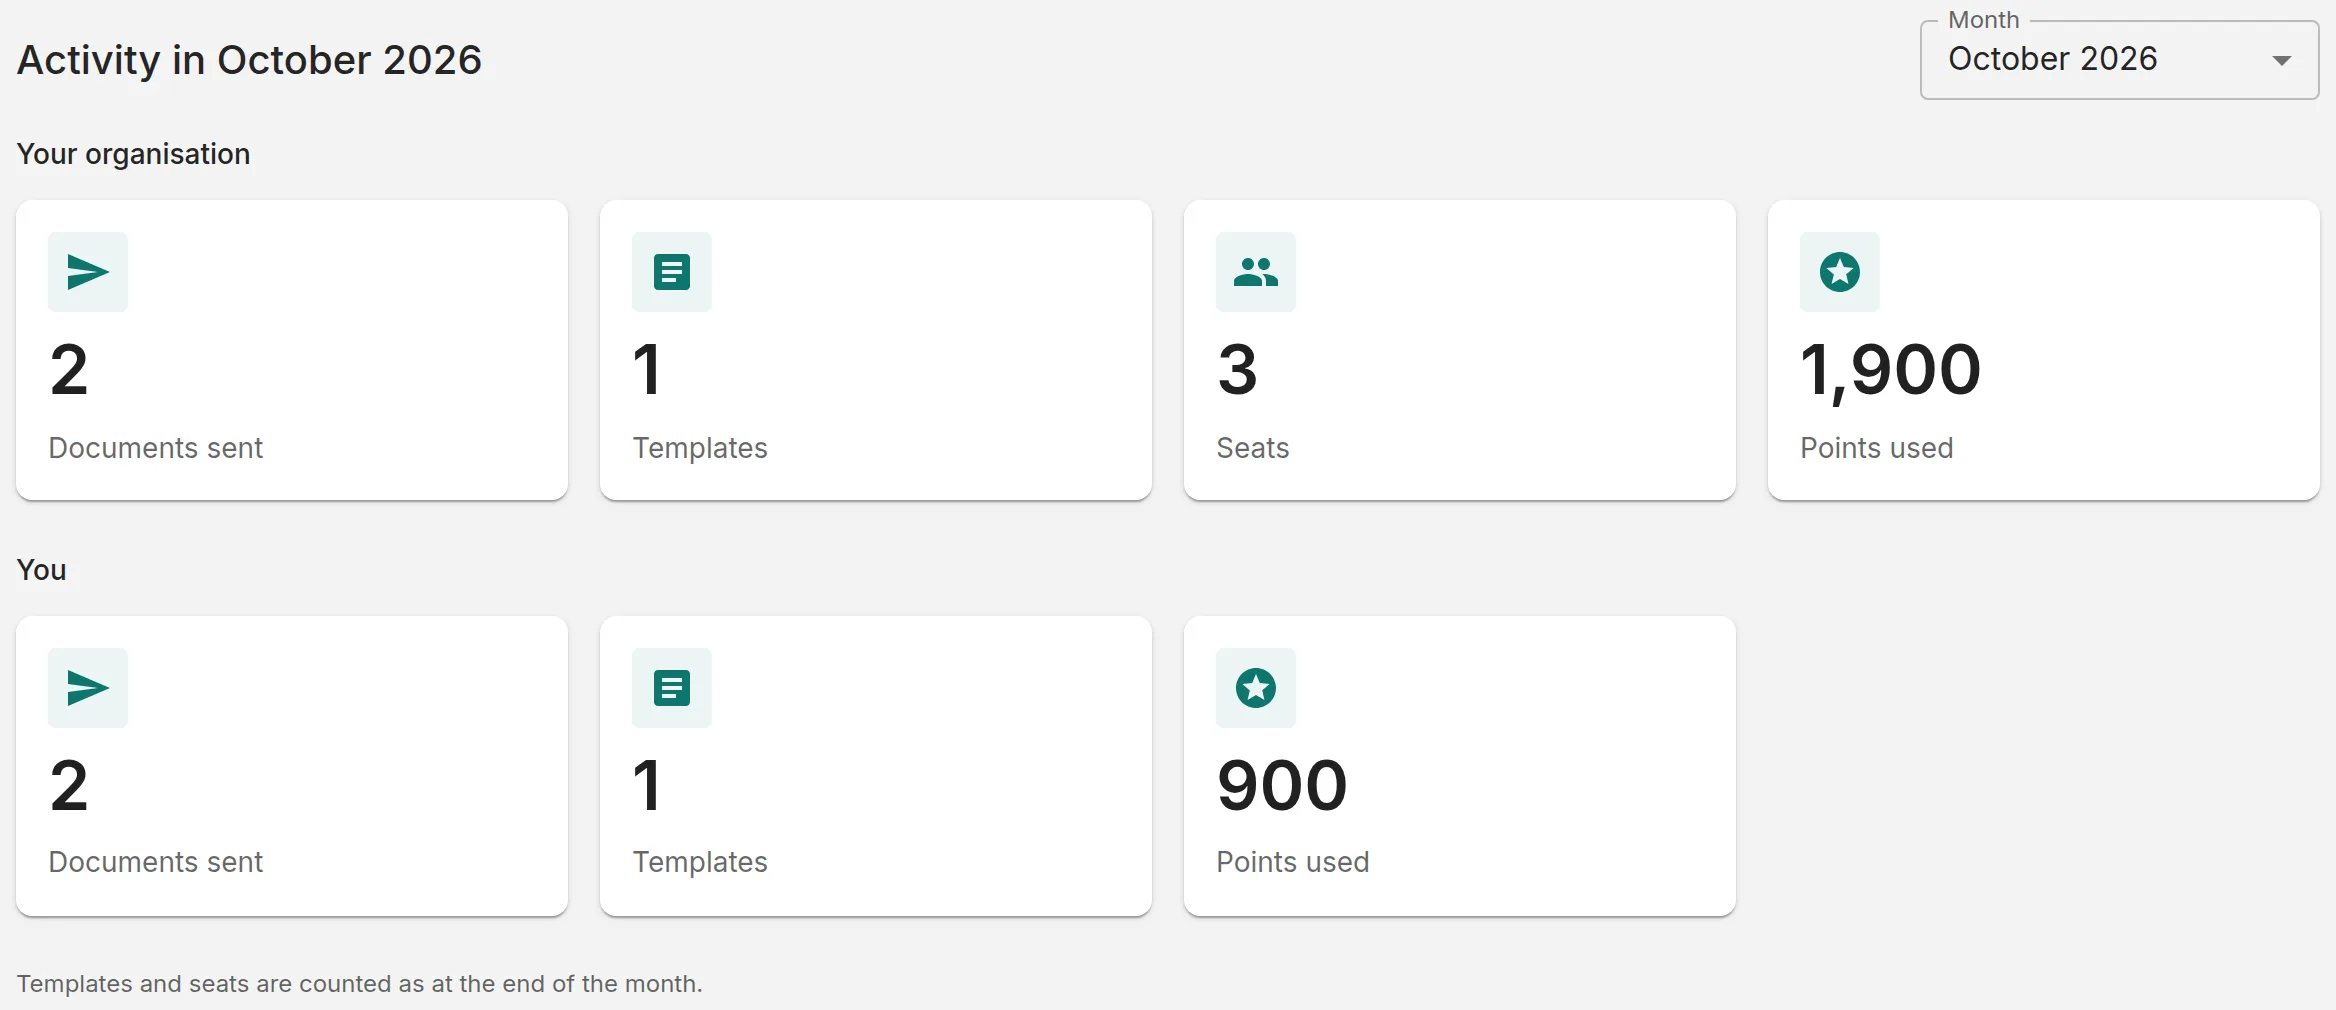
Under “Activity in”, choose a “Month”. “Your organisation” totals everyone's documents sent, templates, seats and points used; “You” is your own share. Templates and seats are counted at the end of the month.
3
See each member's share
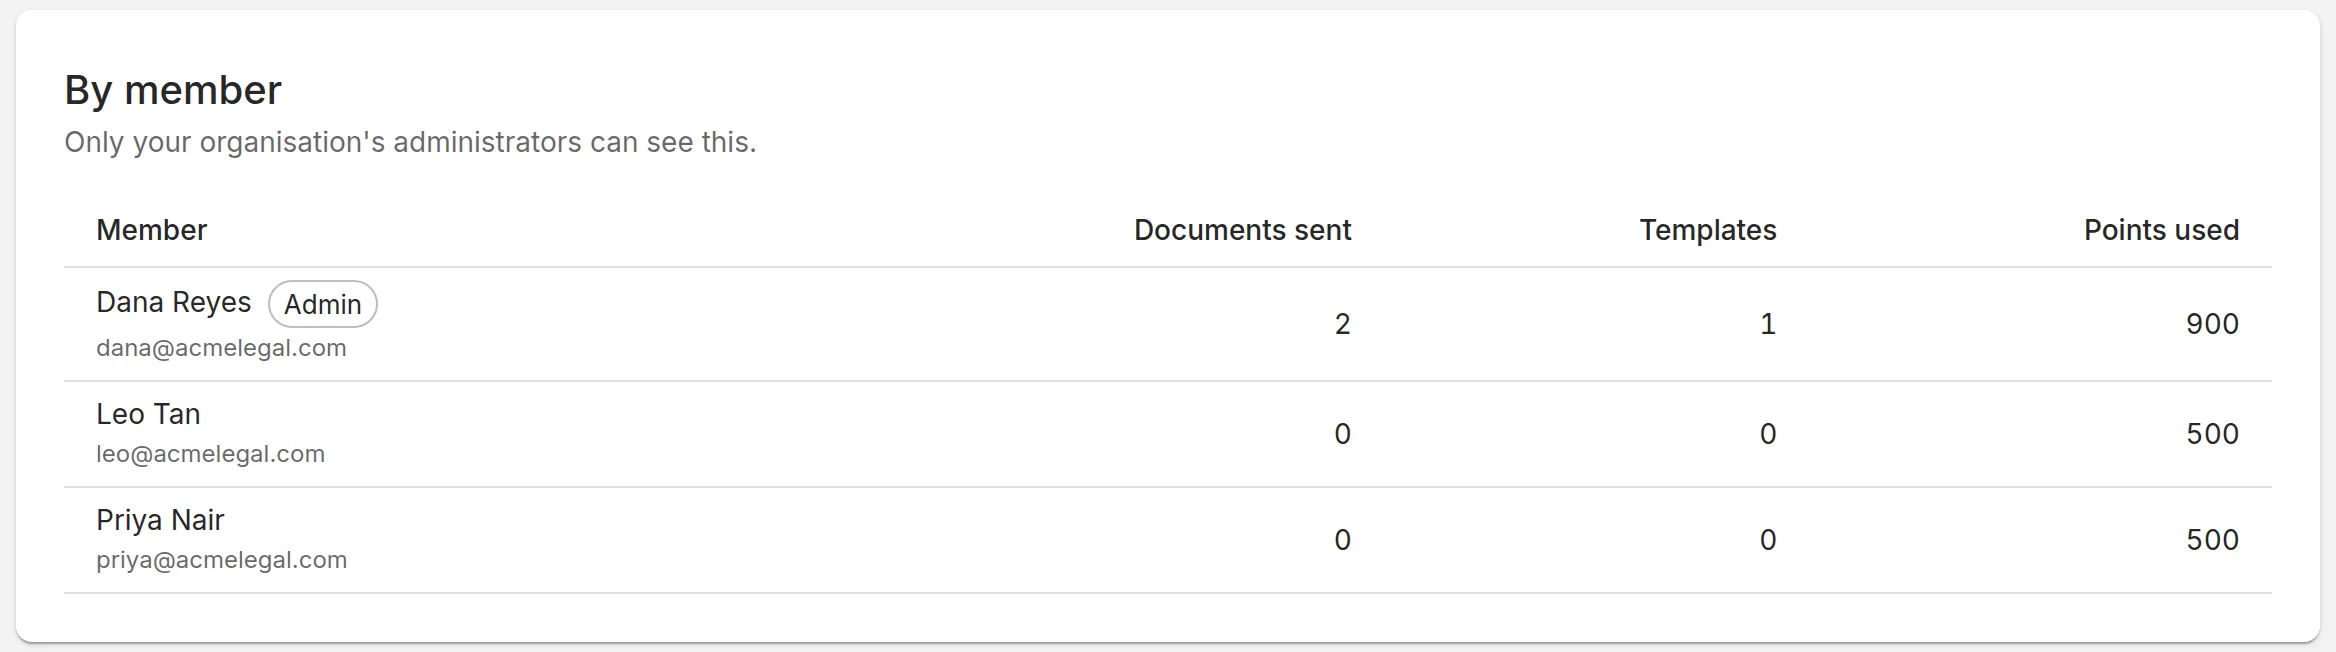
Administrators also see “By member”: each member's documents sent, templates and points used. If it shows “Everyone else”, that's people who have left and people who were only sent a document to sign.
4
Read the points ledger
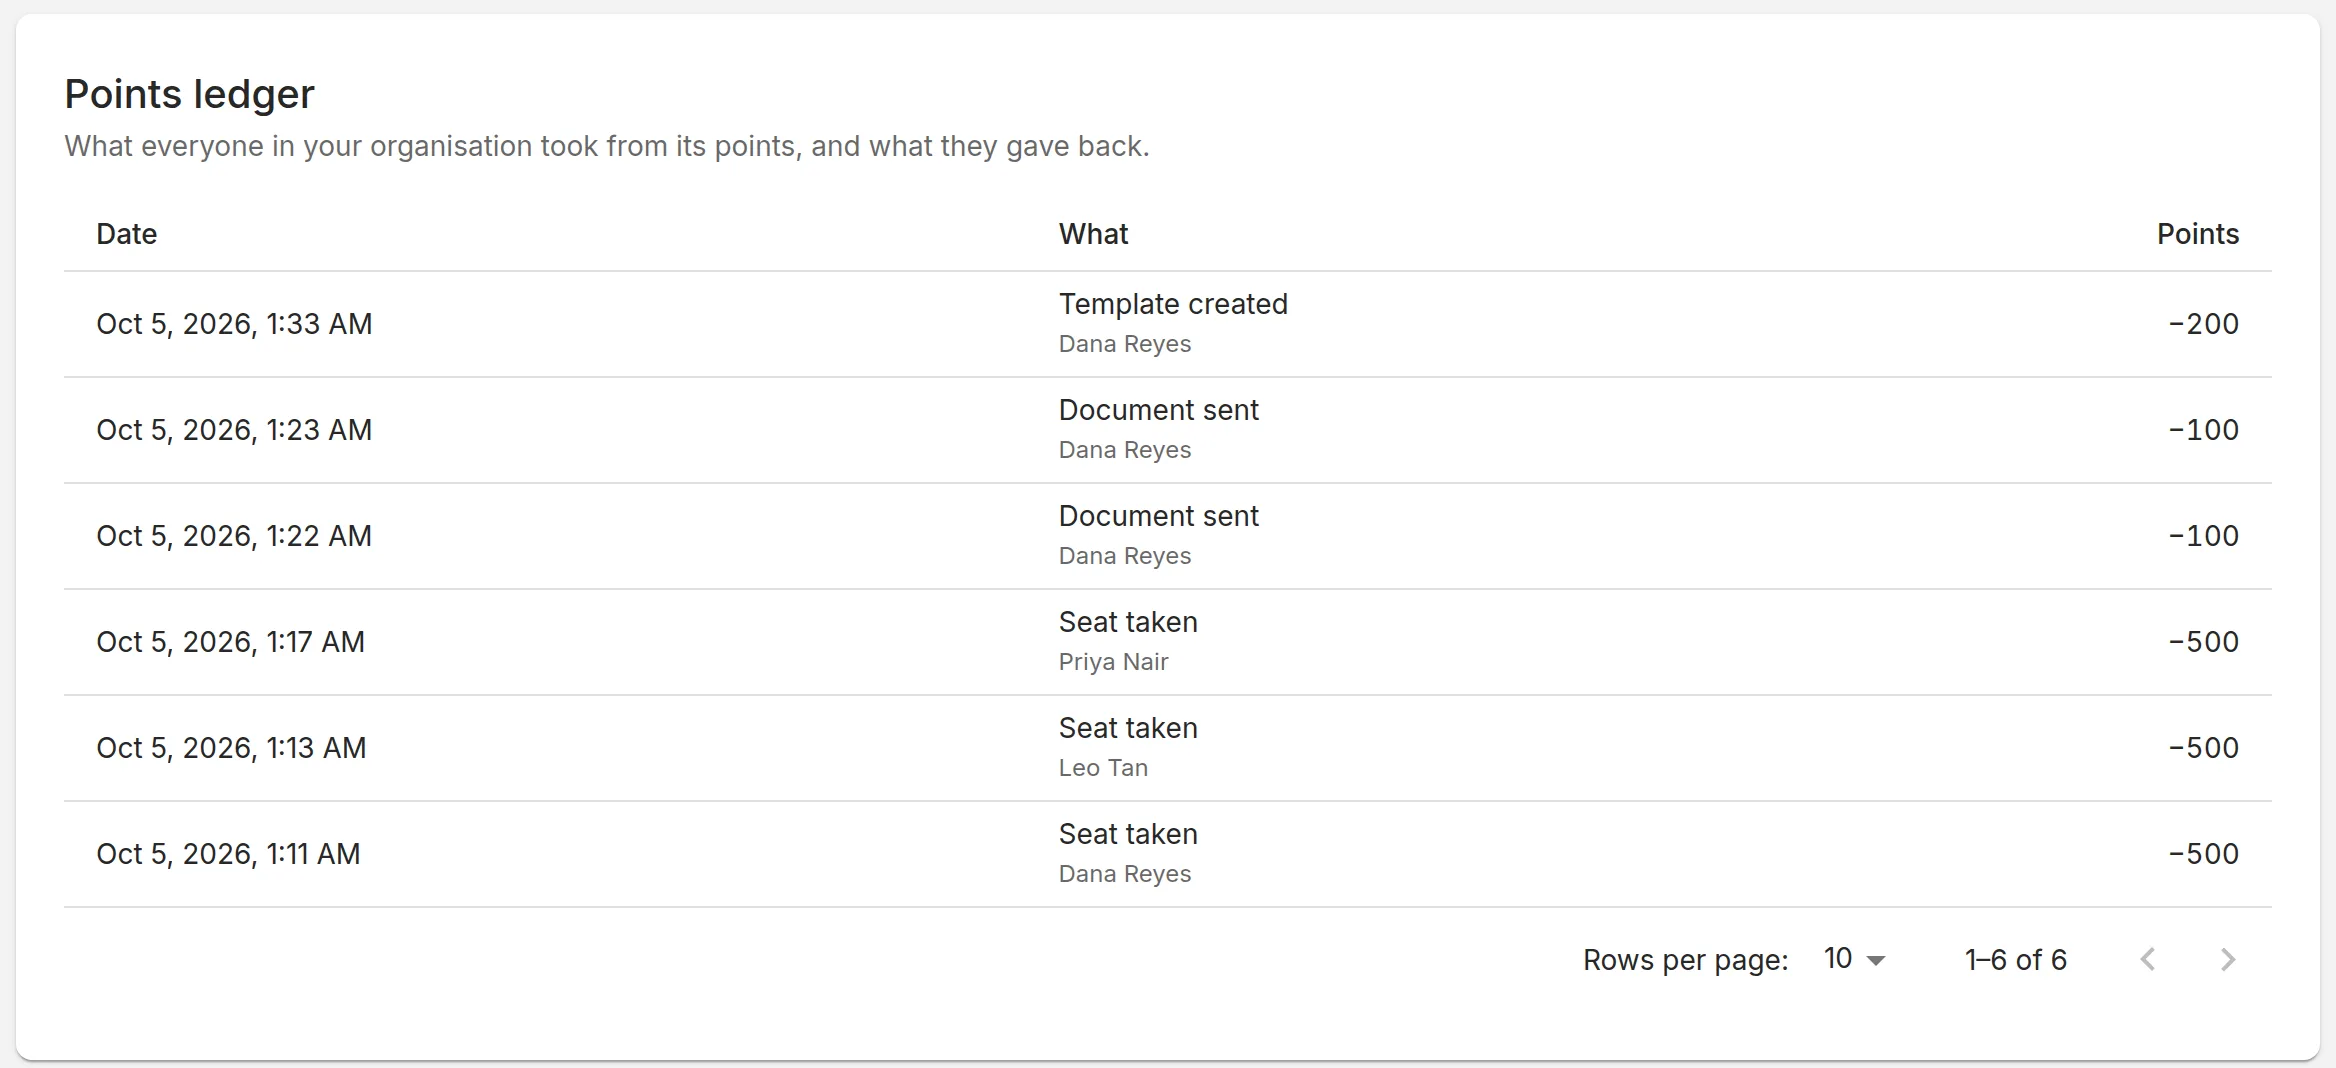
Points are your organisation's shared allowance in one unit. Sending a document, requesting a notarisation, creating a template or taking a seat takes points; discarding the document, cancelling the notarisation, deleting the template or releasing the seat gives them back. Members see their own entries; administrators see everyone's.
Still stuck?
Tell us what you were trying to do and where it went wrong, and we'll help you through it.